Smart Home Cinema – Voice Control
Installation & Setup Guide
Installation & Setup Guide
This tutorial explains how to install and configure Smart Home Cinema – Voice Control
so you can control movie playback hands-free using voice commands via TRIGGERcmd.
The system runs locally on your Windows PC and works with either PotPlayer or VLC.
If you prefer to read this guide in another language, you can select one of the available translations from the
installation page (language selection).
ℹ️
Edition note
This tutorial describes the Voice Assistant Edition of Smart Home Cinema,
which uses Alexa / Google Assistant together with TRIGGERcmd.
Smart Home Cinema also includes the
Local Voice Edition,
which uses a PC microphone and does not require Alexa, Google Assistant,
TRIGGERcmd, Google Home, or a smart speaker.
If you want the microphone-based setup, open the
Full Installation & Setup Guide
and choose the Local Voice Edition setup path.
Offline • Local • Private
Windows 10/11 (64-bit)
PotPlayer version / VLC version
Alexa or Google Assistant
Optional Subtitle Automation
1) Introduction – What Is Smart Home Cinema?
ℹ️
Important: Smart Home Cinema is not a single standalone application.
It is a local automation ecosystem where multiple components work together
to create a seamless, hands-free movie experience.
This guide walks you through the complete setup process, step by step,
covering all required parts in the correct order —
even if you are starting from zero.
Please follow the tutorial from start to finish.
Even if you already use some of these tools, small configuration details matter
for stability and correct operation.
Smart Home Cinema – Voice Control is a local, voice-controlled movie playback system for Windows PCs.
It allows you to watch movies and TV shows on your own screen or television, using
voice commands only, without a keyboard or mouse.
In a typical setup, the computer is connected to a TV (for example via HDMI),
turning it into a full home-cinema system controlled entirely by voice.
Core Philosophy
Offline
All playback logic runs locally on your computer.
Your movies are never uploaded, streamed, or processed in the cloud.
Local
Smart Home Cinema controls media players installed on your own PC (PotPlayer or VLC).
All commands are executed locally through Windows.
Private
Smart Home Cinema does not collect analytics, track user behavior, or transmit personal data.
There are no user accounts inside Smart Home Cinema itself.
Hands-Free
The system is designed to be used without a keyboard or mouse.
Once playback starts, all actions are performed using voice commands only.
A Complete Viewing Flow – From Start to Finish
Smart Home Cinema is not just a set of playback shortcuts.
It is designed to provide a complete viewing flow, from the moment you start a movie
or episode until it ends — using voice control only.
- Starting playback
- Pausing and resuming
- Navigating to the next movie or episode
- Managing subtitles (if enabled)
- Stopping everything instantly
During normal use, you do not need to touch the keyboard or mouse at all.
If you want to see how this experience looks in practice, you can explore hands-free movie control from bed or sofa.
What Smart Home Cinema Is Designed For
- Watching movies or TV shows from local files
- Using a Windows PC connected to a TV or monitor
- Having a home-cinema experience without subscriptions
- Full control over video quality (4K, HDR, original files)
- Automation without cloud dependence
What Smart Home Cinema Is NOT
- It is not a streaming service
- It is not a subscription platform
- It does not provide or download movies
- It is not a media catalog or recommendation system
- It does not replace your media player
Supported Operating Systems
- Windows 10 (64-bit)
- Windows 11 (64-bit)
32-bit versions of Windows are not supported.
Supported Media Players
Smart Home Cinema works with one media player at a time:
- PotPlayer
- VLC Media Player
Important: You must choose one player edition during installation.
Do not install both PotPlayer and VLC editions at the same time.
A Note About Voice Control
Smart Home Cinema uses a voice assistant (Amazon Alexa or Google Assistant)
only as a voice trigger.
- Voice recognition is handled by the assistant
- Commands are forwarded to your PC via TRIGGERcmd
- All movie control happens locally on your computer
Without a voice assistant configured, Smart Home Cinema cannot be used as intended.
2) How the System Works (1-Minute Overview)
Smart Home Cinema is built as a simple, local automation chain.
Each component has a clear role, and understanding this flow will help you
troubleshoot issues quickly if something does not work as expected.
The System Flow
- You speak a voice command
- The voice assistant recognizes it
- TRIGGERcmd forwards the command to your PC
- Smart Home Cinema executes the action locally
- The media player responds instantly
1. Voice Assistant (Alexa or Google Assistant)
The voice assistant is responsible only for voice recognition.
- Listens to your spoken commands
- Matches them to predefined routines
- Sends a trigger signal to TRIGGERcmd
The voice assistant does not control playback directly and does not access your files.
2. TRIGGERcmd (Command Bridge)
TRIGGERcmd acts as a secure bridge between the voice assistant and your computer.
- Receives commands from Alexa or Google Assistant
- Executes predefined commands on your PC
- Runs silently in the background
3. Smart Home Cinema (Local Automation Engine)
Smart Home Cinema is the core logic layer.
- Decides which command should run
- Determines which movie or episode is affected
- Controls playback behavior
- Handles subtitles if enabled
All logic runs locally and does not require cloud access.
4. Media Player (PotPlayer or VLC)
The media player is responsible for actual playback.
Smart Home Cinema controls it using official, supported mechanisms.
Internet Usage
- Voice assistant communication
- Optional subtitle downloads
Movies and playback actions are never uploaded.
Why This Architecture Matters
- Instant response times
- Maximum privacy
- Full control over local media
- Independence from streaming platforms
- Long-term stability
3) System Requirements
Smart Home Cinema – Voice Control runs locally on your Windows PC and controls your media player
using voice commands (via Alexa or Google Assistant + TRIGGERcmd).
3.1 Supported Operating Systems
- Windows 10 (64-bit)
- Windows 11 (64-bit)
32-bit Windows is not supported.
3.2 Hardware Requirements
- Any modern Windows PC capable of running your chosen media player (PotPlayer or VLC).
- Recommended: SSD for smooth file operations (HDD also works).
- Optional: A TV connected to your PC (HDMI / DisplayPort) for a true home-cinema experience.
3.3 Display / TV Setup (Optional, Recommended)
You can watch on a computer monitor, but Smart Home Cinema is typically used with a TV connected to the PC.
If your TV is connected, Windows can extend/duplicate the display and your movies can be played on the TV.
3.4 Required Software Components
-
Smart Home Cinema – Voice Control (this product)
-
One supported media player (choose one):
- PotPlayer (PotPlayer version)
- VLC Media Player (VLC version)
⚠
Important — Do not change the default installation path.
Smart Home Cinema detects PotPlayer and VLC automatically — but only if they are installed
in their default folders.
Do not choose a custom installation path.
If PotPlayer or VLC are installed in a different location, the installer will not find them
and Smart Home Cinema cannot be installed.
- PotPlayer: C:\Program Files\DAUM\PotPlayer
- VLC: C:\Program Files\VideoLAN\VLC
If you installed the player somewhere else, uninstall it and reinstall it using the default path.
-
TRIGGERcmd (required for voice-trigger execution on your PC)
-
A voice assistant (required):
- Amazon Alexa
- Google Assistant
Important: Smart Home Cinema is designed for voice control.
Without Alexa or Google Assistant configured correctly, the system cannot be used as intended.
3.5 Internet Connection (When Needed)
- Required during setup for installing/configuring Alexa or Google Assistant and TRIGGERcmd.
- Optional for subtitle downloading (OpenSubtitles), if you enable subtitle automation features.
3.6 Disk / Folder Requirements
-
You must select a dedicated Movies Folder during setup.
Smart Home Cinema always works with the files inside this folder.
-
The Movies Folder must be located on a fixed drive (Windows-reported fixed disk).
This includes internal drives and many external HDD/SSD devices.
-
USB flash drives and removable media are not supported (the installer will block these paths).
3.7 Supported Editions (Choose One)
Smart Home Cinema has two separate editions:
- PotPlayer version (for PotPlayer)
- VLC version (for VLC Media Player)
Do not install both editions at the same time.
Choose the edition that matches your installed player.
3.8 Optional Subtitle Automation (Only If You Want It)
Subtitle automation is optional.
If you do not want to use subtitles, you can skip all subtitle-related features.
If you choose to enable subtitle automation, Smart Home Cinema can automatically:
- download subtitles
- synchronize subtitles
- clean and manage subtitle files
To use subtitle automation, you will need:
- an OpenSubtitles account
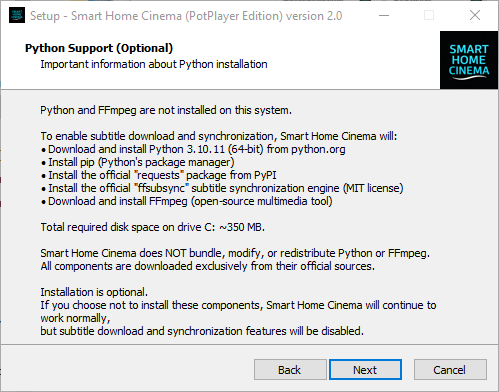
- Python support (only if offered by the installer)
If you skip subtitle automation, Smart Home Cinema works perfectly
for playback control and movie management.
ℹ
Recommended Setup Order (Before Installing Smart Home Cinema)
To avoid interruptions during installation, we strongly recommend completing the following steps first —
even if you already use some of these tools:
-
Install your media player — PotPlayer or VLC (Chapter 7)
This is required, because Smart Home Cinema controls one of these players.
-
Create a TRIGGERcmd account and install the TRIGGERcmd desktop app (Chapter 8)
If you already use TRIGGERcmd, you still need to review Chapter 8 — it explains how to import the
Smart Home Cinema commands safely, alongside your existing ones.
-
Set up your voice assistant — Alexa or Google Assistant (Chapters 9–10)
Even if you already use Alexa or Google, these chapters explain how to link TRIGGERcmd with your assistant
so the voice commands can control your PC.
-
(Optional) Create an OpenSubtitles account if you plan to use subtitles (Chapter 11)
This account is required only if you want automatic subtitle downloads.
Once all of the above are ready and correctly configured, you can continue with the installation of
Smart Home Cinema – Voice Control.
4) Required Accounts & Applications (Before Installation)
4.1 TRIGGERcmd (Required)
TRIGGERcmd is a required component for Smart Home Cinema – Voice Control.
It acts as a secure command bridge between your voice assistant
(Amazon Alexa or Google Assistant) and your Windows PC.
Without TRIGGERcmd installed and running, Smart Home Cinema cannot receive
or execute any voice commands.
What TRIGGERcmd Does
- Receives trigger signals from your voice assistant
- Executes predefined commands locally on your PC
- Runs silently in the background
What TRIGGERcmd Does NOT Do
- Does not stream, upload, or analyze your media files
- Does not control playback directly
- Does not send playback data to the cloud
All movie control logic remains fully local inside Smart Home Cinema.
What You Must Do Before Installation
- Create a TRIGGERcmd account
- Install the TRIGGERcmd desktop application
- Log in successfully
- Confirm that TRIGGERcmd is running in the system tray
Do NOT create any commands in TRIGGERcmd yet.
Command setup will be covered later in this tutorial.
4.2 Voice Assistant (Required)
Smart Home Cinema – Voice Control requires a voice assistant in order to receive spoken commands.
A voice assistant (Amazon Alexa or Google Assistant) is used only as a voice input layer.
It listens to your spoken words, recognizes the command, and forwards it to TRIGGERcmd.
The voice assistant does not control playback directly and does not
interact with your media files.
What the Voice Assistant Does
- Listens to spoken voice commands
- Converts speech to text
- Matches the command to a predefined routine
- Sends a trigger signal to TRIGGERcmd
At this point, the voice assistant’s role ends.
What the Voice Assistant Does NOT Do
- Does not play, pause, or stop movies directly
- Does not access your Movies Folder
- Does not manage files or subtitles
- Does not execute commands on your PC by itself
All playback logic and automation happens locally on your computer,
inside Smart Home Cinema.
Supported Voice Assistants
Smart Home Cinema can be used with:
- Amazon Alexa
- Google Assistant
Both assistants work independently and forward commands to TRIGGERcmd.
It is technically possible to have both Amazon Alexa and Google Assistant
configured at the same time, and to issue commands from either one.
Smart Home Cinema does not distinguish between assistants — any valid command
received through TRIGGERcmd is executed in the same way.
In practice, most users choose to use a single voice assistant for simplicity.
Using more than one assistant is optional and not required.
How You Can Speak Commands
- A smartphone (Alexa app or Google Assistant app)
- A dedicated smart speaker (Amazon Echo or Google Nest)
Using a phone is fully supported and works correctly.
Using a smart speaker is optional and improves convenience, but is not required.
Phone vs Smart Speaker — Important Clarification
Many users use their phone as the primary voice control device.
This is a valid and supported way to use Smart Home Cinema.
Dedicated smart speakers offer a more seamless hands-free experience,
especially when watching from a distance (bed, couch, or across the room),
but they are not mandatory.
Smart Home Cinema works correctly in both scenarios.
Important Notes
- A phone app is required to configure the voice assistant
- Voice routines must be created to trigger Smart Home Cinema commands
- Routine setup is covered later in this tutorial
The voice assistant is used only as a trigger mechanism.
It does not replace Smart Home Cinema, TRIGGERcmd, or your media player.
4.3 OpenSubtitles (Optional)
OpenSubtitles is required only if you choose to enable subtitle automation in Smart Home Cinema.
If you do not want to use subtitles, you can skip this component entirely.
Smart Home Cinema works perfectly for movie playback and voice control without subtitle automation.
What OpenSubtitles Is Used For
When subtitle automation is enabled, OpenSubtitles is used to:
- Download subtitles automatically for your movies or episodes
- Match subtitles based on the original movie filenames
- Provide subtitle files that can later be synchronized and managed by Smart Home Cinema
OpenSubtitles is used only for subtitle downloading.
It does not affect playback, movie selection, or voice control in any way.
How Subtitle Downloading Works in Smart Home Cinema
When you run the Download Subtitles command, Smart Home Cinema does not rely on a generic subtitle downloader.
Instead, it uses its own subtitle search and selection logic built specifically for OpenSubtitles.
This logic analyzes available subtitle results and automatically selects the most relevant match based on:
- the original movie filename
- the selected subtitle language
- subtitle availability and relevance
No manual selection is required.
The entire process is automatic and consistent across all supported movies.
All subtitle downloading and selection runs locally on your PC and is designed to be predictable, fast, and reliable.
What OpenSubtitles Does NOT Do
- Does not provide movies or video content
- Does not stream or play subtitles
- Does not control subtitle timing during playback
- Does not interact with your media player directly
All subtitle processing (synchronization, cleaning, file handling) happens locally on your PC.
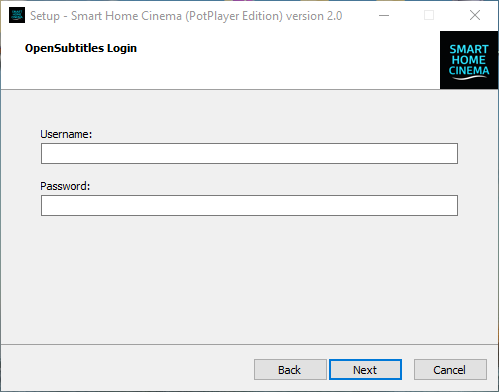
Account & Credentials
If you enable subtitle automation, you must provide OpenSubtitles credentials during setup.
- Credentials are used only to obtain a user authentication token
- Credentials are stored locally on your PC
- Credentials are not shared or transmitted to third parties
Smart Home Cinema does not collect or store OpenSubtitles credentials on any external server.
Important Notes About Subtitle Automation
Subtitle automation is completely optional.
Many users choose to watch movies without subtitles, and Smart Home Cinema is fully functional in this mode.
If you later decide to enable subtitle automation, OpenSubtitles can be configured at that time.
5) How Smart Home Cinema Works (Core Logic & Viewing Workflow)
This chapter explains the core operating logic of Smart Home Cinema.
Understanding these rules is essential before installation, because they explain:
- why two folders are required
- how movies are selected and played
- how voice commands affect your files
- how subtitle automation works (if enabled)
5.1 The First File Rule (Rule #1)
Smart Home Cinema always operates on the first video file in your Movies Folder.
When you say Play Movie or Play Movie TV, Smart Home Cinema starts the first video file in the folder.
Windows determines file order alphabetically.
There is no playlist and no database.
The movie you want to watch must be the first video file in the Movies Folder.
This rule is the foundation of the entire system. It guarantees predictable behavior, maximum stability,
and unlimited long-term usage without broken libraries or corrupted playlists.
If you're curious why this approach works so well, you can read a deeper explanation of The First File Rule.
5.2 The Two Folders Concept
During installation, you will select two folders:
-
Movies Folder
Contains the movies or episodes you plan to watch. Smart Home Cinema always operates on this folder,
and the first file is always the active movie.
-
Watched Movies Folder
Contains movies you have already watched and want to keep. Movies are moved here when you want to archive them.
These folders are essential for how Smart Home Cinema moves from one movie to the next.
5.3 Delete Movie vs Next Movie (Critical Difference)
After finishing a movie, you have two choices:
Delete Movie
- Moves the movie (and subtitle, if present) to the Recycle Bin
- Acts as a safe delete (can be restored)
- Use this when you do not want to keep the movie
Next Movie
- Moves the movie (and subtitle, if present) to the Watched Movies Folder
- The file is not deleted
- Use this when you want to keep the movie for your collection
In both cases, the next file automatically becomes the first file, and playback continues without manual intervention.
5.4 Preparing the Movies Folder (Before Watching)
Before using Smart Home Cinema, you must prepare your Movies Folder.
ℹ
Important — unpack movies before adding them to the Movies Folder
Many movies come packaged inside their own folders, for example:
Movies\Movie Name (2024)\Movie Name (2024).mkv
Movies\Movie Name (2024)\subs\english.srt
This structure will NOT work with Smart Home Cinema.
You must open the folder and move the files directly into the Movies Folder:
Movies\Movie Name (2024).mkv
Movies\Movie Name (2024).srt
Smart Home Cinema only works with files that are stored
directly inside the Movies Folder.
If a movie remains inside another folder, it cannot be detected.
TV Shows / Episodes
- Place all episodes in the Movies Folder
- Windows sorts them automatically (Episode 01, 02, 03…)
- No manual work required
Movies (Optional Ordering)
- If you want a specific viewing order, you may rename files using numbers (1, 2, 3…)
- If you do not care about order, leave filenames unchanged
Important: If you plan to use subtitle automation, read the next section first.
Renaming at the wrong time can prevent subtitle matching.
5.5 Subtitle Automation – Correct Workflow (If You Use It)
Subtitle automation is optional. If you do not want subtitles, you can skip this entire section.
⚠ Very Important Rule
If you use subtitle automation, do NOT rename movies before downloading subtitles.
Subtitle services rely on the original movie filenames to find matches.
Correct Subtitle Preparation Order (follow exactly):
-
Keep Original Filenames
Do not add numbers. Do not rename files yet.
-
Download Subtitles
Run Download Subtitles. Subtitles are downloaded for all movies in the folder (if available).
Requires OpenSubtitles credentials entered during installation.
-
Sync Subtitles
Run Sync Subtitles. Each subtitle is synchronized and a new subtitle file with _2 suffix is created.
-
Clean Subtitles
Run Clean Subtitles:
- Original subtitles are backed up to SHC_SubtitlesBackup
- Synced subtitles are renamed to match the movie filenames
-
(Optional) Rename for Viewing Order
You may now rename movies (1, 2, 3…) for your preferred order.
If you rename movies, rename the subtitles the same way so they stay paired.
If you rename movies before downloading subtitles, subtitle matching may fail.
5.6 Stop Everything & Shutdown PC (Critical Warning)
Stop Everything
The Stop Everything command is designed as a
final system command for Smart Home Cinema.
When executed, it performs the following actions immediately:
- Stops all media playback
- Closes the active media player
- Closes all Smart Home Cinema components
-
If playback is running on a TV or secondary display, switches the display
back to the main PC monitor
- Shuts down the computer immediately
This command is intentionally designed to run
without confirmation dialogs or prompts,
allowing the entire system to be stopped hands-free using a single voice command.
Shutdown PC
The Shutdown PC command is a simplified system command that:
- Immediately shuts down the computer
It does not interact with playback logic or media files and performs a direct
system shutdown.
⚠
Important Warning (Read Carefully)
Both Stop Everything and Shutdown PC are
intentional final-action commands.
- These commands do NOT save open files or documents
- Any unsaved work in other applications will be lost
-
Smart Home Cinema does not attempt to detect, pause, or protect other
running software
You are fully responsible for saving any important work before using these commands.
Use Stop Everything or Shutdown PC
only when you are ready to end the viewing session and shut down the system.
Smart Home Cinema starts a one-minute Windows shutdown countdown for these commands.
If you triggered Stop Everything or Shutdown PC by mistake and Windows has not shut down yet, you may be able to cancel the pending shutdown during that countdown:
- Press Windows + R
- Type:
shutdown /a
- Press Enter
This only works while the one-minute Windows shutdown countdown is still active. Once Windows has already started shutting down, it may be too late to cancel.
Why this behavior is intentional
Smart Home Cinema is designed for
remote, hands-free usage, often from a distance
(for example, while watching from a bed or couch).
These commands provide a reliable way to:
- instantly stop playback
- safely return from TV display mode
- shut down the PC without physical interaction
This behavior is not a bug or a crash scenario — it is a
core design feature of the system.
5.7 Summary – The Viewing Cycle
- Prepare the Movies Folder
- (Optional) Prepare subtitles correctly (Download → Sync → Clean)
- Use Play Movie (first file)
- Watch using voice commands only
-
When finished:
- Delete Movie → discard (Recycle Bin)
- Next Movie → keep (move to Watched Movies Folder)
- Repeat
This simple design replaces playlists, databases, and media libraries — and keeps Smart Home Cinema stable forever.
6.1 Folder Requirements (Critical Rules)
During installation, Smart Home Cinema requires you to select two folders:
Movies Folder
- Contains movies or episodes you plan to watch
- This is the active folder Smart Home Cinema controls
Watched Movies Folder
- Contains movies you have already watched
- Used by the Next Movie command to move watched content
Both folders must follow all rules below.
Rule #1 — Both Folders Must Be on a FIXED Drive
Smart Home Cinema accepts only drives that Windows reports as Fixed.
✔ Allowed
- Internal HDD / SSD
- External HDD / SSD detected by Windows as Fixed
✖ Not allowed
- USB flash drives
- Memory cards
- Removable media
Why this rule exists
- Prevents sudden disconnections
- Avoids drive letter changes
- Protects playback logic and file integrity
- Ensures reliable long-term operation
If a removable drive is selected, the installer blocks installation.
Rule #2 — Both Folders Must Be on the SAME Partition
The Movies Folder and Watched Movies Folder must be located on the same drive letter.
Why this rule exists
- The Next Movie command moves files automatically
- Same-partition moves are instant and safe
- Cross-partition moves are slow and unreliable for automation
This guarantees:
- instant transitions,
- no delays,
- no partial file transfers.
Rule #3 — The Two Folders Must NOT Be Identical
The Movies Folder and Watched Movies Folder cannot be the same folder.
Why this rule exists
- Prevents accidental misconfiguration
- Avoids logical loops where movies cannot advance
- Protects the user from selecting the same folder twice by mistake
Important
If any of these three rules is violated, the installer:
- displays a warning popup,
- blocks installation progress,
- does not allow you to continue.
This behavior is intentional and protects both your files and Smart Home Cinema’s logic.
6.2 Installation Process (Step-by-Step)
This section mirrors the exact installer screens, in the order you will see them.
-
Step 1 — Run the Installer
- Right-click the installer
- Select Run as administrator (recommended)
-
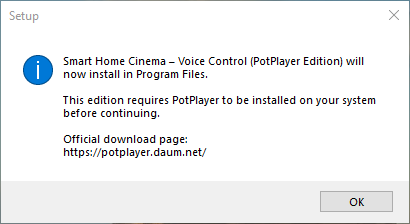
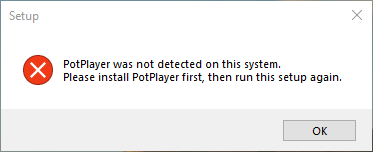
Step 2 — Player Verification
The installer checks whether the required player is installed:
- PotPlayer (PotPlayer version)
- VLC Media Player (VLC version)
If the required player is not detected, installation cannot continue.
Example error message:
-
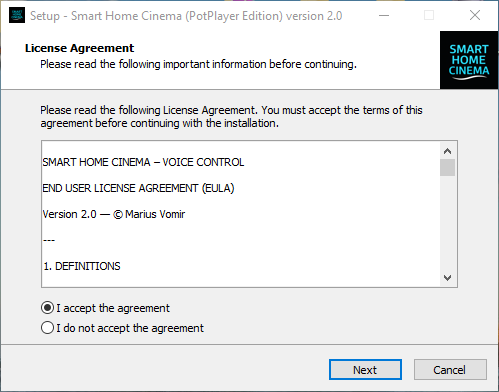
Step 3 — Accept the EULA
- Read and accept the license agreement to continue
-
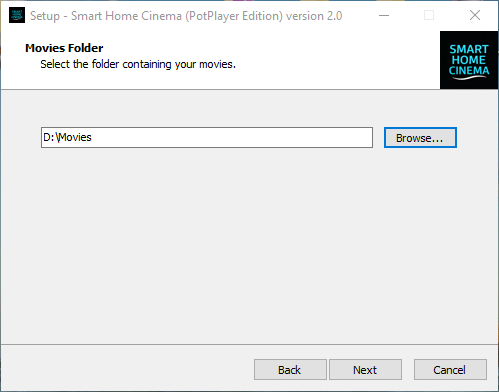
Step 4 — Select Movies Folder
- Must be on a Fixed drive
- Becomes the active viewing queue
-
Folder Naming — Important Clarification
Important:
The folder names shown in the screenshots (for example Movies or Watched Movies) are
only examples.
You are free to name both folders anything you want, in any language,
and using any naming convention that makes sense to you.
Smart Home Cinema does not require specific folder names.
During installation, the installer simply remembers the folders you select and saves their exact paths
in the configuration.
What matters is which folders you choose, not how they are named.
-
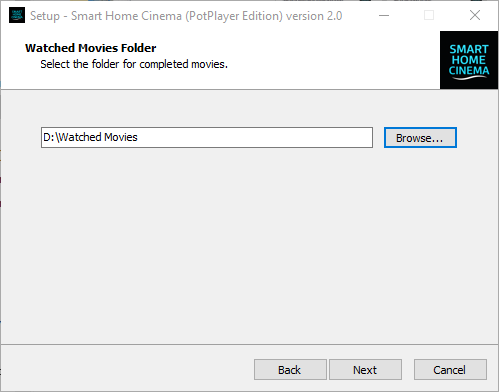
Step 5 — Select Watched Movies Folder
Must be:
- on the same partition as the Movies Folder
- a different folder
The installer enforces both rules automatically.
-
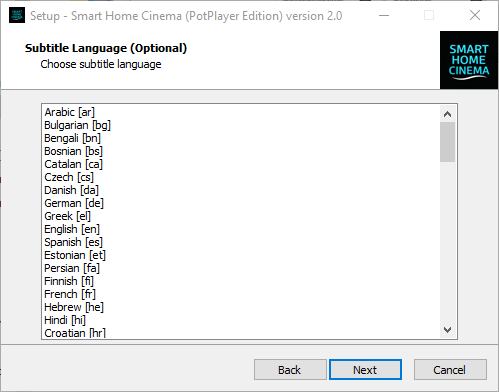
Step 6 — Optional Configuration Pages
Depending on your choices, you may see:
- Optional subtitle automation components (Python, tools)
- Subtitle language selection
- OpenSubtitles credentials (optional)
If you do not want subtitle automation, these steps can be skipped.
Note about Python installation (optional):
If you choose to install Python for subtitle automation, the installation process may take a few minutes,
especially on slower systems or HDD-based computers.
Please wait until the installer finishes.
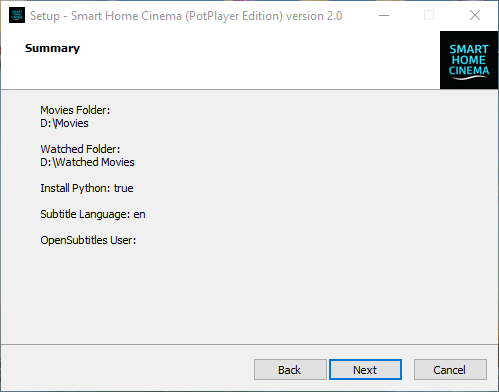
-
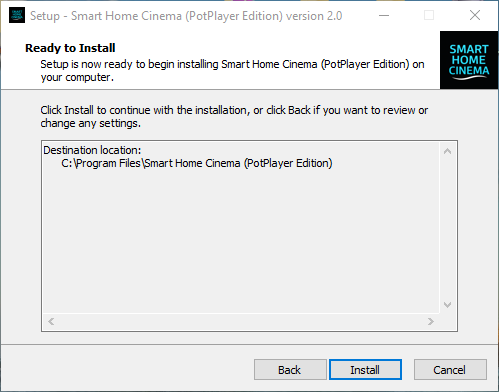
Step 7 — Summary & Installation
- Review all selected options
- Click Install
- Wait for installation to complete
6.3 What You Should NOT Do (Critical Warnings)
After installation:
- ✕ Do not rename, move, or delete the Movies Folder
- ✕ Do not rename, move, or delete the Watched Movies Folder
- ✕ Do not install both PotPlayer and VLC editions at the same time
- ✕ Do not manually edit configuration files unless instructed
-
✕ Do not delete or modify files inside
C:\Program Files\Smart Home Cinema
-
✕ Do not delete, rename, or modify anything inside
C:\ProgramData\SHC
→ This folder stores logs and critical system data required for Smart Home Cinema to operate correctly
-
✕ Do not allow antivirus software to quarantine Smart Home Cinema files
→ Add exclusions if required
Breaking these rules may cause commands to fail or the system to stop working.
Important
Trial, License & System Changes
Before continuing, please note the following important information regarding
licensing and system changes.
Smart Home Cinema includes a 14-day trial period with full functionality.
We strongly recommend evaluating the software during this time.
Because the software operates fully offline after license activation,
refunds are not available once a license is activated.
Each license is bound to a single Windows PC.
A license rebind (for reinstalling Windows or moving to a new system)
is available once every 365 days.
These rules exist to ensure system stability and prevent abuse,
while still allowing legitimate system upgrades or reinstalls.
📌 Full details are explained in:
Legal & Privacy → Licensing, Trial & Rebind Policy
Once you are aware of these points, you can safely continue with the player setup.
7) Player Setup
Important Clarification — Subtitle Synchronization Commands
Note:
This configuration is required only if you plan to use subtitles with Smart Home Cinema.
If you do not use subtitles, you can safely skip this section.
All playback and movie management features will continue to work normally without it.
Smart Home Cinema provides two different subtitle synchronization mechanisms,
designed to work together, not to replace each other.
Although they may sound similar at first glance, they serve different purposes.
1) Main Subtitle Synchronization (Batch Sync)
- This is the primary and recommended subtitle synchronization method
- Synchronizes subtitle files automatically, in batch
- Analyzes the entire subtitle file and adjusts timing globally
- Is part of the Subtitle Automation Block
- In most cases, this step alone provides perfect or near-perfect synchronization
For the vast majority of movies, no further manual adjustment is required
after this process.
2) Fine Adjustment — Sync Forward / Sync Backward
- These commands are not a second synchronization system
- They are designed as a fine-tuning fallback, used only if needed
- Adjust subtitle timing during playback
- Move subtitles forward or backward by small increments (±1 second)
- Useful only in rare edge cases where minor timing drift remains
Think of them as a precision adjustment tool, not as a replacement
for automatic synchronization.
Why both systems exist
- Batch Sync → solves 95–99% of synchronization issues automatically
- Sync Forward / Backward → provides manual fine control only if necessary
Most users will rarely need Sync Forward or Sync Backward — but having them
available ensures complete control in all scenarios.
👉 Next, we will configure PotPlayer so that these fine-adjustment commands
can be triggered reliably through Smart Home Cinema voice commands.
PotPlayer does not support native voice control. If you want a clear explanation of how voice control works with PotPlayer, you can read the
PotPlayer Voice Control guide.
7.1 PotPlayer version — Subtitle Sync Hotkeys (Required)
⚠️ Important — PotPlayer Keyboard Shortcuts Used by Smart Home Cinema
Smart Home Cinema relies on a small, specific set of PotPlayer keyboard shortcuts
to ensure reliable voice control during playback.
If you have previously customized PotPlayer keyboard shortcuts,
please review the information below before continuing.
Shortcuts used by Smart Home Cinema
- Space — Play / Pause
- Left Arrow (←) — Rewind
- Right Arrow (→) — Forward
- F10 — Subtitle Sync Increase (+1 second)
- F9 — Subtitle Sync Decrease (–1 second)
Mandatory requirement
These keys must be assigned to their default PotPlayer actions
(with the exception of subtitle sync, which is remapped to F9 / F10 as shown below).
If any of the keys listed above were previously remapped to other actions,
Smart Home Cinema voice commands may not function correctly.
Recommended safe setup
- If unsure, uninstall PotPlayer
- Reinstall PotPlayer using default settings
- Remap only Subtitle Sync Increase / Decrease to F10 / F9
- Do not modify Space or Arrow key behavior
Note: Customizing other PotPlayer shortcuts (play, pause, seek, stop)
is not supported and may interfere with voice control.
To enable voice-controlled subtitle synchronization in Smart Home Cinema – Voice Control,
PotPlayer must be configured with two specific keyboard shortcuts.
These shortcuts allow the system to shift subtitles forward or backward by one second using voice commands.
Why this step is required
By default, PotPlayer uses the . (dot) and , (comma) keys for subtitle synchronization.
These keys are not universal Windows keys and cannot be reliably triggered by external automation tools.
For this reason, Smart Home Cinema requires the subtitle sync actions to be reassigned to F10 and F9,
which are standard, universally supported keys.
Note: F9 and F10 were historically used by PotPlayer’s old broadcast/chat features.
These features are deprecated and no longer active, so the keys are safe to reuse.
Required key mapping
- F10 → Increase Subtitle Sync (+1 second)
- F9 → Decrease Subtitle Sync (–1 second)
Step-by-step configuration
-
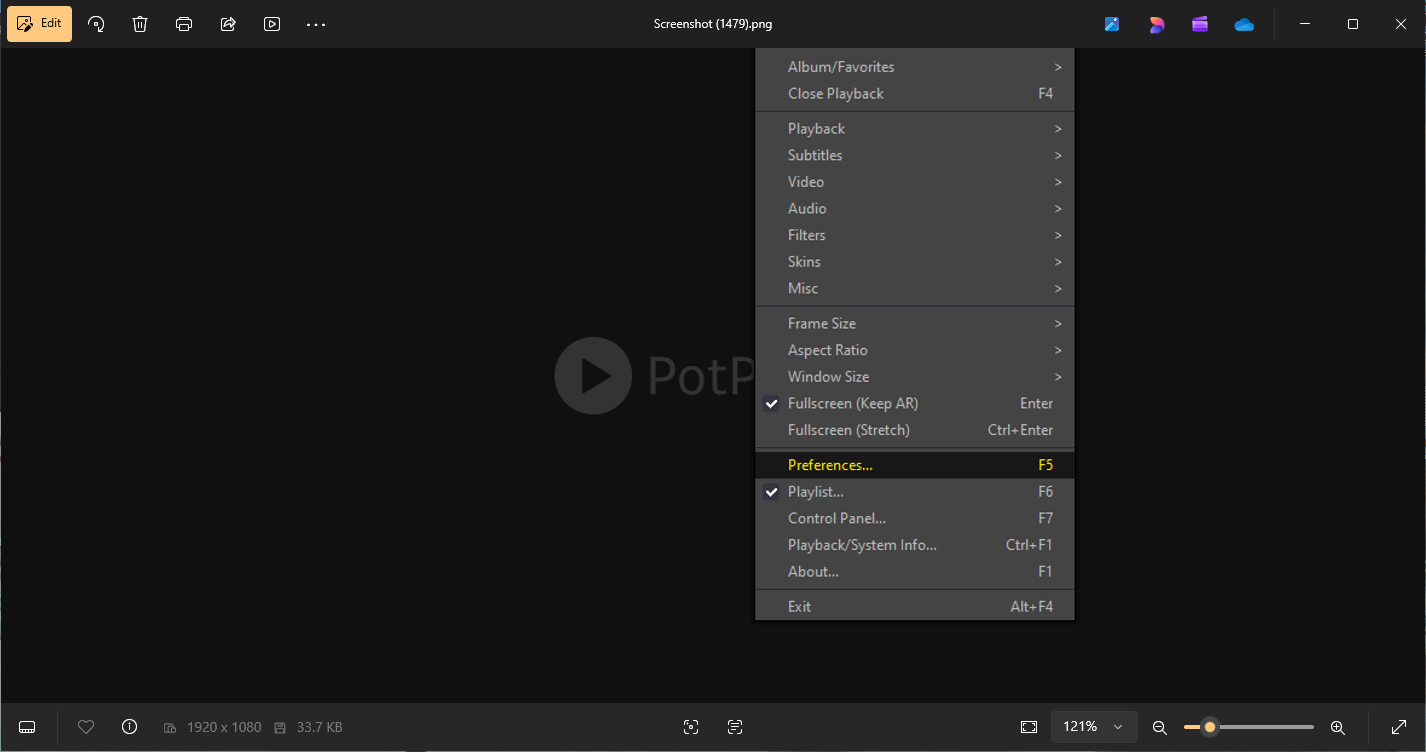
Open PotPlayer.
-
Right-click anywhere inside the player window.
-
Select Preferences (or press F5).
PotPlayer
Open Preferences
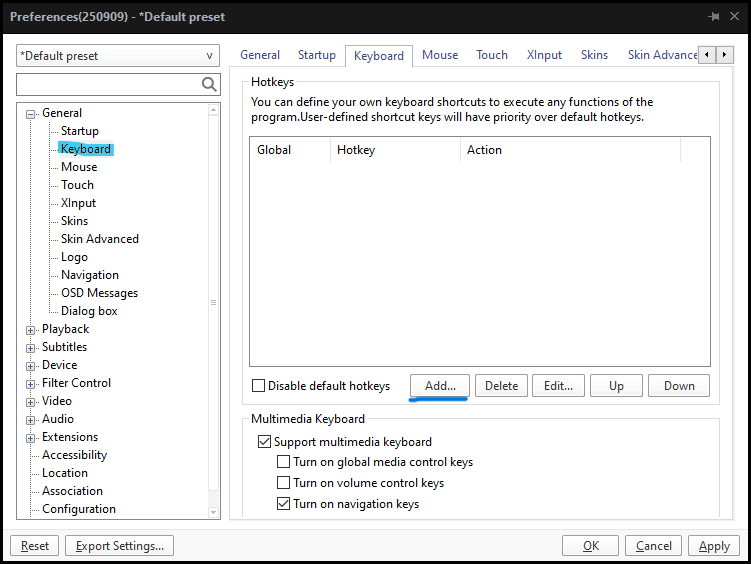
-
Go to General → Keyboard, then click Add… to create a new custom hotkey.
PotPlayer
Preferences → Keyboard
-
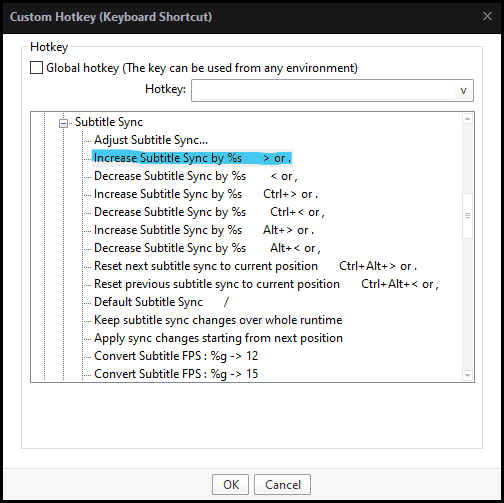
5.1 Select Increase Subtitle Sync
In the Custom Hotkey window, expand Subtitles, then expand
Subtitle Sync. Select the first Increase Subtitle Sync
entry in the list (the one without any key combination assigned).
PotPlayer
Select Increase Subtitle Sync
-
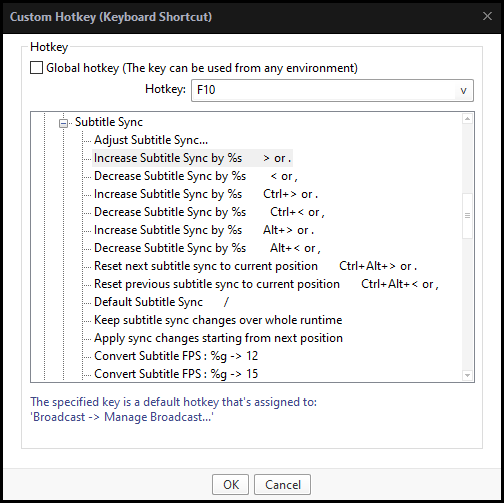
5.2 Assign F10 and confirm
Click inside the Hotkey field at the top,
press the F10 key on your keyboard and verify
that F10 appears in the field.
Then click OK to confirm.
-
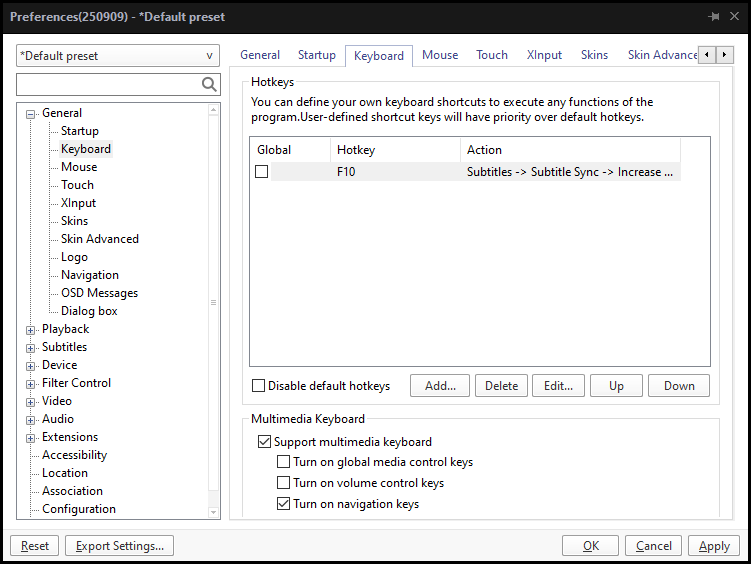
5.3 F10 mapping completed
After clicking OK, PotPlayer automatically returns
to the Preferences → Keyboard screen.
At this point, the F10 key is already listed and mapped to
Subtitles → Subtitle Sync → Increase.
This is the starting point for adding the next hotkey (F9).
PotPlayer
F10 mapping completed
-
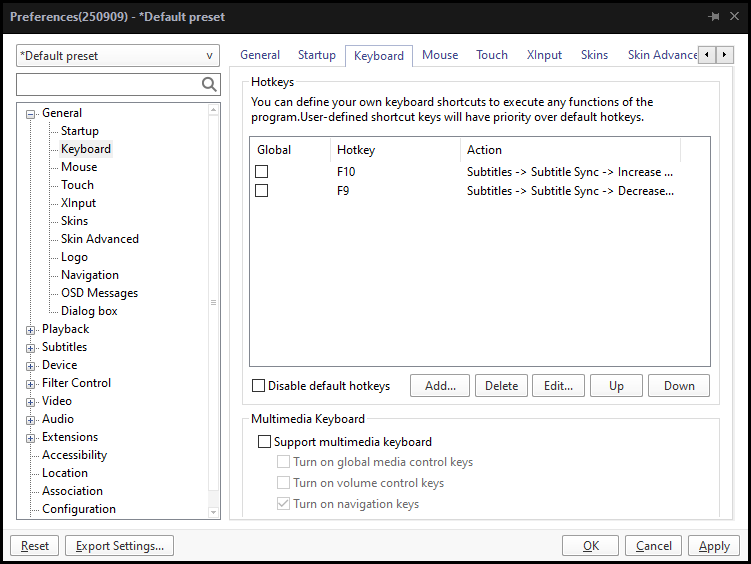
Assign F9 — Decrease Subtitle Sync
- Click Add… again
- Expand: Subtitles → Subtitle Sync
-
Select the first “Decrease Subtitle Sync” entry in the list
(the one without any key combination assigned)
- Click in the Hotkey field and press F9
- Click OK to confirm
-
Final check
- Keyboard list must show: F10 → Subtitles → Subtitle Sync → Increase
- Keyboard list must show: F9 → Subtitles → Subtitle Sync → Decrease
- Click Apply, then OK to save the changes
PotPlayer
Final hotkey mapping
Once this is done, subtitle fine adjustment commands in Smart Home Cinema will work correctly.
VLC uses different default keys for subtitle synchronization, which may not be ideal for voice-controlled automation.
If you want a clear explanation of how voice control works with VLC, you can read the
VLC Voice Control guide.
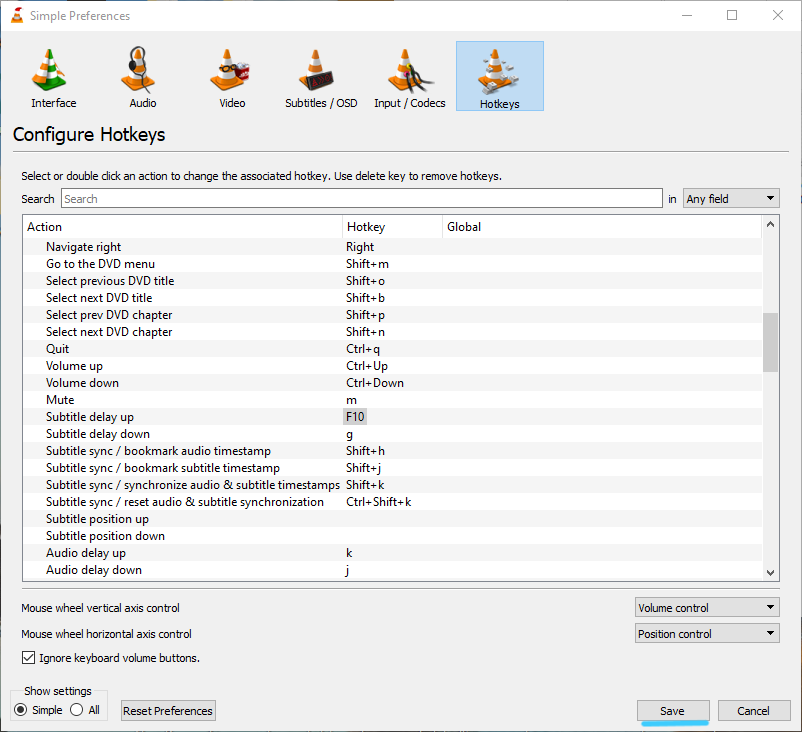
7.2 VLC version — Subtitle Sync Hotkeys (Required)
⚠️ Important — VLC Hotkeys Used by Smart Home Cinema
Smart Home Cinema relies on a small, consistent set of VLC keyboard shortcuts
in order to control subtitle synchronization through voice commands.
If you previously customized hotkeys in VLC, please review this section carefully
and make sure the keys below match our configuration.
Hotkeys required for Smart Home Cinema
- F10 — Subtitle delay up (+1 second)
- F9 — Subtitle delay down (–1 second)
Why this is required
By default, VLC uses different keys for subtitle timing adjustments.
These defaults are not ideal for automation and may not work
reliably with Smart Home Cinema voice commands.
Reassigning subtitle synchronization to F10 and F9
guarantees predictable behavior across all systems.
Note: If VLC warns that a key is already used, simply confirm and continue.
Smart Home Cinema does not rely on the functions that previously used F9/F10.
In this section, you will configure VLC so Smart Home Cinema can adjust subtitles
forward and backward by one second using voice commands.
Step-by-step configuration
-
Open VLC Media Player.
-
Go to Tools → Preferences.
-
In the Preferences window, open the Hotkeys tab.
VLC
Preferences → Hotkeys
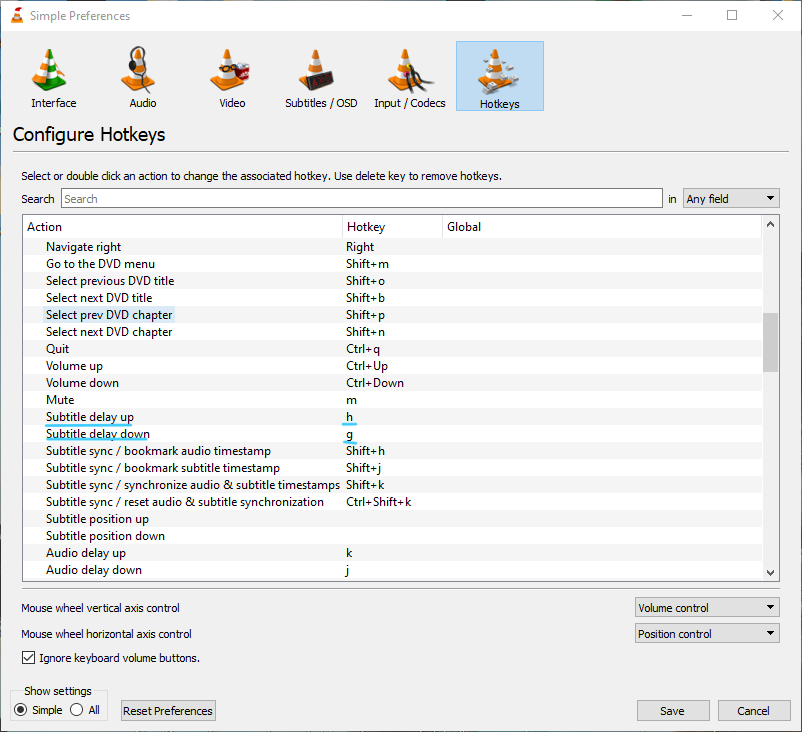
-
Scroll until you find:
- Subtitle delay up
- Subtitle delay down
Double-click the current hotkey next to
Subtitle delay up.
VLC
Locate subtitle delay hotkeys
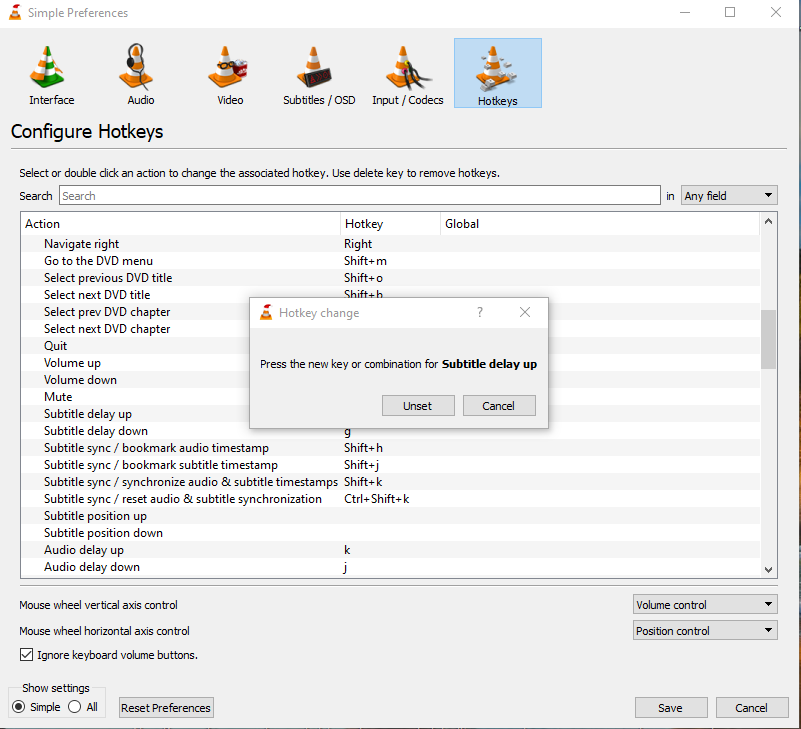
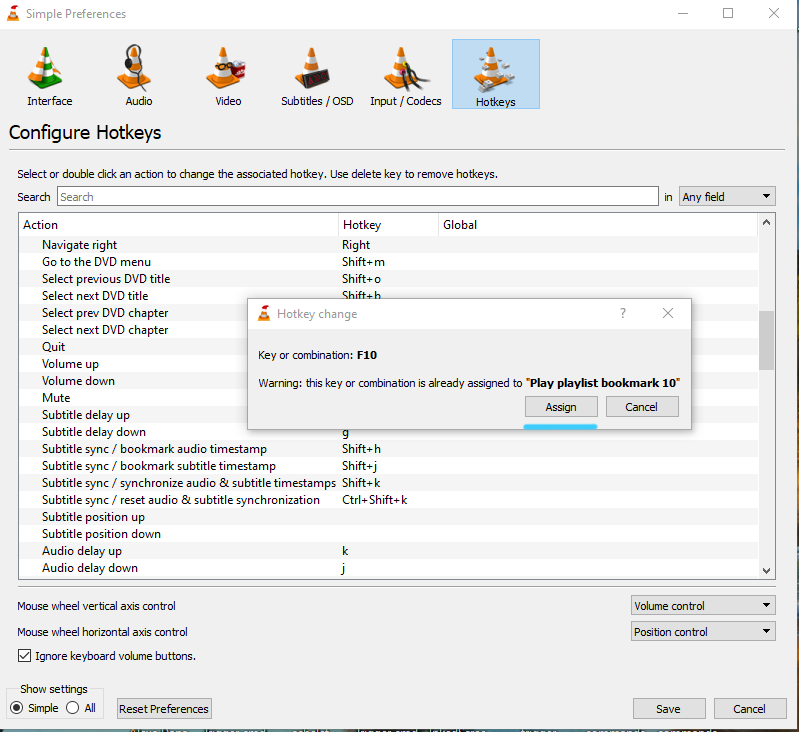
-
When the popup appears, press F10 and then click Assign.
VLC may warn that F10 is already assigned to another function.
This is expected — click Assign to replace it.
-
Now repeat the process for Subtitle delay down
and assign F9.
Once these mappings are saved, Smart Home Cinema can control subtitle timing
with precise +1s / −1s adjustments using voice commands.
Switching between editions (PotPlayer ↔ VLC)
You can switch versions at any time — for example, from PotPlayer version
to VLC version, and back again.
Rule: always do it in this order:
- Uninstall the current Smart Home Cinema edition
- Delete the folder:
C:\Program Files\Smart Home Cinema (PotPlayer\VLC version)
- Install the new edition
Important: Each edition (PotPlayer / VLC) uses its own command set.
After switching editions, you must import the new Smart Home Cinema command file again in TRIGGERcmd so it replaces the previous one.
This prevents old configuration or progress files from causing unexpected behavior.
8) TRIGGERcmd Setup
TRIGGERcmd is the automation bridge that allows your voice assistant
(Alexa or Google Assistant) to control your Windows PC.
In this chapter, you’ll learn how to install TRIGGERcmd, connect your
computer, import commands, and verify that everything works correctly.
Even if you found this guide while simply looking for
how to configure TRIGGERcmd on Windows,
you can safely follow the steps below — they apply both to
Smart Home Cinema and to general TRIGGERcmd usage.
If you want a simple explanation of what TRIGGERcmd is and why it is used, you can read the
TRIGGERcmd Beginner Guide.
This chapter shows how to link each voice routine to a Smart Home Cinema command.
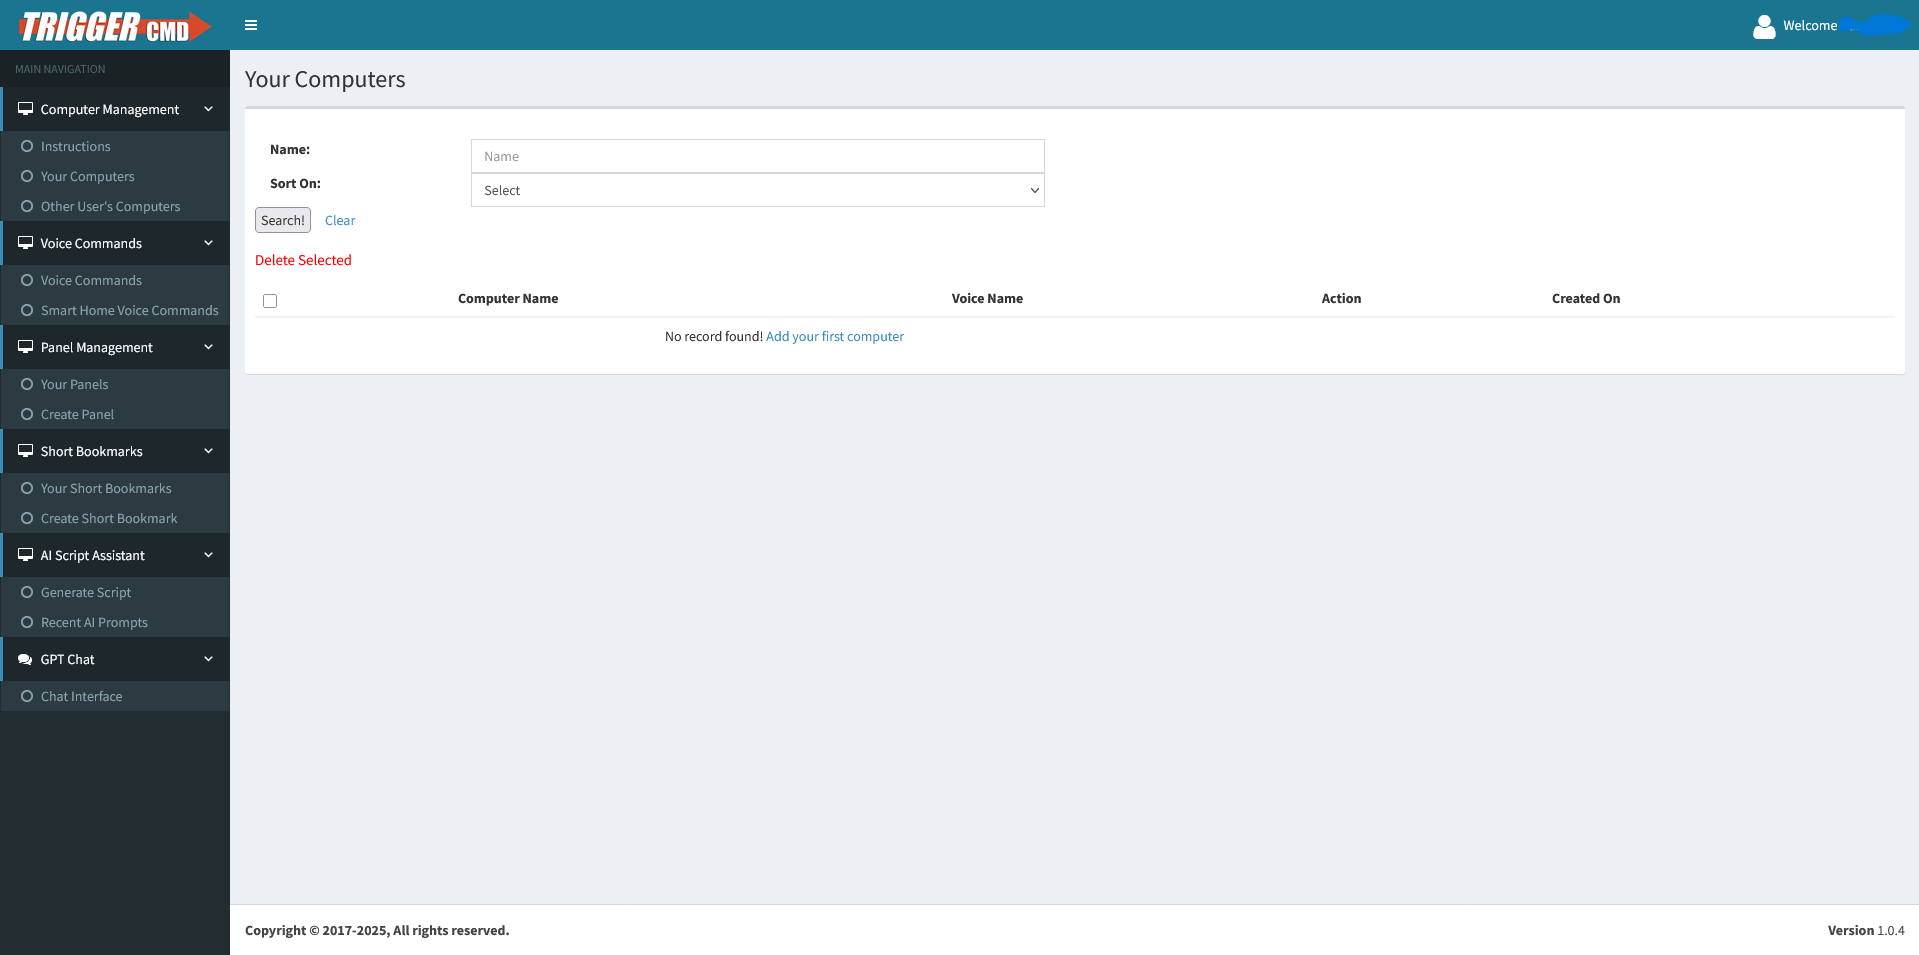
8.1 Create a TRIGGERcmd Account & Connect Your Computer
Before adding any Smart Home Cinema commands, you must create a TRIGGERcmd
account and connect your Windows PC using the official TRIGGERcmd agent.
-
Create a TRIGGERcmd account
Go to triggercmd.com and sign up
-
Add your first computer
Click “Add your first computer” in your TRIGGERcmd account
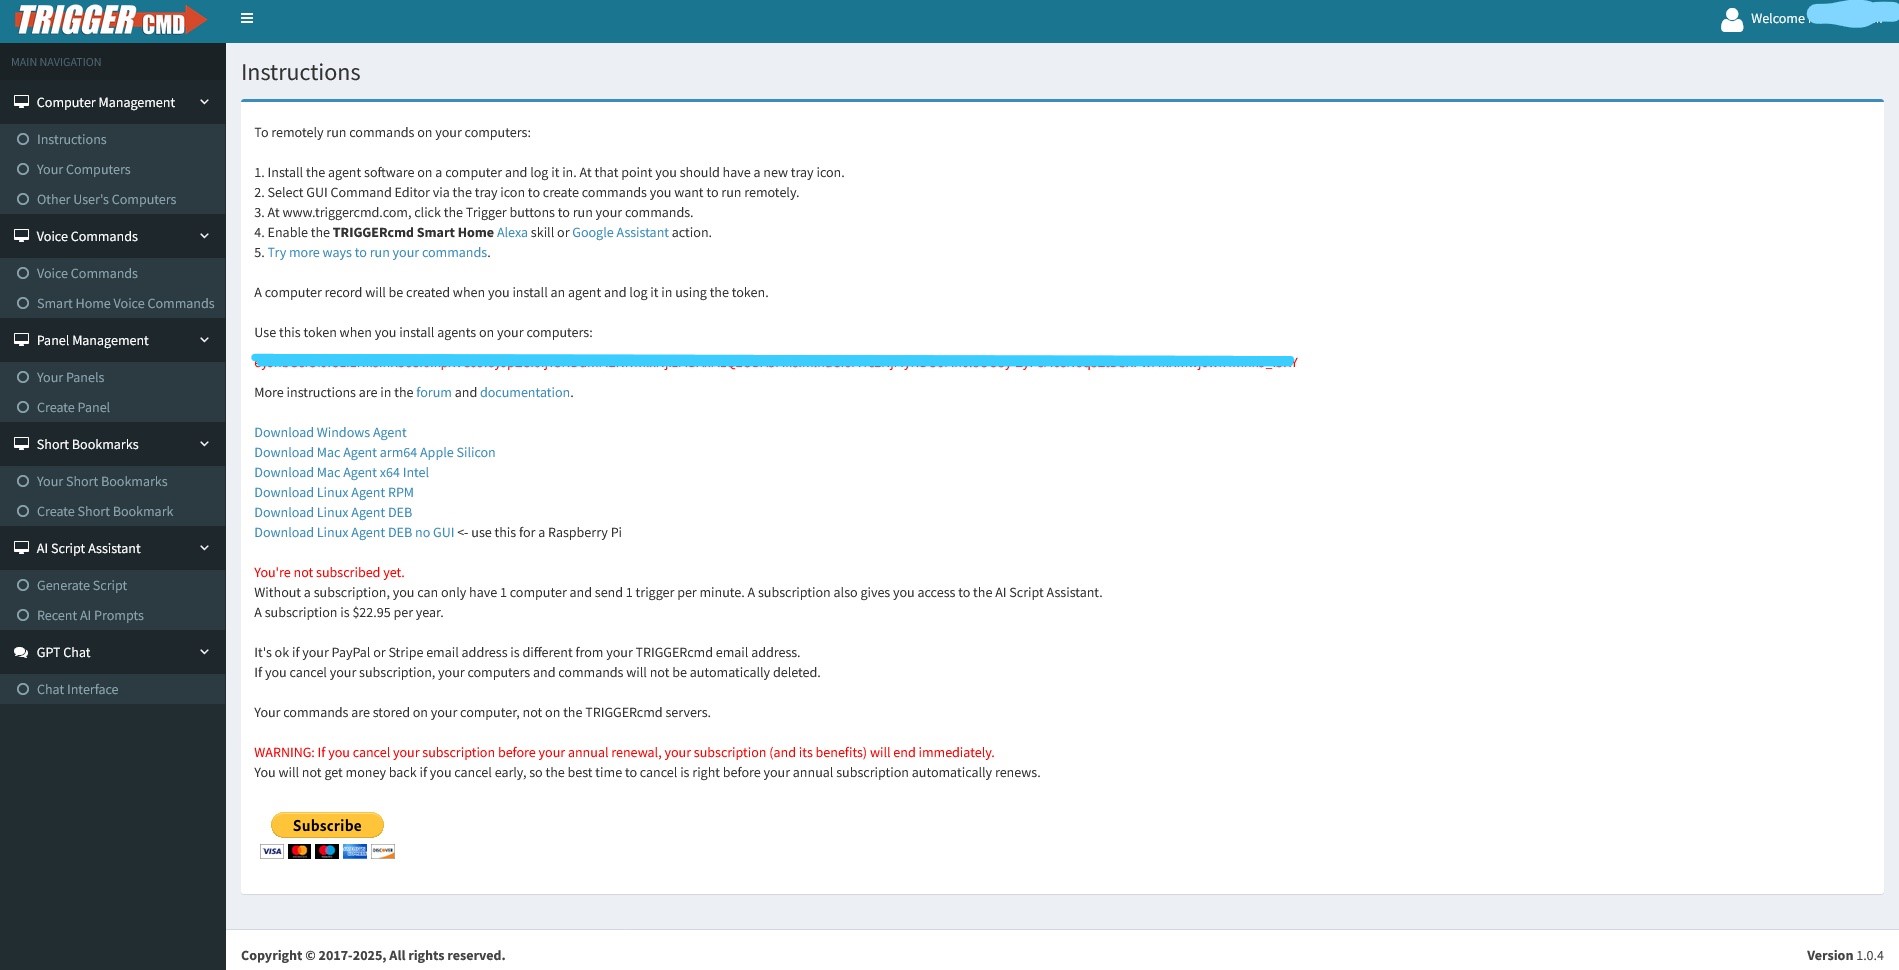
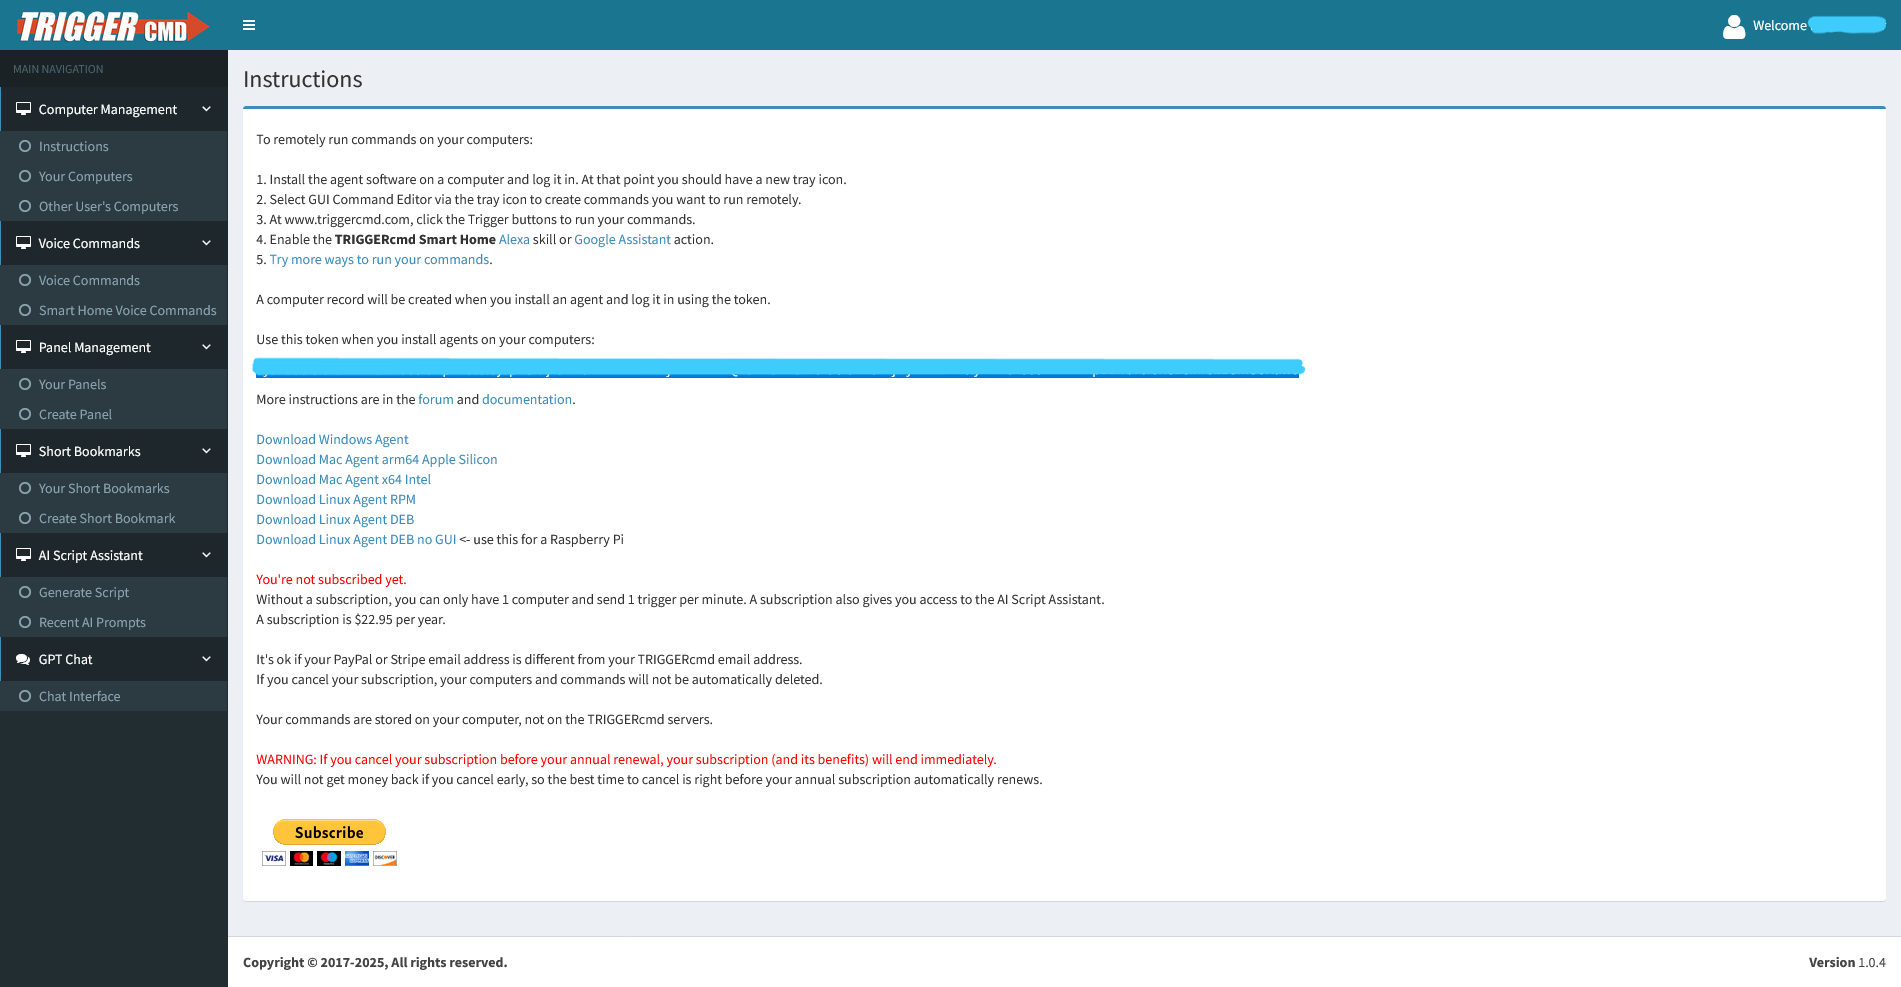
-
Download the Windows Agent
Download and install the TRIGGERcmd Windows Agent
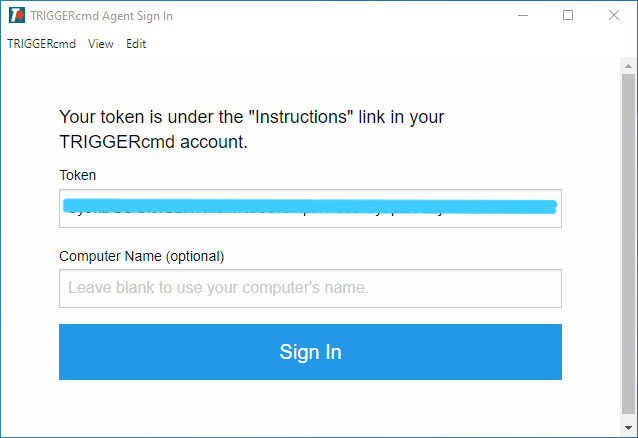
-
Sign in using your account token
Paste your token into the agent using Ctrl + V
(mouse right-click paste does not work), then sign in
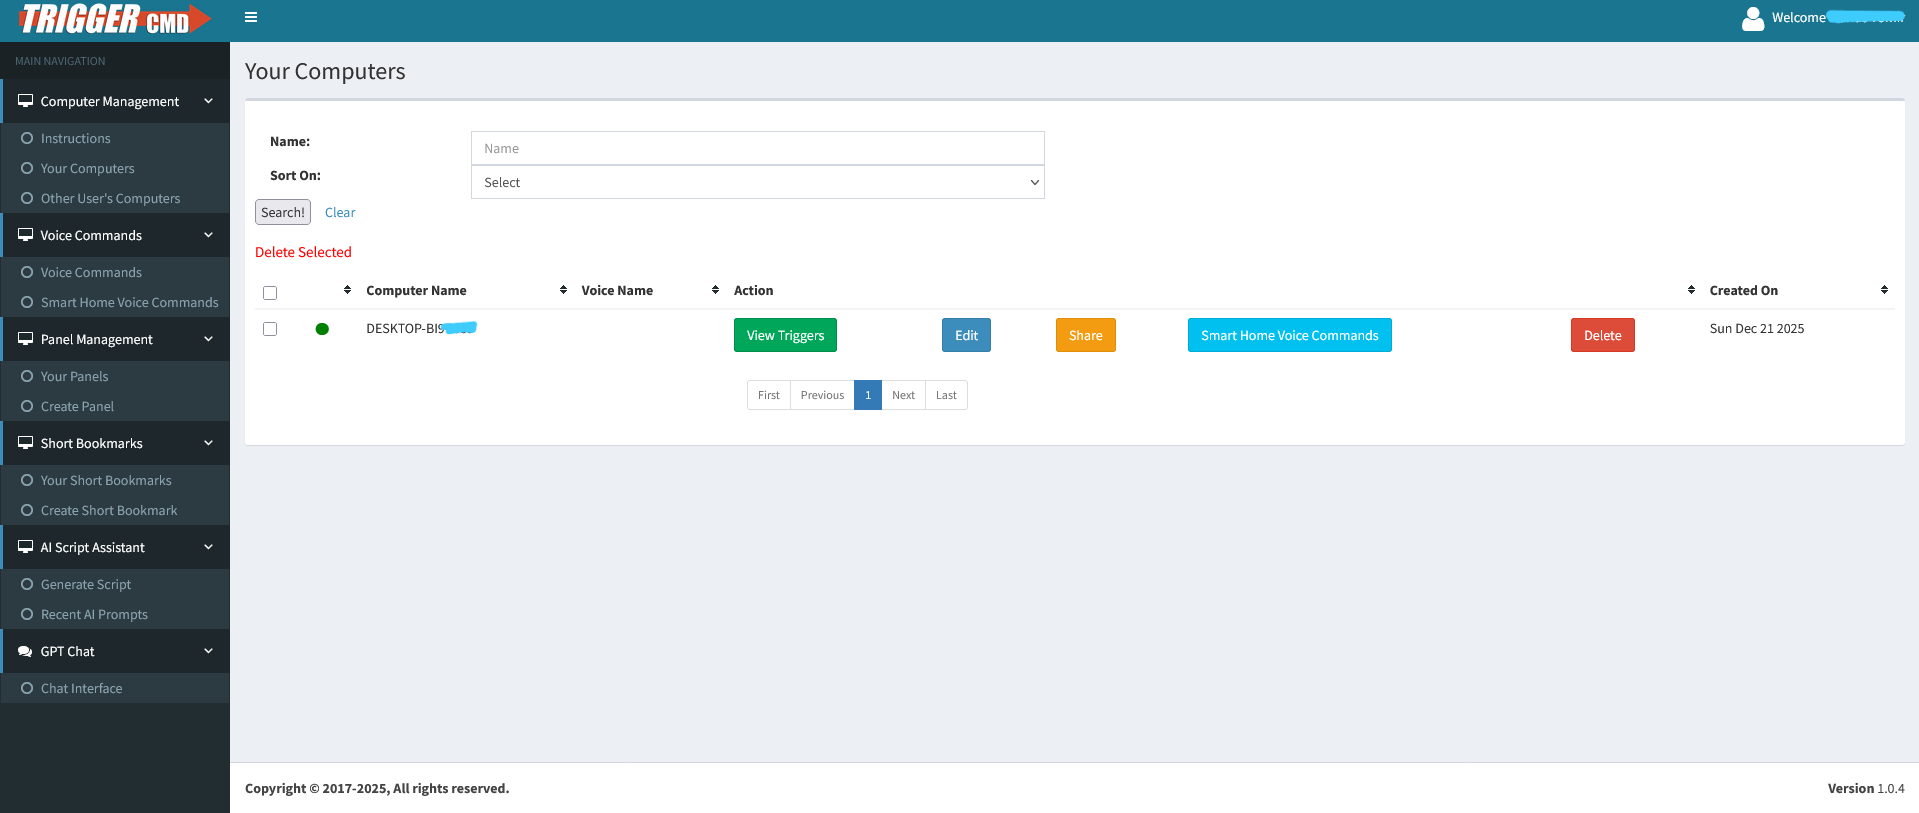
-
Confirm your computer appears in TRIGGERcmd
Refresh the page and verify that your computer is listed as Online
Step 1Add your first computer
Step 2Download Windows Agent
Step 5
Computer successfully added
8.2.1 Automatic Import (Recommended)
Smart Home Cinema provides a ready-to-use TRIGGERcmd commands file
that contains all required Smart Home Cinema commands.
This method allows you to add all commands at once and is the
recommended setup for new TRIGGERcmd users or users who do not have
existing custom commands.
Step-by-step configuration
-
Before you start (very important)
Before importing the Smart Home Cinema commands file, the
TRIGGERcmd Desktop Agent must be completely closed.
If the agent is running, TRIGGERcmd will ignore any changes
made to the commands file.
-
Step 1 — Completely close the TRIGGERcmd Agent
- Look at the system tray (bottom-right corner of the Windows taskbar)
- Click the up arrow (▲) to show hidden tray icons
- Find the TRIGGERcmd icon
- Right-click the icon and select Quit
Make sure the TRIGGERcmd icon disappears completely from the tray.
Simply closing the browser or logging out is not enough.
-
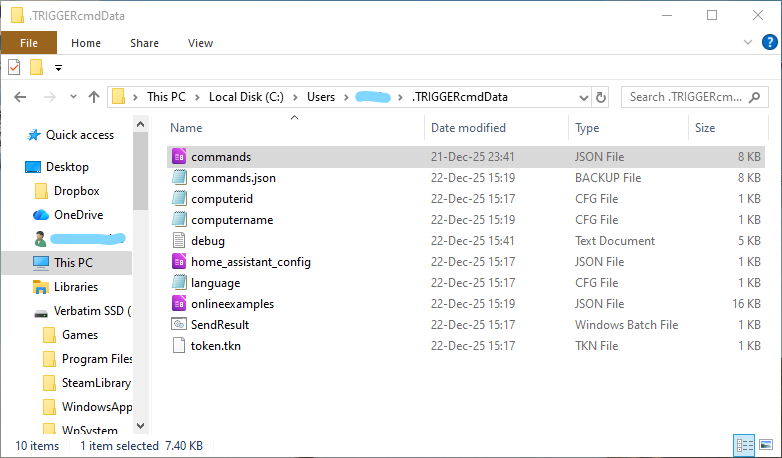
Step 2 — Locate the TRIGGERcmd data folder
TRIGGERcmd stores all command definitions locally on your computer.
Open File Explorer and navigate to:
C:\Users\<YourUsername>\.triggercmdData
Replace <YourUsername> with your Windows account name.
Windows
TRIGGERcmd commands file location
-
Step 3 — Identify and back up the commands file
- The file is named commands
- It has no file extension
- It is usually the first file in the list
Before making any changes, create a backup:
- Copy the existing commands file
- Paste it somewhere safe (Desktop, Documents, etc.)
- Optionally rename it (for example:
commands_backup)
This backup allows you to restore your previous configuration instantly
if needed.
-
Step 4 — Replace the commands file (after installing Smart Home Cinema)
The Smart Home Cinema commands file becomes available
after Smart Home Cinema is installed.
During installation, Smart Home Cinema places a ready-to-use
TRIGGERcmd commands file inside its installation directory.
Location of the Smart Home Cinema commands file:
C:\Program Files\Smart Home Cinema (PotPlayer version)\Docs
If you are reading this section before installing Smart Home Cinema,
this file will not exist yet. You will copy it
after completing the Smart Home Cinema installation.
- Open the folder shown above
- Locate the commands file provided by Smart Home Cinema
- Copy this file
- Paste it into
C:\Users\<YourUsername>\.triggercmdData
- When prompted, choose Replace
-
Step 5 — Restart the TRIGGERcmd Agent
Launch the TRIGGERcmd Desktop Agent again and wait a few seconds
for it to initialize.
-
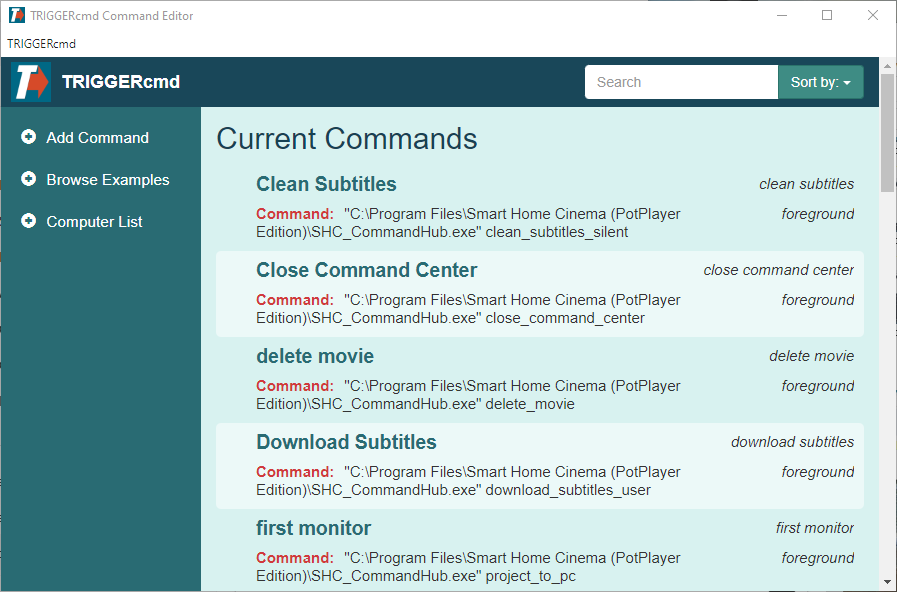
Step 6 — Verify imported commands
- Right-click the TRIGGERcmd tray icon
- Select GUI Command Editor
You should now see all Smart Home Cinema commands listed and
associated with your computer.
TRIGGERcmd
GUI Command Editor — commands imported
TRIGGERcmd Free Plan — Important Notes
- TRIGGERcmd Free allows unlimited command creation
- The only limitation is one voice command per minute
- This rate limit rarely affects normal movie watching
- Smart Home Cinema functions correctly with the TRIGGERcmd Free plan
-
Users who prefer unlimited command execution frequency may upgrade to
TRIGGERcmd Pro, but this is not required for standard home usage
8.2.2 Existing TRIGGERcmd Users — Safe Merge (Manual)
This section applies only if you already use TRIGGERcmd and want to keep
your existing commands.
If you already have TRIGGERcmd configured with your own commands, you should
follow all steps from section 8.2.1 exactly as written, with
one single difference.
- ❌ Do NOT replace the existing
commands file
- ✅ Merge Smart Home Cinema commands into your current configuration
This ensures that all your existing TRIGGERcmd commands remain intact,
while Smart Home Cinema commands are added safely.
Important:
Use Notepad only.
Do not use Word, WordPad, or other rich text editors.
Step-by-step safe merge
-
Step 1 — Open the Smart Home Cinema commands file
- Open File Explorer
- Navigate to:
C:\Program Files\Smart Home Cinema (PotPlayer version)\Docs
- Locate the commands file
- Right-click → Open with → Notepad
-
Step 2 — Copy the correct content
The file starts with an opening square bracket:
[
And ends with a closing square bracket:
]
Select and copy only what is between these brackets
(from the first { to the last }).
⚠️ Do not copy the square brackets themselves.
Press Ctrl + C to copy.
-
Step 3 — Open your existing TRIGGERcmd commands file
C:\Users\<YourUsername>\.triggercmdData
- Locate the file named commands (no file extension)
- Right-click → Open with → Notepad
-
Step 4 — Insert Smart Home Cinema commands
In the TRIGGERcmd file, locate the opening square bracket at the top:
[
- Click immediately after this bracket
- Press Enter to move to a new line
- Press Space once to align indentation
- Press Ctrl + V to paste
After pasting the Smart Home Cinema commands, add a comma (,) immediately after the closing brace (}) of the last Smart Home Cinema command, before the first command that was already present in your TRIGGERcmd file.
[
  { "trigger": "Last Smart Home Cinema command" },
  { "trigger": "Your first existing TRIGGERcmd command" },
  { "trigger": "Your last existing TRIGGERcmd command" }
]
Important:
Keep the commas that are already present between your existing TRIGGERcmd commands.
Only the final command in the entire file must not end with a comma.
If the JSON formatting is not preserved exactly, TRIGGERcmd may not load the commands file and your commands may not work.
✅ You are inserting commands inside the existing list,
not replacing it.
-
Step 5 — Save and continue
- Close Notepad
- Click Save when prompted
- Restart the TRIGGERcmd Desktop Agent
After this, both your existing commands and Smart Home Cinema commands
will work together.
9) Amazon Alexa Setup
Amazon Alexa is one of the two supported voice assistants for
Smart Home Cinema. In this chapter, you’ll learn how to connect
Alexa with TRIGGERcmd so that your voice commands can control
your Windows PC.
If you searched online for
how to connect Alexa with TRIGGERcmd or
how to control a Windows PC using Alexa,
this guide will also help — the steps below apply both to
Smart Home Cinema and to general TRIGGERcmd + Alexa setups.
If you want a simple explanation of how Alexa works with TRIGGERcmd and what role it plays in this setup, you can read the
Alexa Beginner Guide.
This chapter explains how to connect Amazon Alexa with Smart Home Cinema
using the TRIGGERcmd skill. All configuration steps are performed using the Alexa mobile app.
⚠
Important — please read this first
Even if you already use Amazon Alexa and have the app installed and working on your phone or smart speakers,
Smart Home Cinema still requires one mandatory step:
linking your Alexa account with your TRIGGERcmd account.
This connection allows Alexa to send voice commands to your computer.
Already using Alexa? Read carefully
-
If you already use Alexa but have not linked it with TRIGGERcmd,
you can skip the basic Alexa setup steps and go directly to Phase 3.1 in this chapter.
-
If you already use Alexa and your Alexa account is already linked with TRIGGERcmd,
you can skip this entire chapter, as no additional configuration is required.
-
If this is your first time using Alexa,
follow the steps below starting from Phase 1.
Important:
Alexa must be configured correctly for Smart Home Cinema to work.
All voice commands are executed through the TRIGGERcmd Smart Home skill.
Phase 1 — Install Alexa App & Create Account / Sign In
This phase covers installing the Amazon Alexa app and completing the initial
account setup.
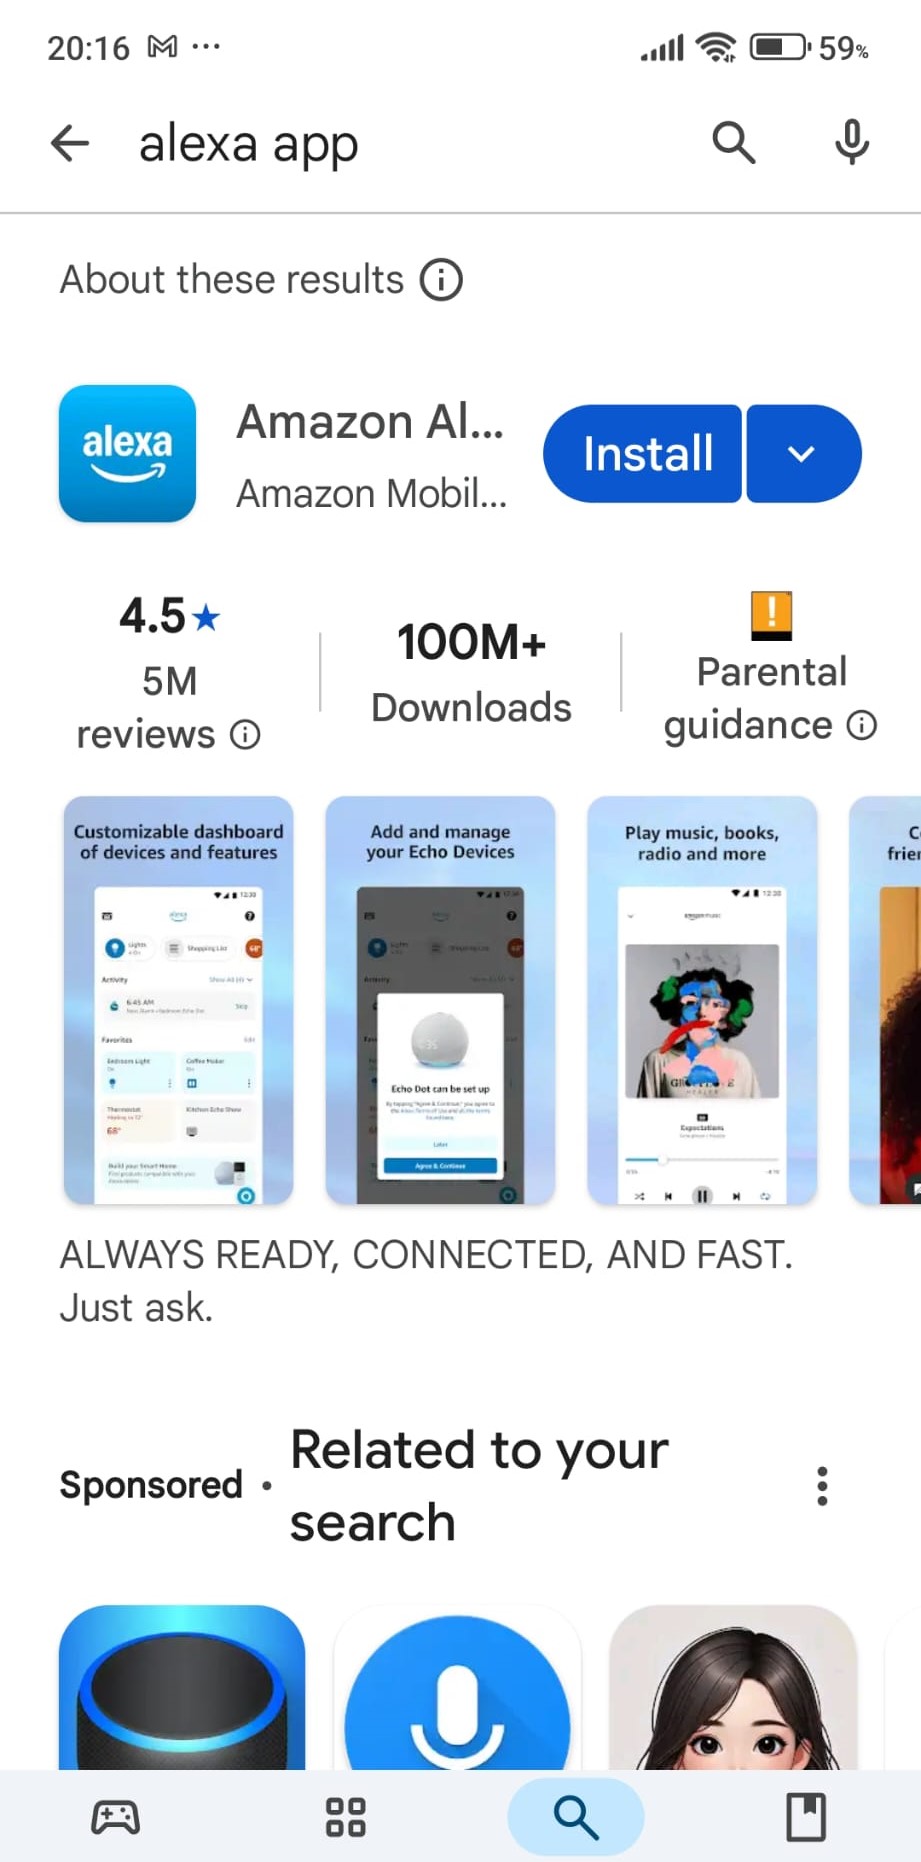
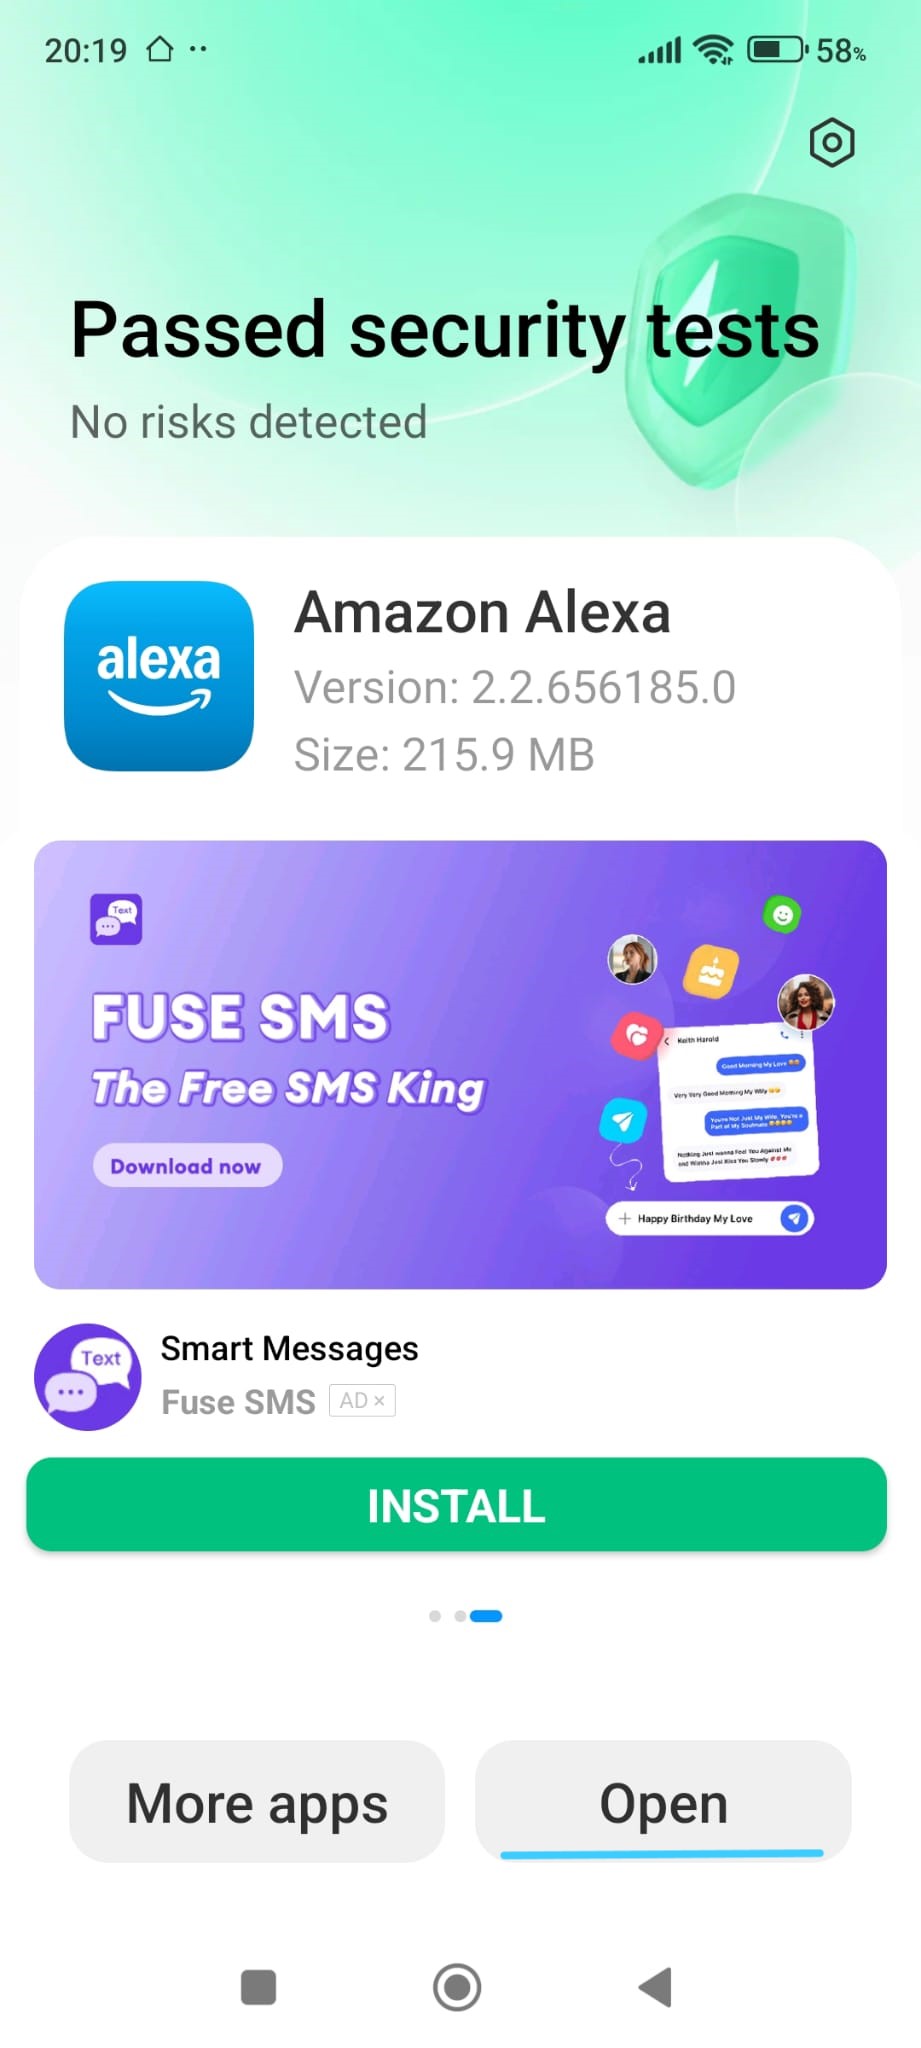
-
Install the Amazon Alexa app
Search for Amazon Alexa in Google Play or the App Store and install the app
-
Open the Alexa app
Once installation is complete, open the app to begin setup
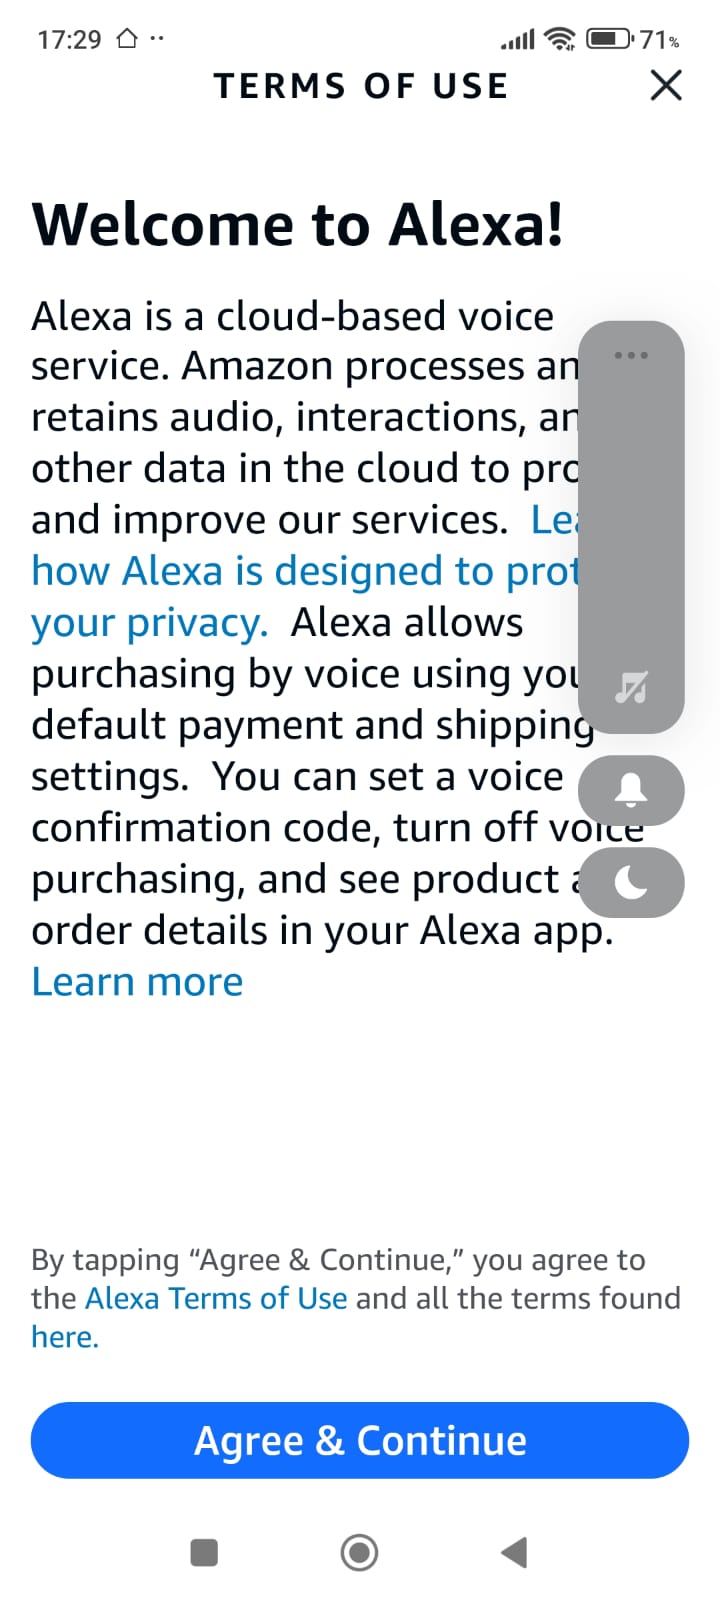
-
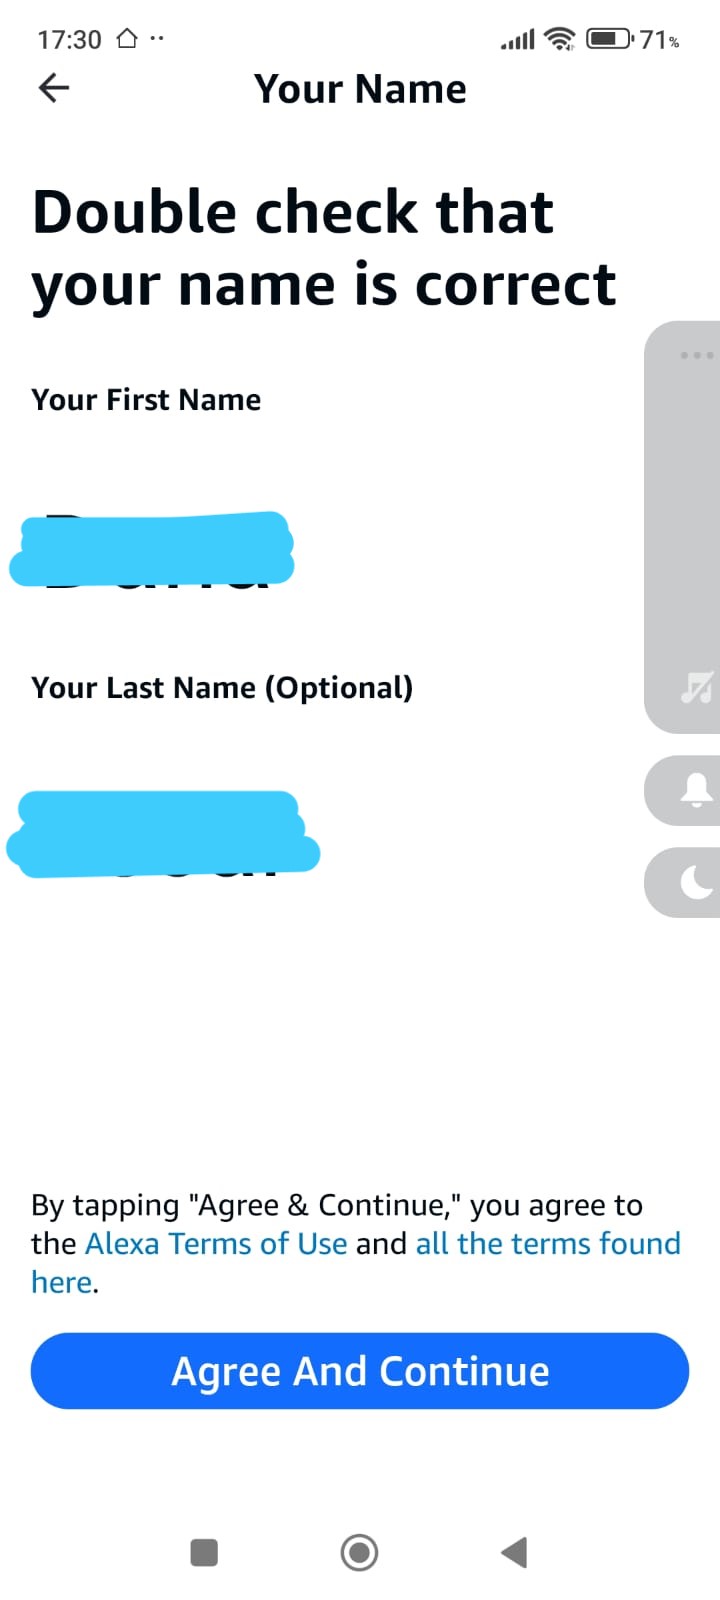
Accept the terms of use
Review the information shown and tap Agree & Continue
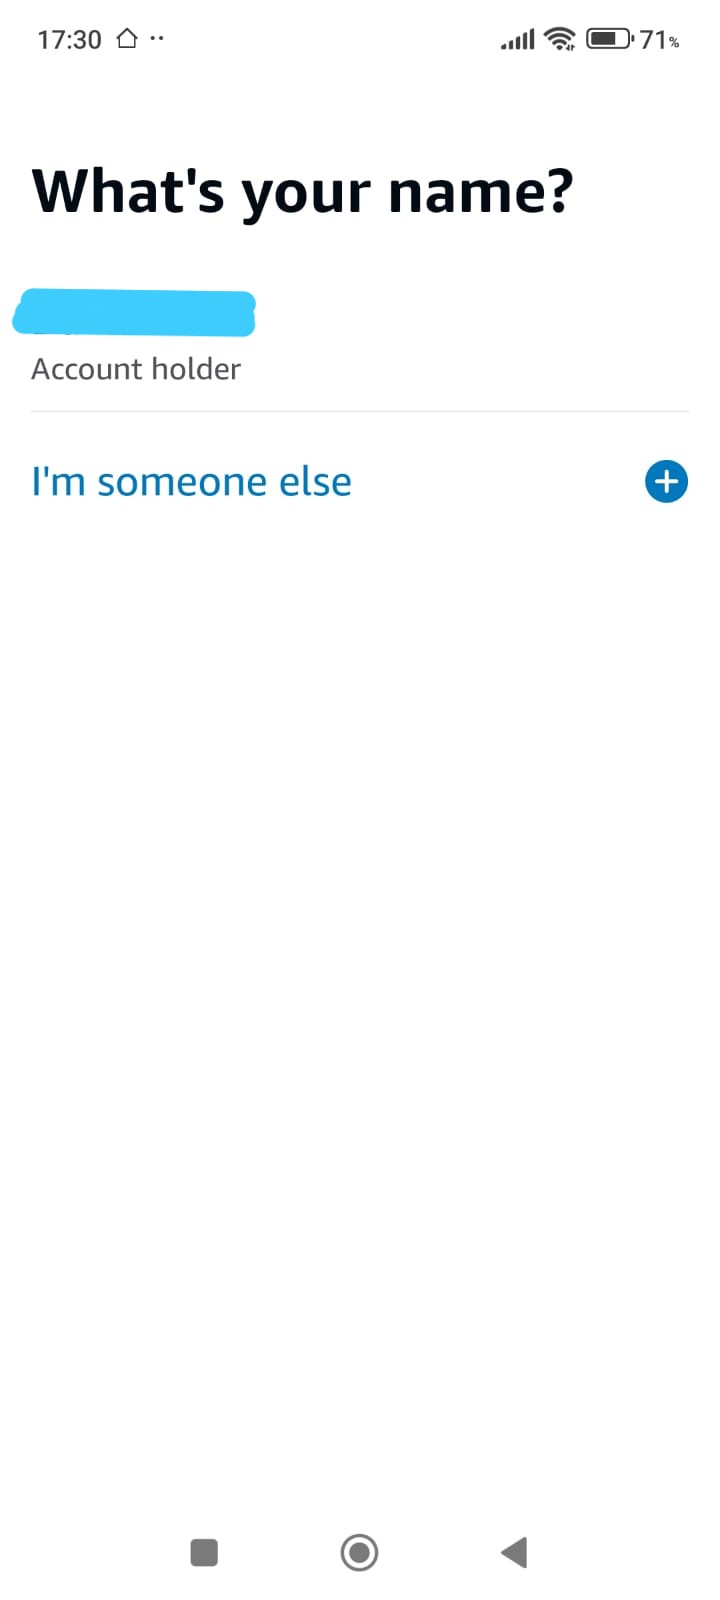
-
Confirm the account holder
Select Account holder
-
Confirm your name
Verify that your name is correct and tap Agree & Continue
Phase 1
Alexa App — Install & Account Setup
Phase 2 — Skip Initial Device Setup Screens
During the initial setup, Alexa may display screens related to device setup,
permissions, or device discovery. These steps are not required
for Smart Home Cinema.
Tap Skip, Later, or Not now,
exactly as shown in the screenshots below, and continue.
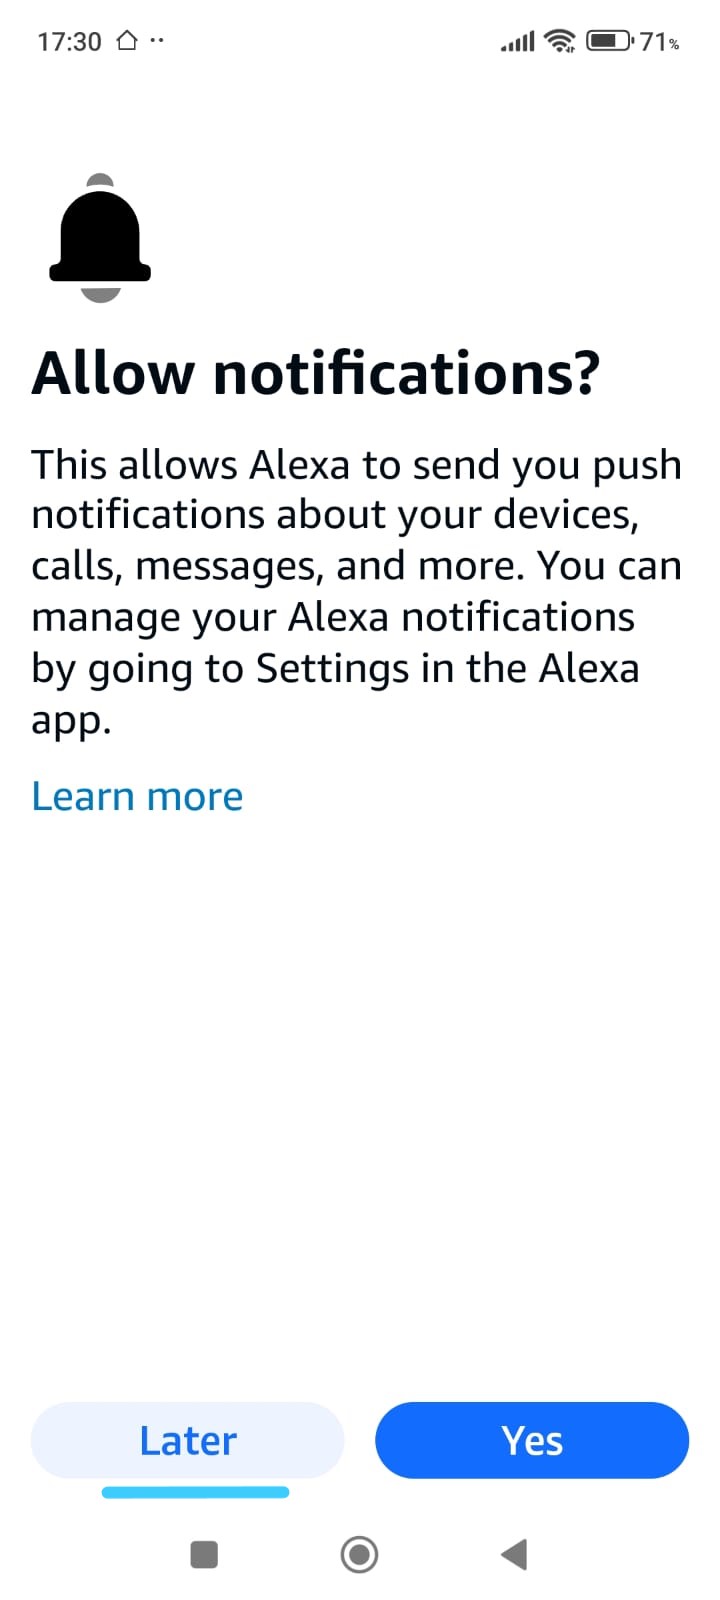
-
Notifications screen
When asked to allow notifications, you may tap Later.
Notifications are optional and not required for Smart Home Cinema.
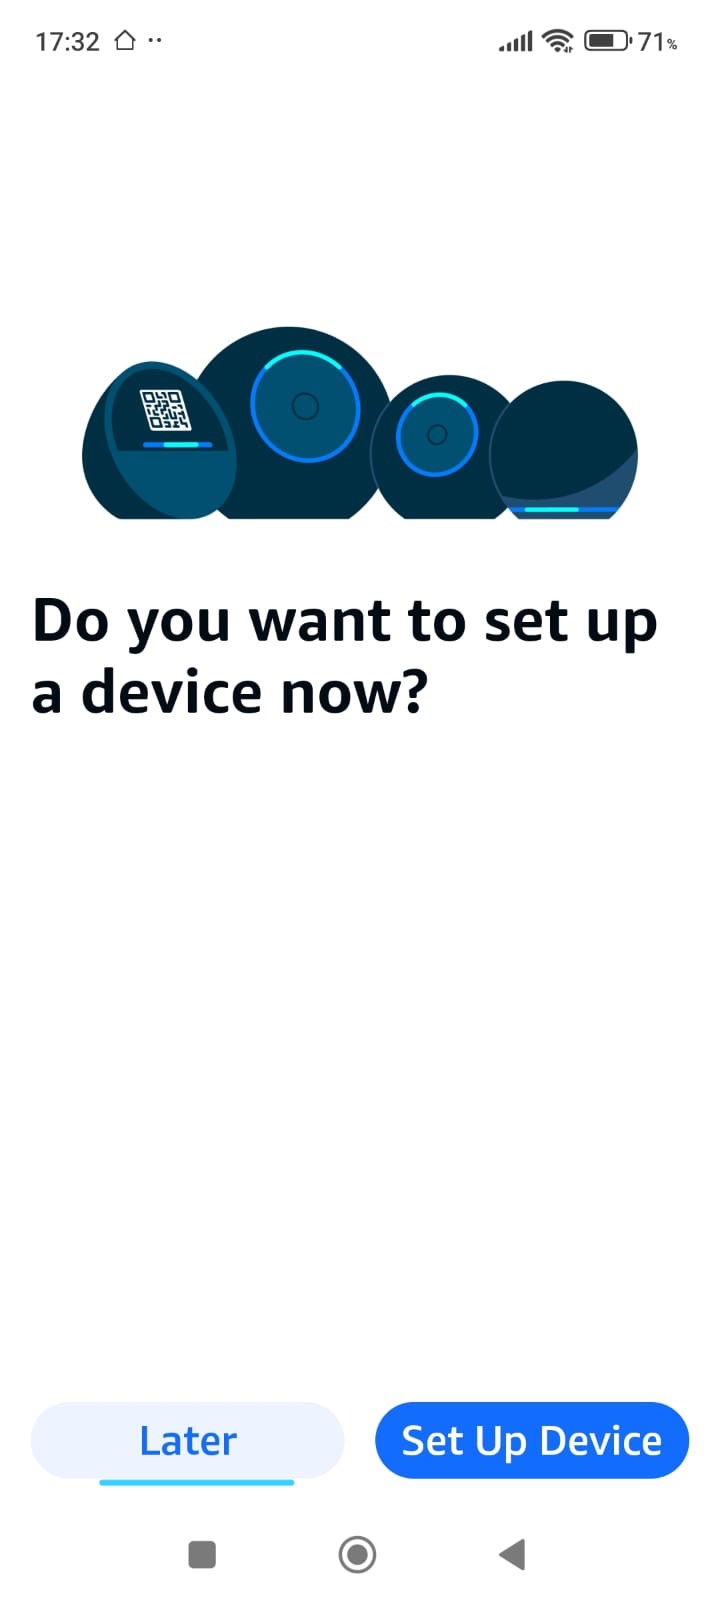
-
Device setup prompt
If Alexa asks whether you want to set up a device now,
choose Skip or Later to continue.
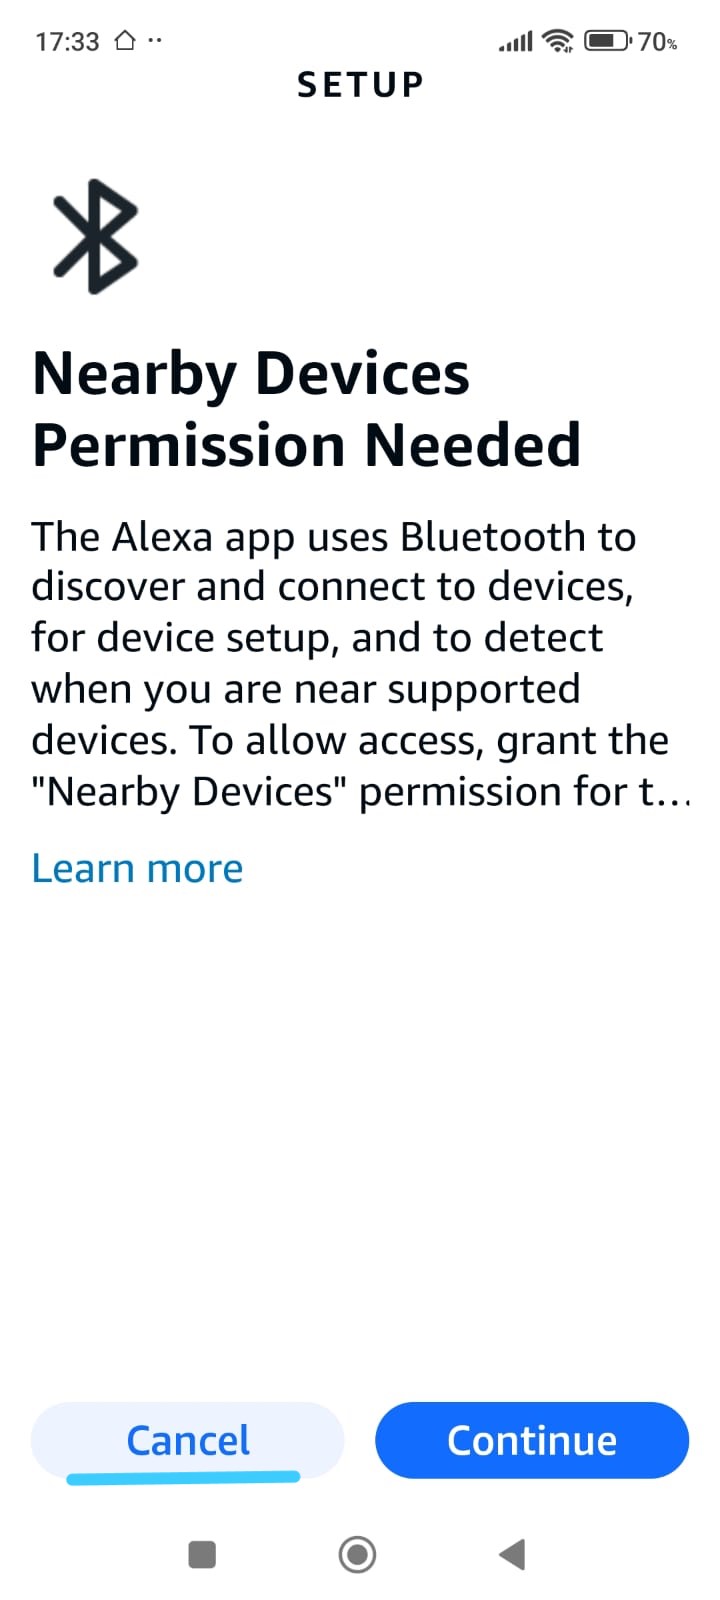
-
Nearby devices permission
If prompted for nearby devices access, you may tap Cancel
or skip when available. This does not affect Smart Home Cinema.
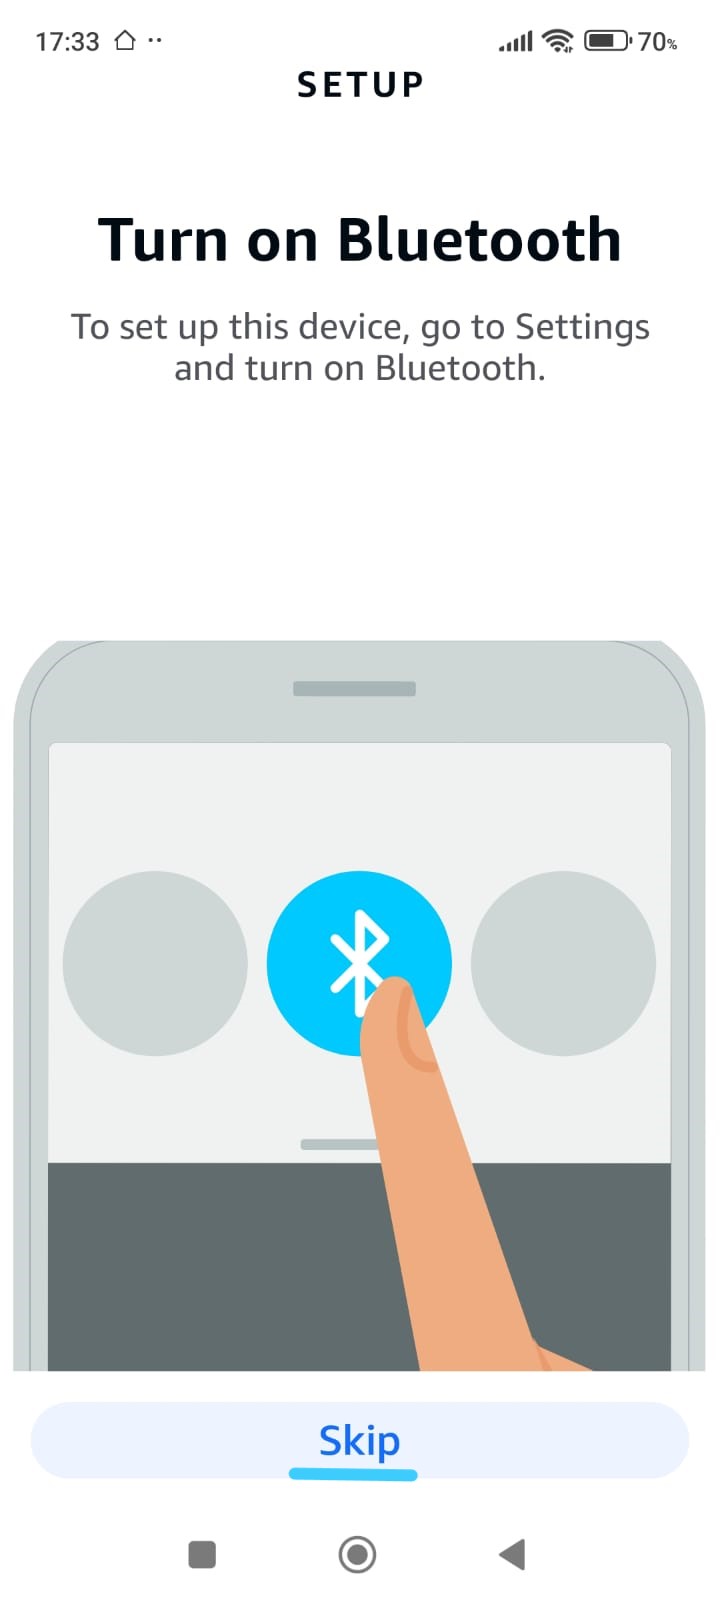
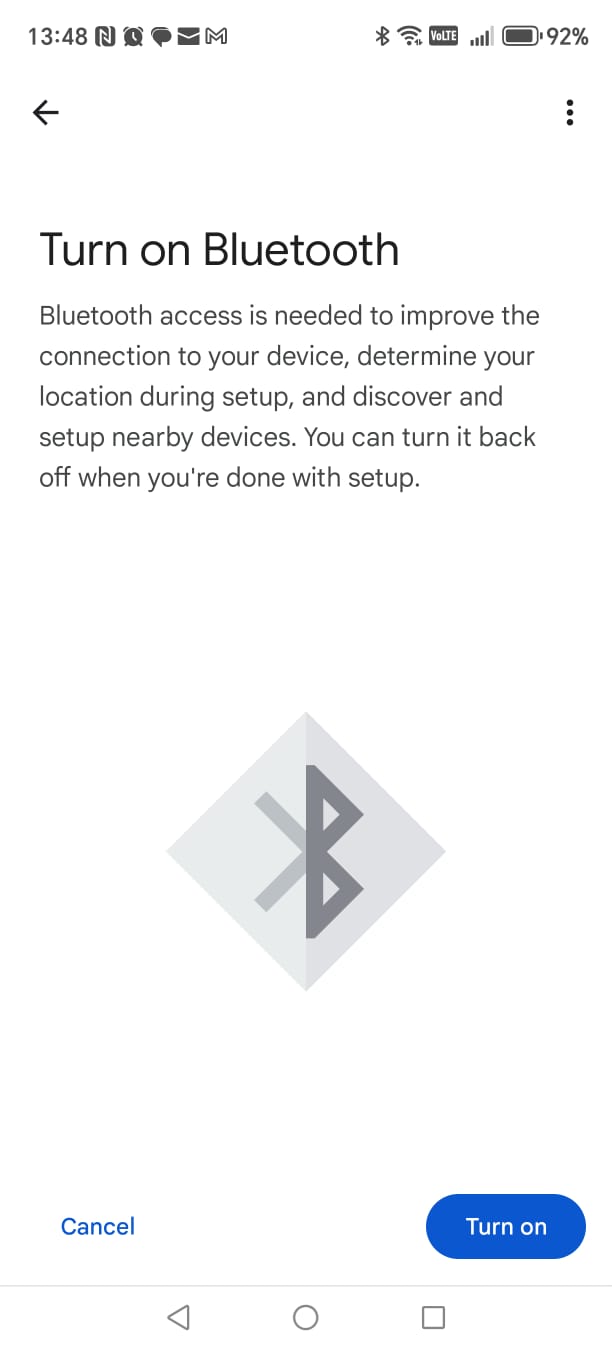
-
Bluetooth setup
If Alexa requests Bluetooth for device setup, tap Skip
to continue without enabling it.
-
Device selection screen
When the device list appears, do not select any device.
Simply close the screen using the X button in the top-right corner.
📌 Short note:
Echo devices are not mandatory for Smart Home Cinema and can be added later if desired.
All features work the same using voice commands from your phone,
but an Echo device makes everyday use easier and more comfortable.
This does not affect Smart Home Cinema functionality.
Phase 2
Skip optional device & permission setup
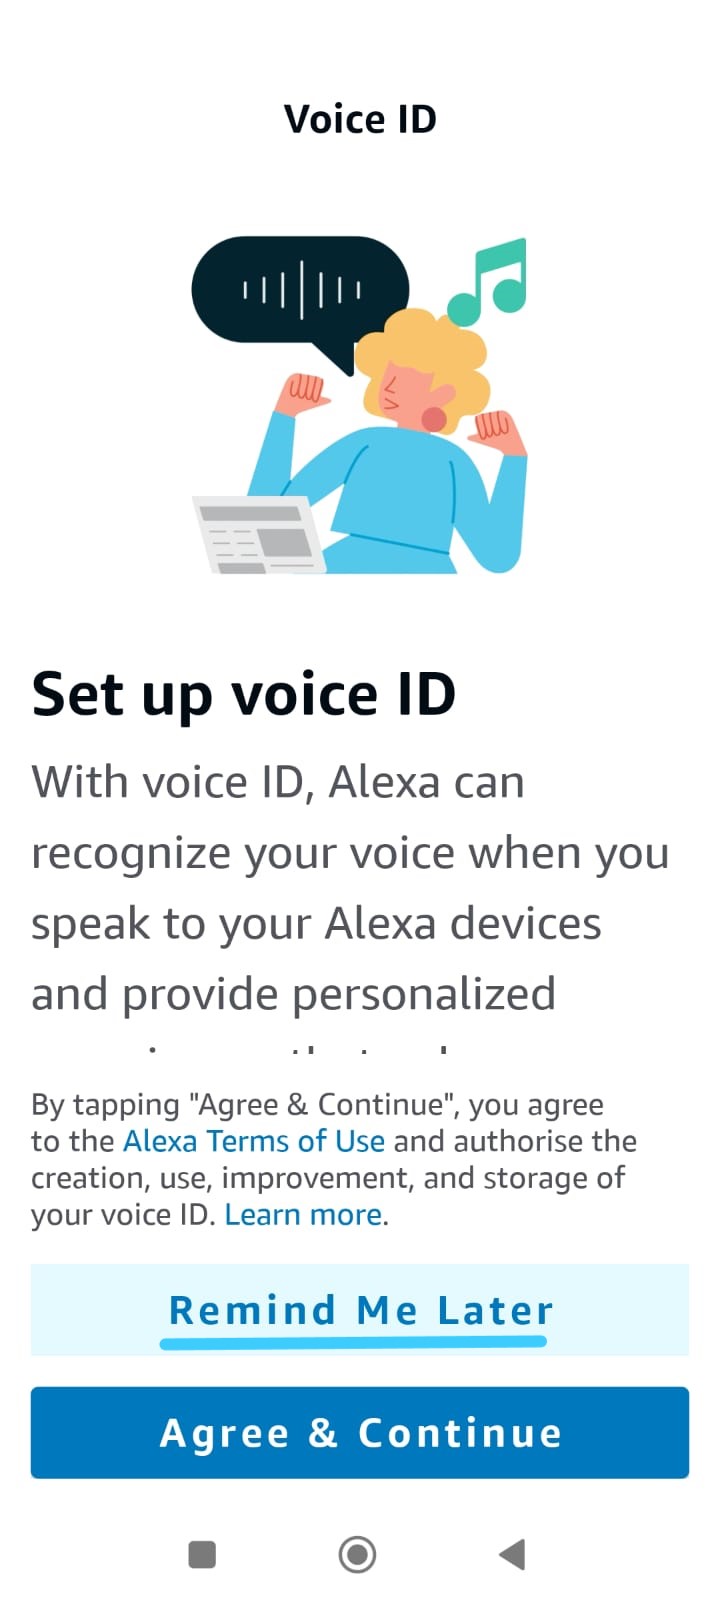
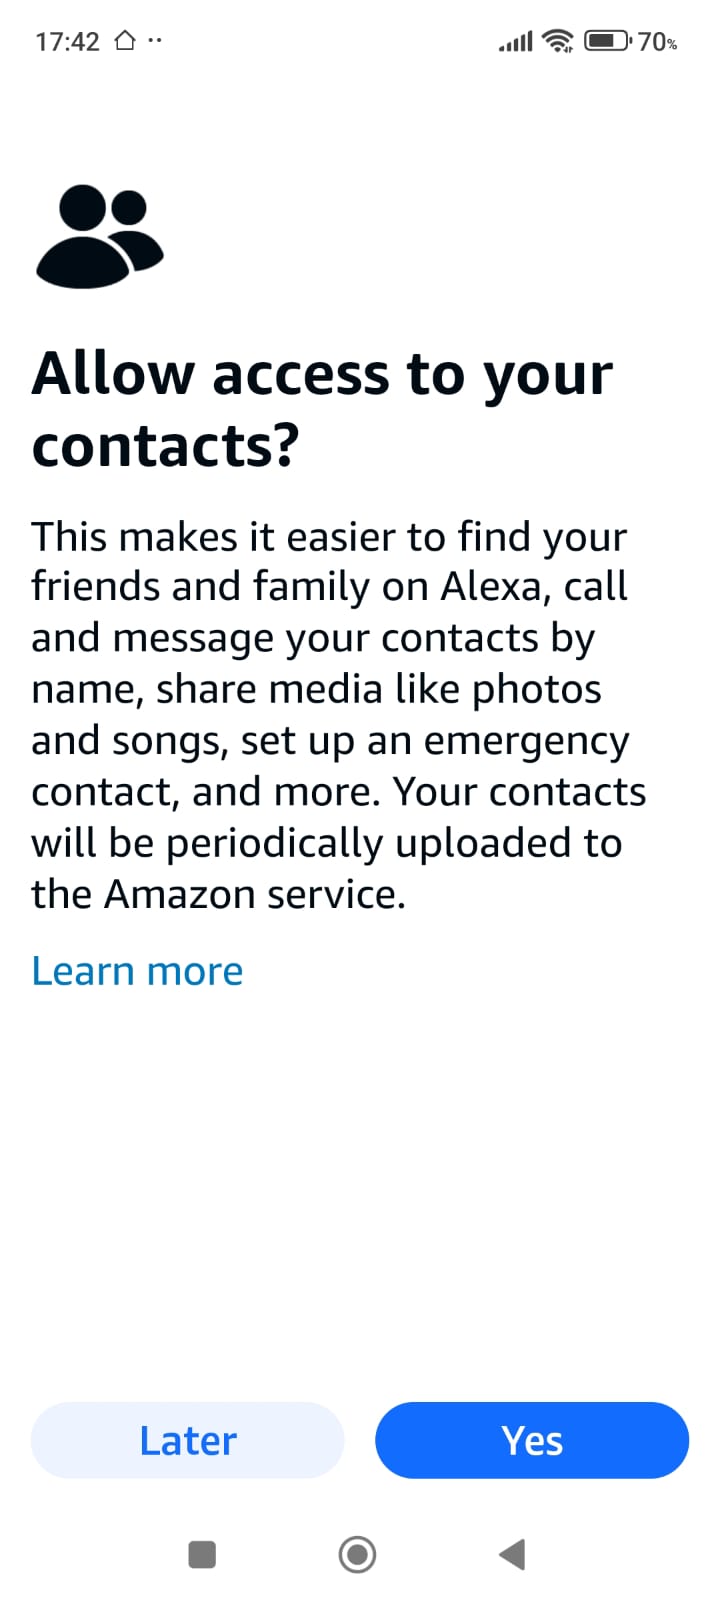
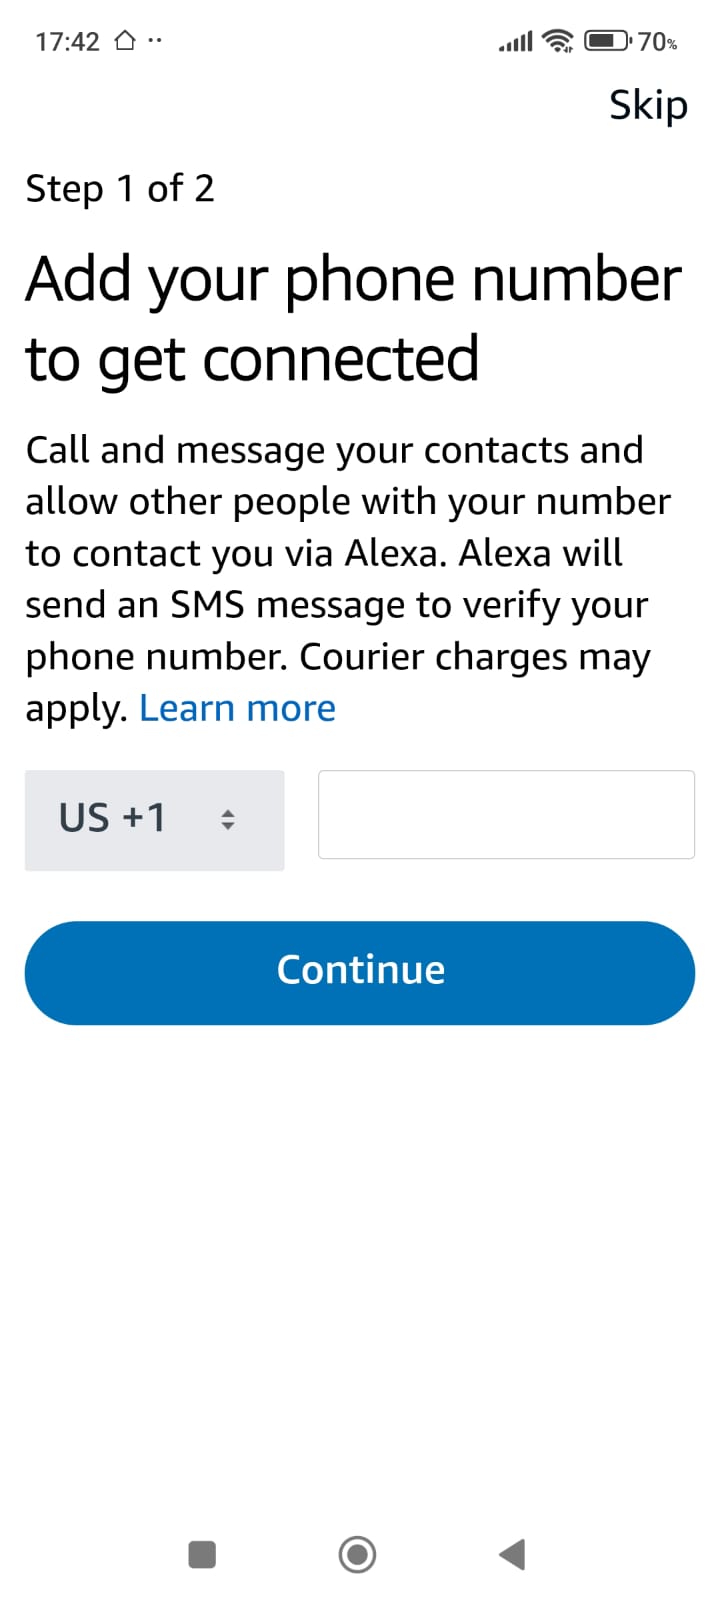
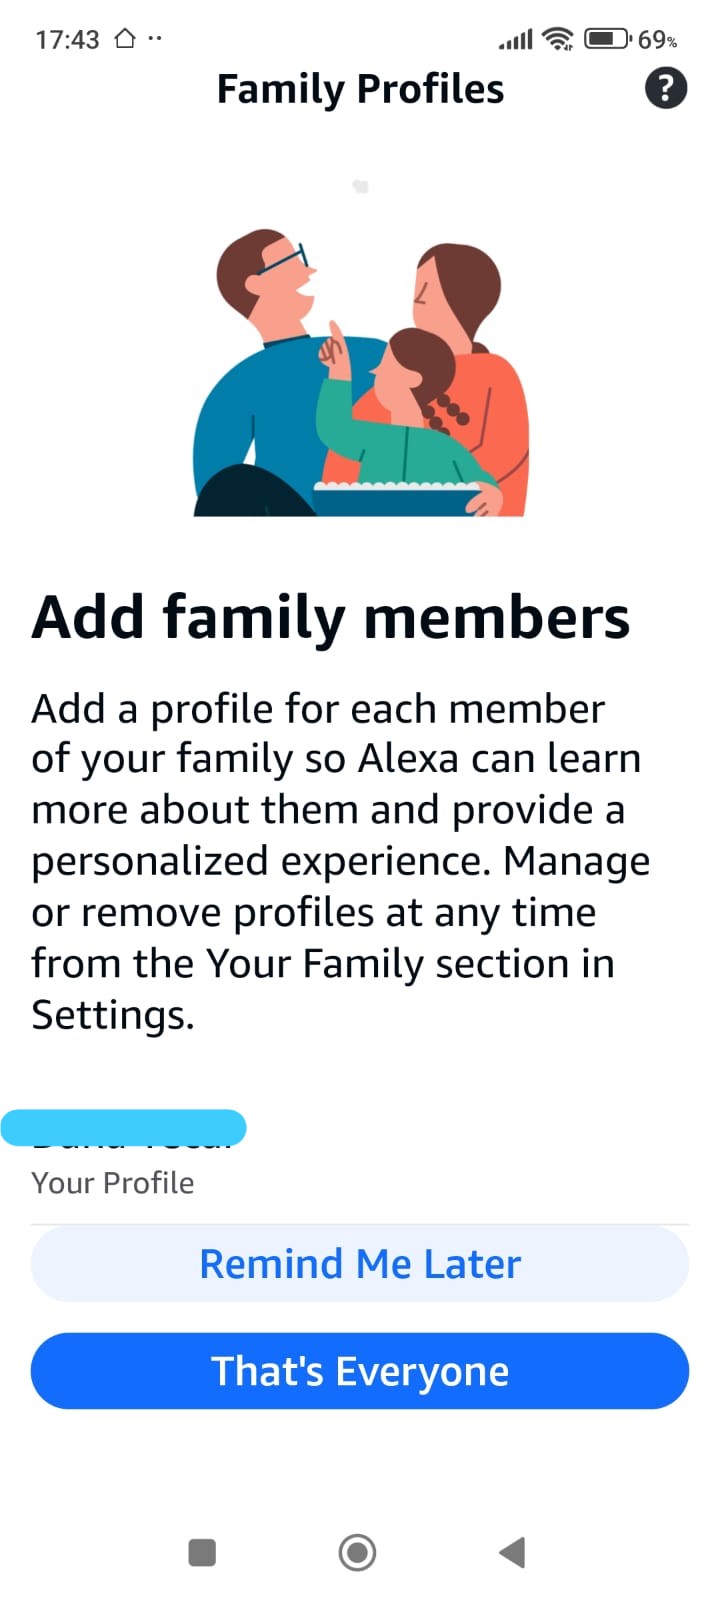
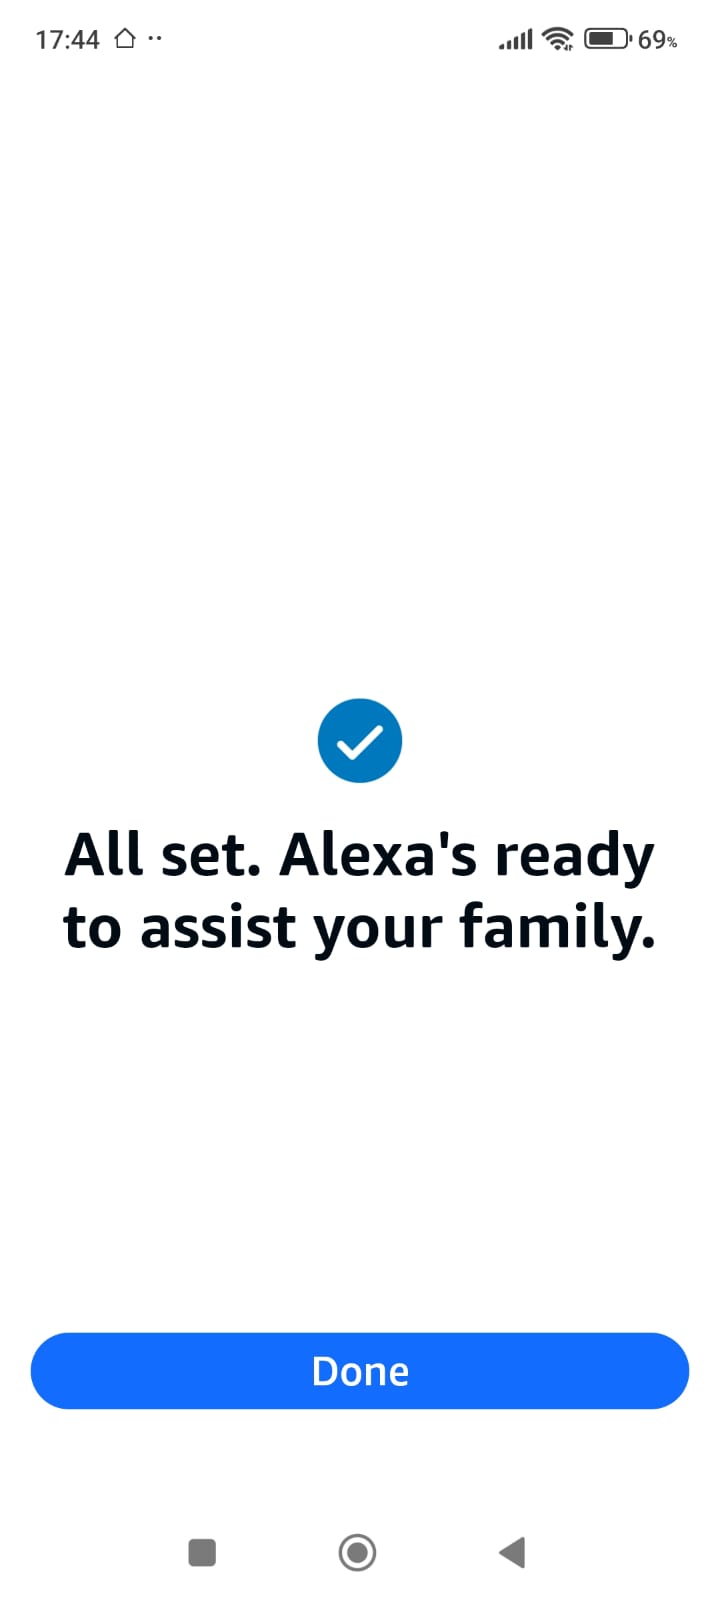
Phase 2.1 — Optional Alexa Personalization (Can Be Skipped)
During setup, Alexa may offer optional features such as
Voice ID, contacts access,
phone number, and family profiles.
These options are completely optional and
do not affect Smart Home Cinema in any way.
You can configure them now, skip them, or adjust them later
from the Alexa app settings.
Phase 2.1
Optional personalization screens
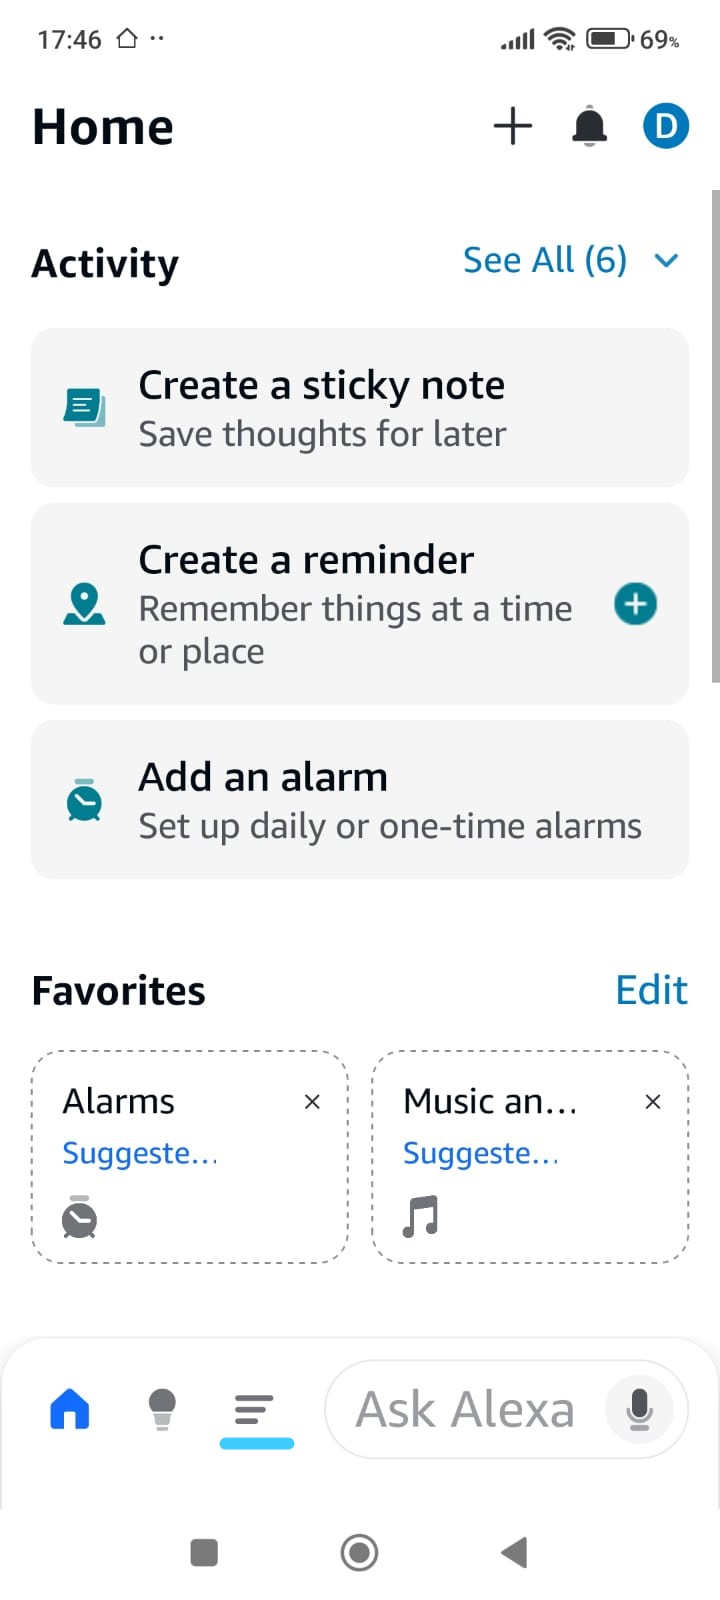
Phase 3.1 — Navigate to Alexa Skills (Account Linking Preparation)
In this step, you will begin the process of linking your Alexa account with your TRIGGERcmd account.
This connection is required so that Alexa can send voice commands to your computer and control Smart Home Cinema.
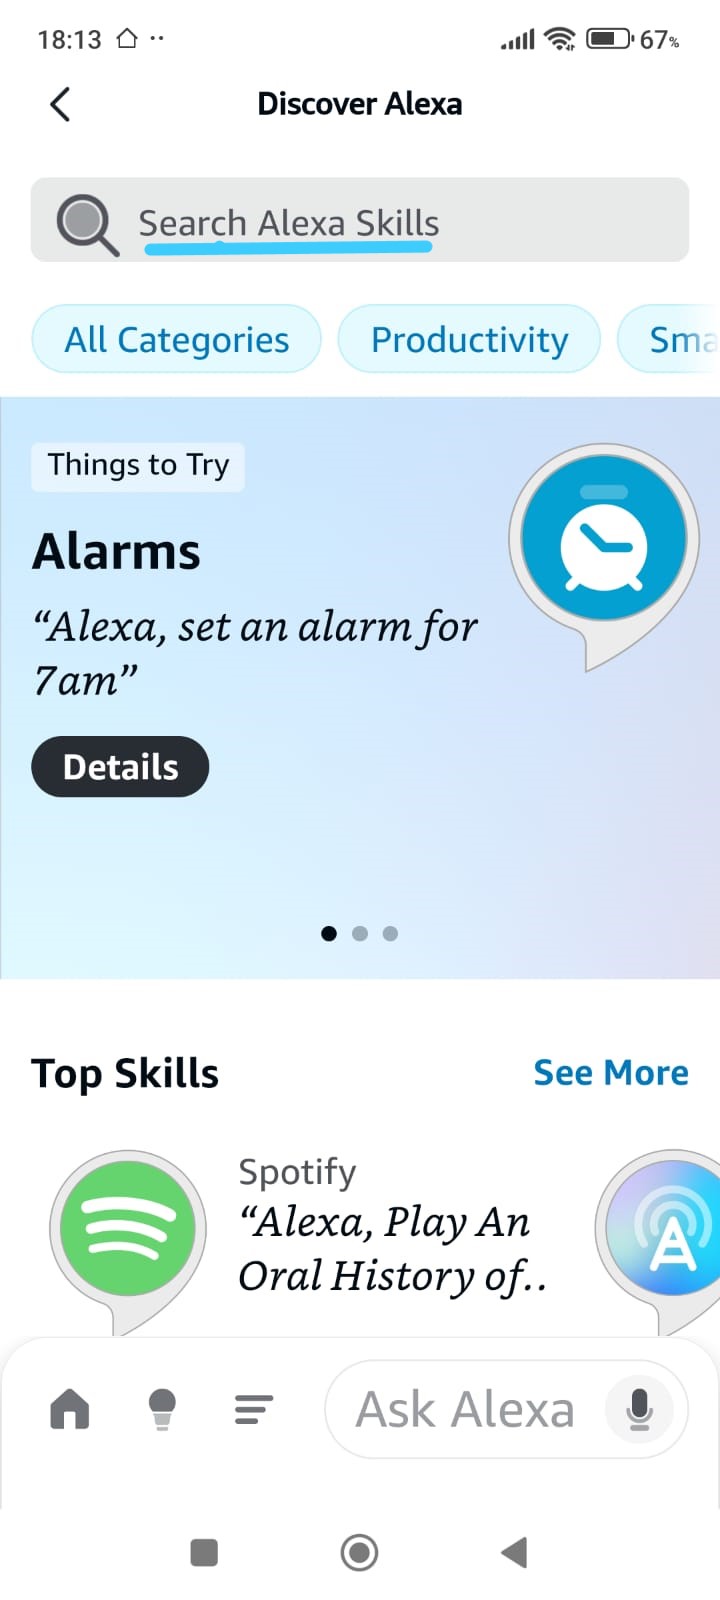
After completing the initial Alexa app setup, you will land on the Home screen.
From here, you need to navigate to the section where Alexa allows you to add extra functionality, called Skills.
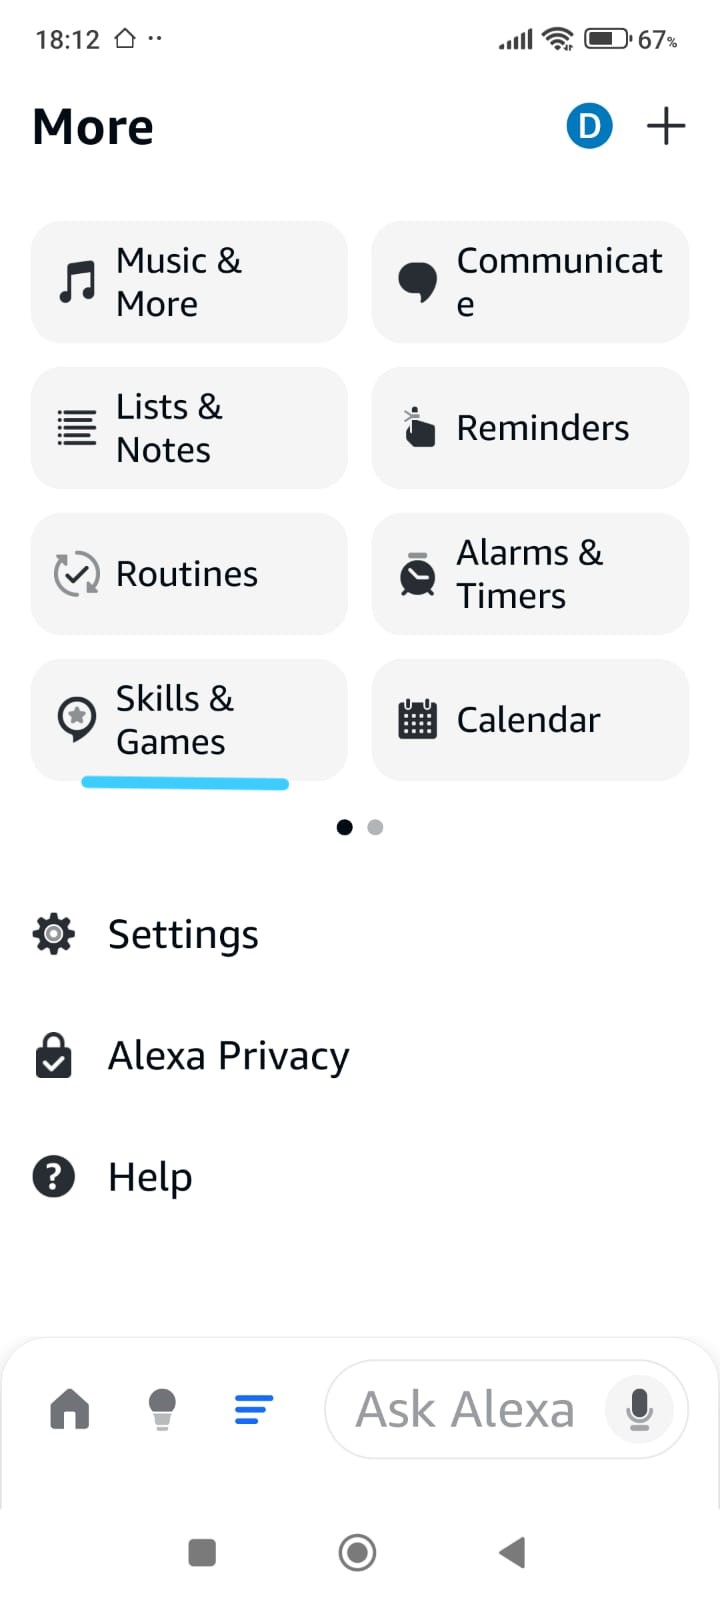
Follow these steps:
-
open the More menu in the Alexa app (this is the three-line icon at the bottom of the screen,
highlighted with a turquoise underline in the screenshot);
-
go to Skills & Games by following the same turquoise underline cues shown on the screen.
This will take you to the Discover Alexa section, where you can browse and search for new skills.
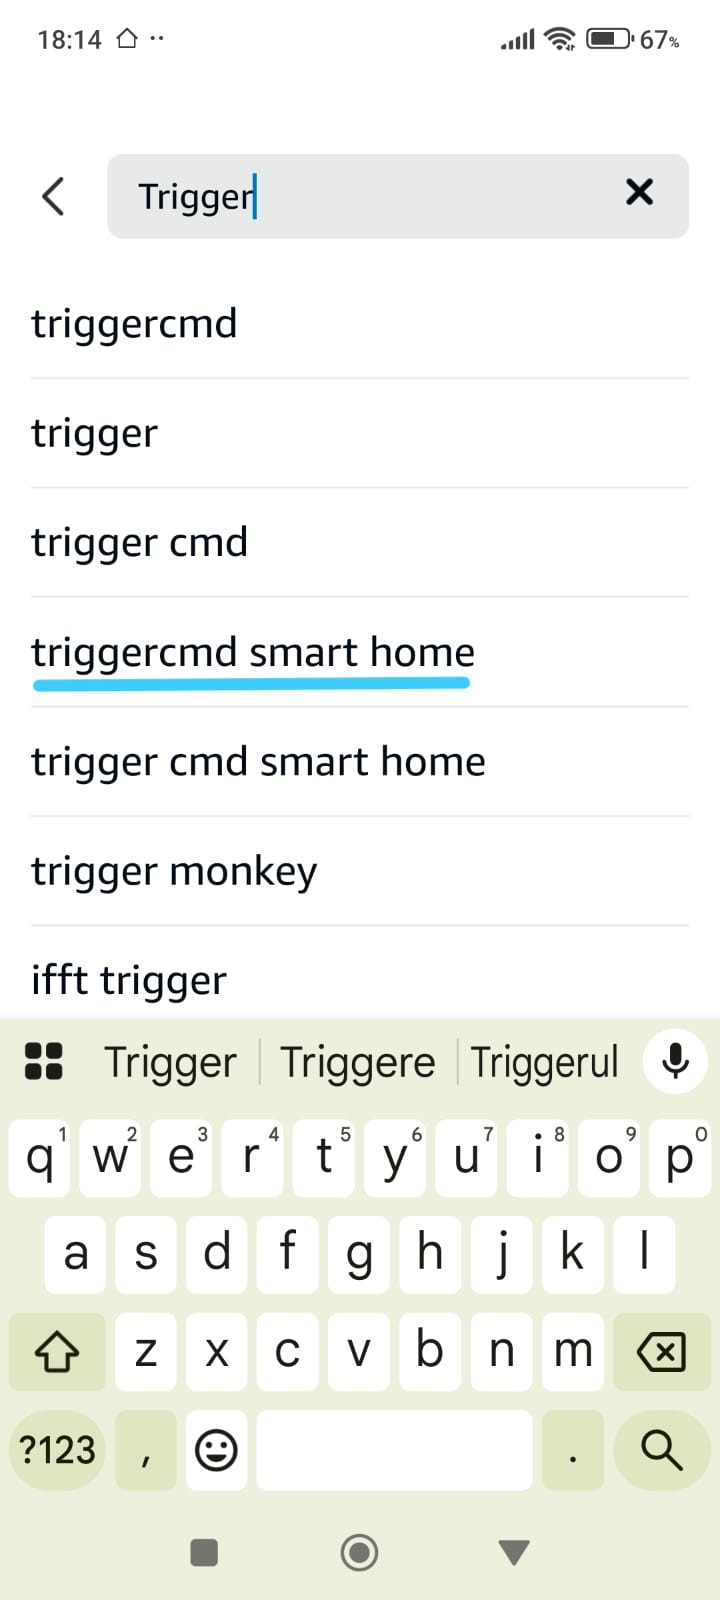
In the search bar at the top of the screen, type TRIGGERcmd.
When the search results appear, select TRIGGERcmd Smart Home, exactly as highlighted with the turquoise underline in the screenshot.
This is the skill used to connect Alexa with Smart Home Cinema.
Phase 3.1
Alexa → More → Skills & Games
Phase 3.2 — Enable the TRIGGERcmd Skill & Sign In
In this step, you will enable the TRIGGERcmd Smart Home skill and link it to your TRIGGERcmd account.
This step authorizes Alexa to communicate with TRIGGERcmd and send voice commands to your computer.
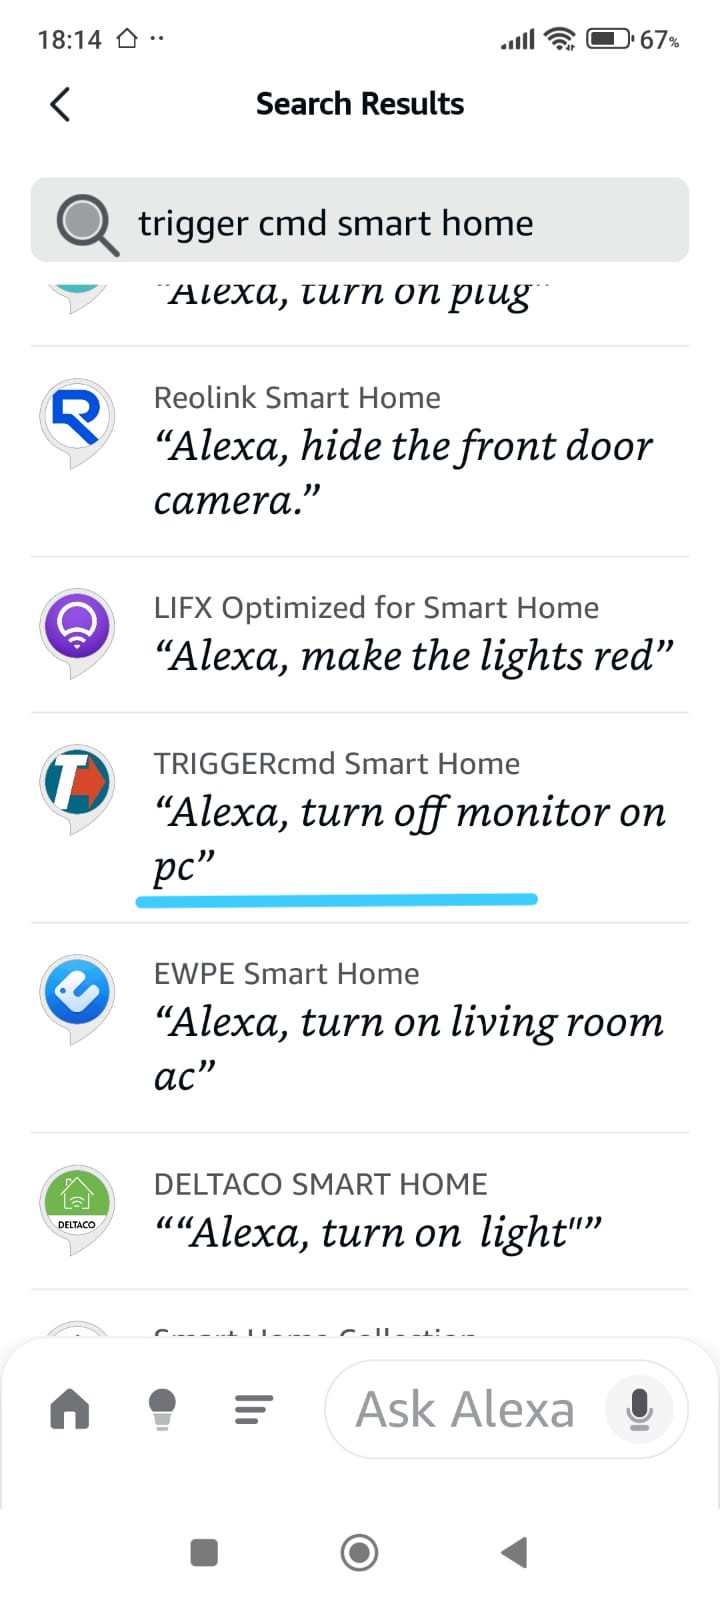
After searching for TRIGGERcmd, the Alexa app will display a list of results.
From this list, select TRIGGERcmd Smart Home, exactly as highlighted with the turquoise underline in the screenshot.
This ensures you are opening the correct skill.
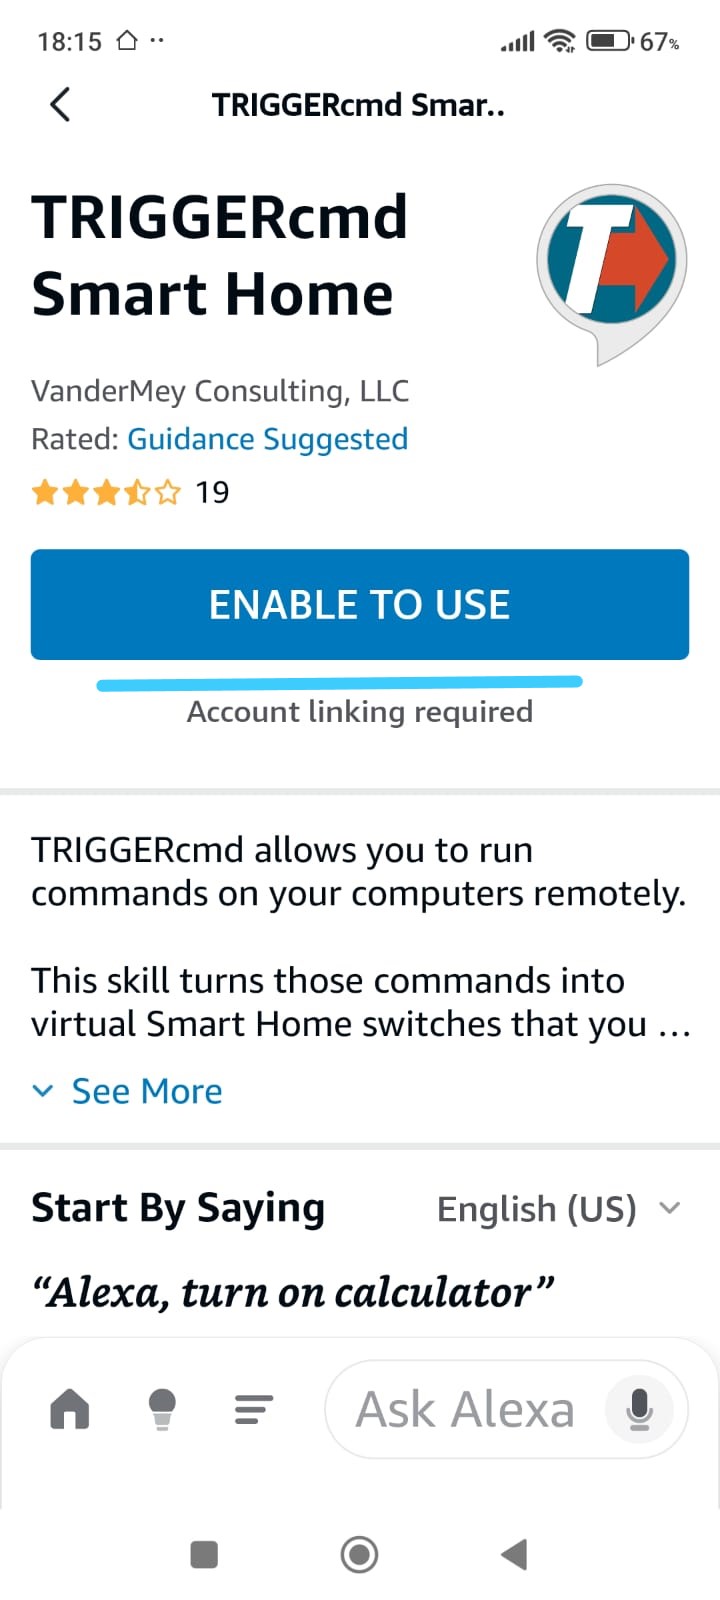
Once the skill page opens, tap Enable to Use.
This button is also highlighted with a turquoise underline to clearly indicate where to tap.
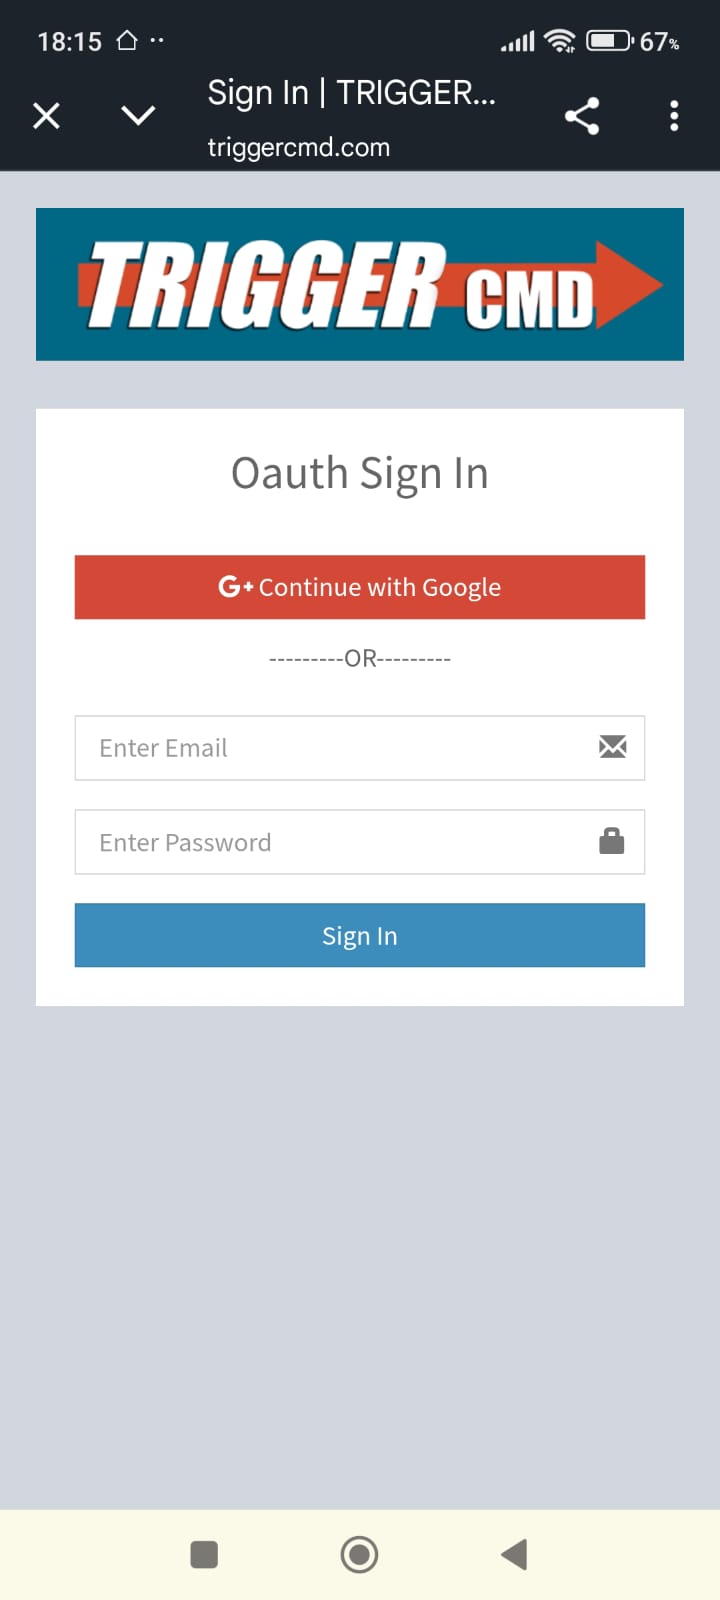
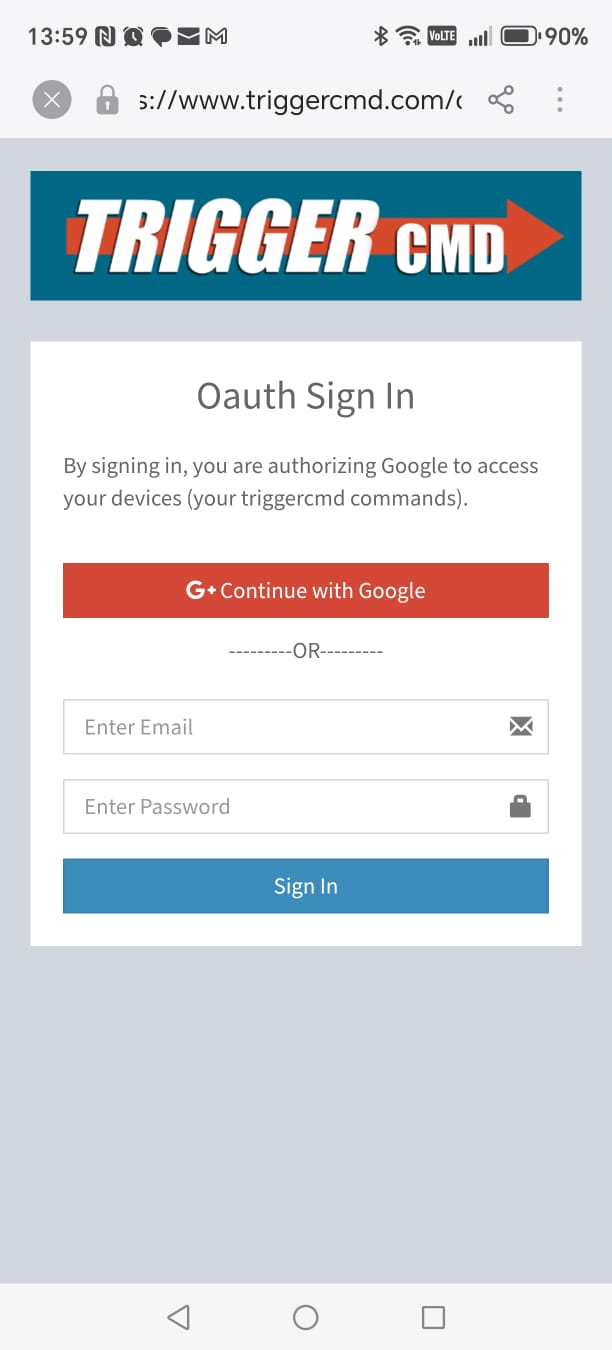
After enabling the skill, you will be redirected to the TRIGGERcmd sign-in page.
Here, log in using your TRIGGERcmd account credentials.
You may sign in using your email and password, or another available sign-in method, depending on your account.
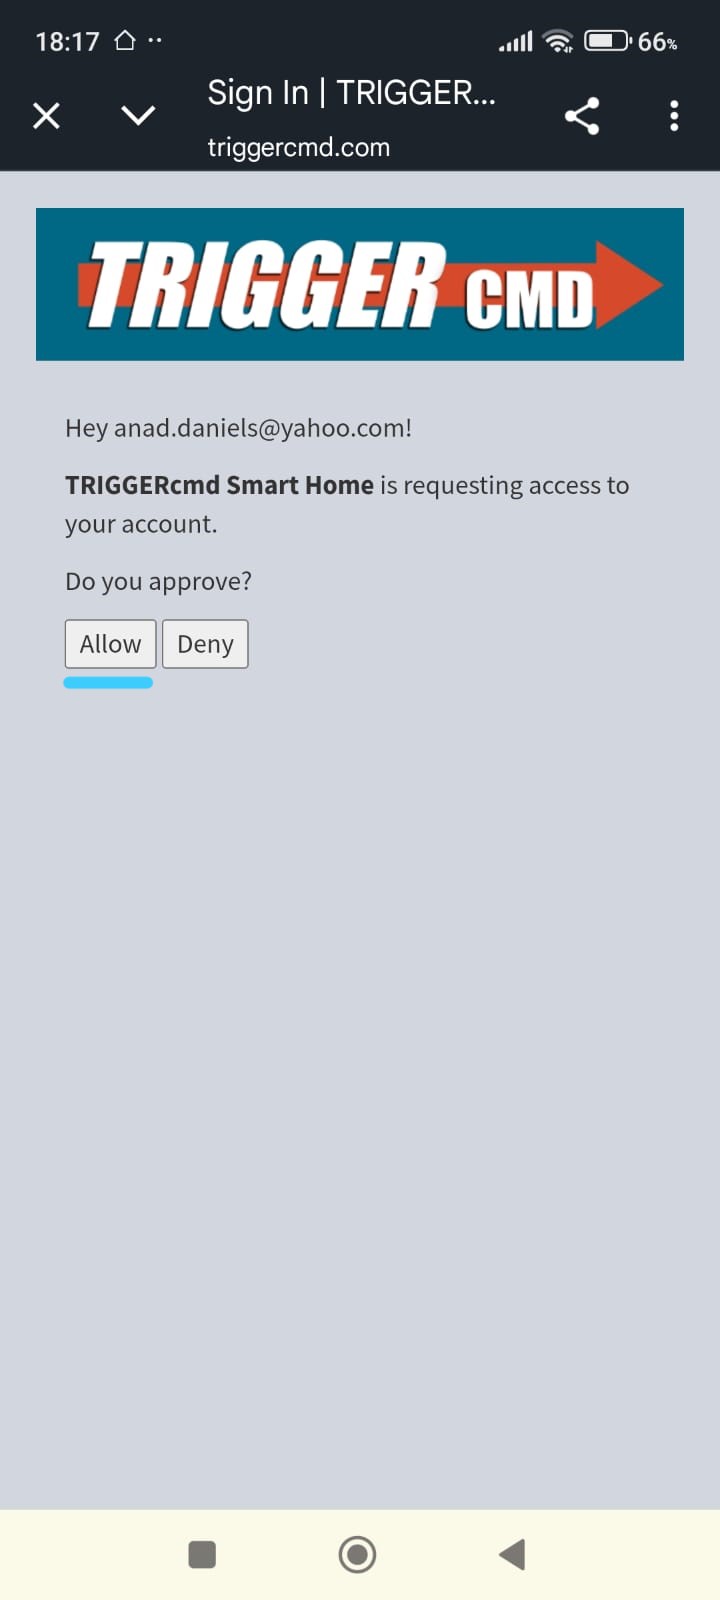
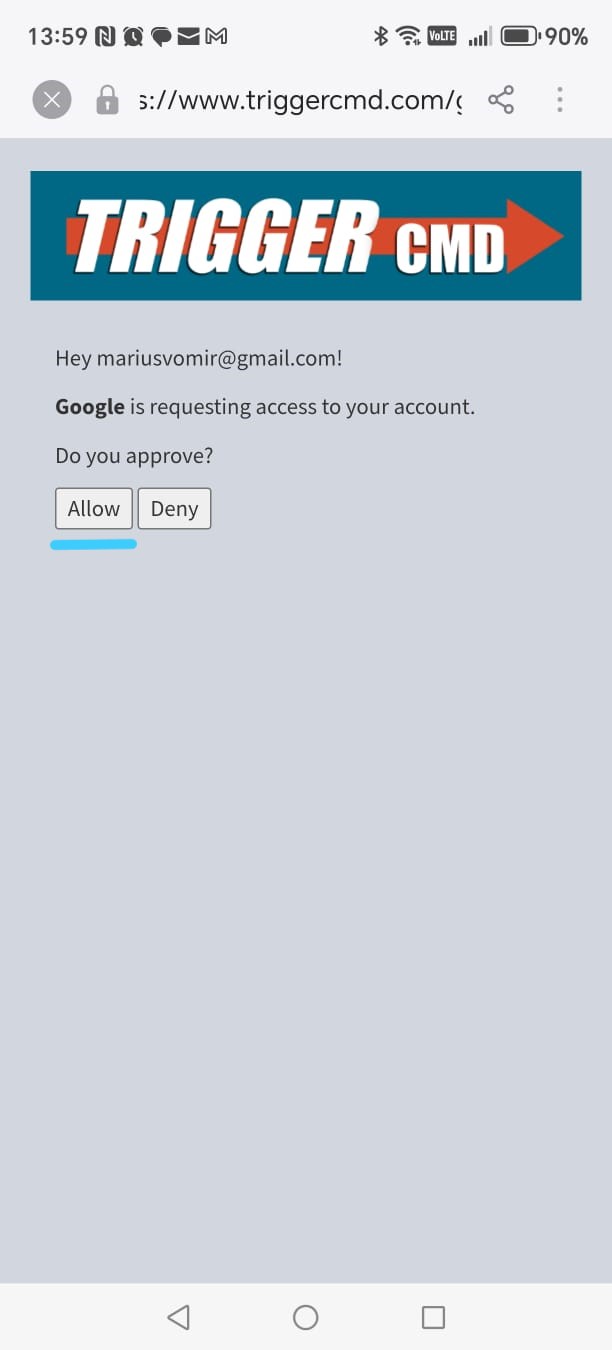
After signing in, TRIGGERcmd will ask for permission to access your account.
Tap Allow, following the turquoise underline shown in the screenshot, to approve the connection.
This step completes the authorization process between Alexa and TRIGGERcmd.
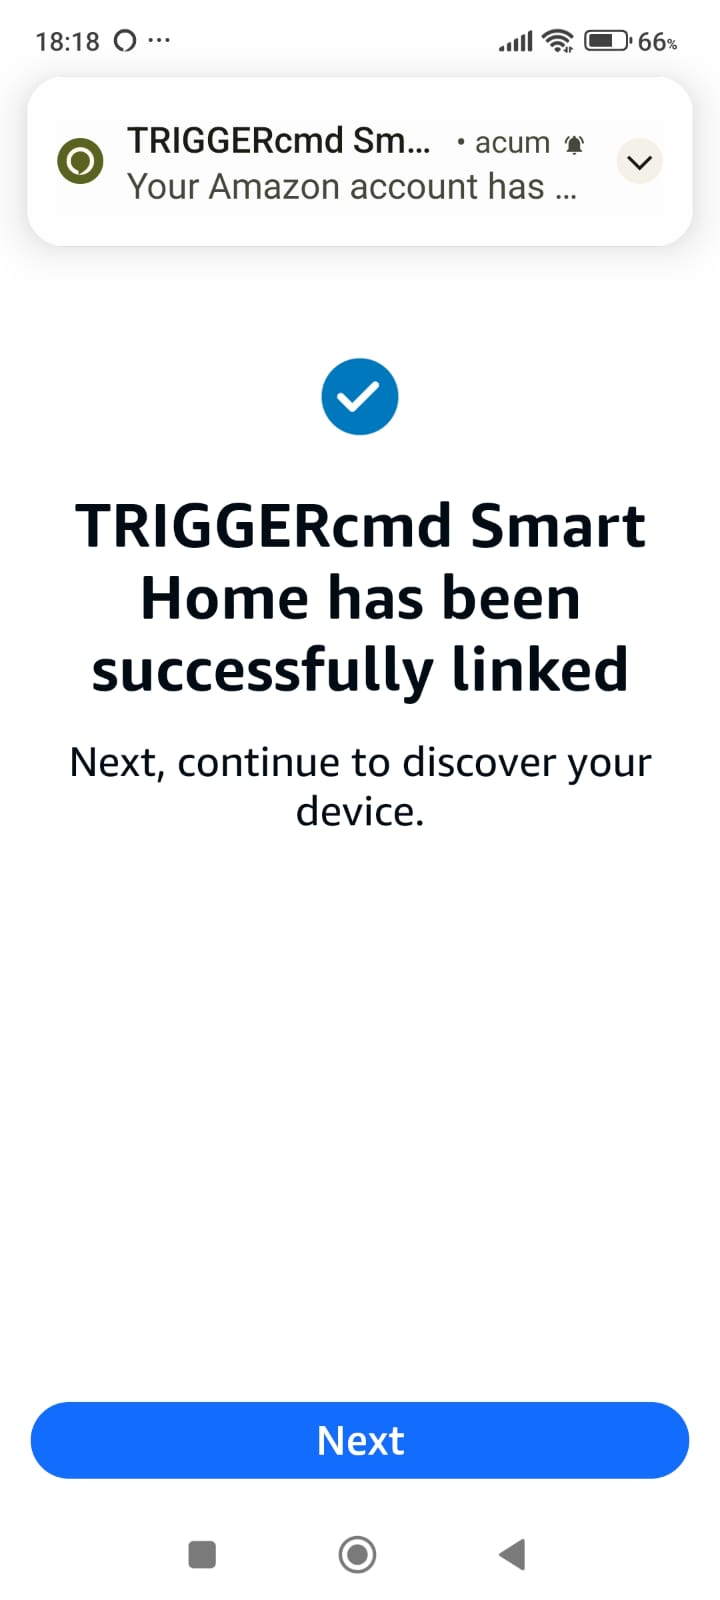
To finish this step, tap Next on the confirmation screen shown above.
This will complete the skill linking process and return you to the Alexa app.
Phase 3.2
Enable TRIGGERcmd Smart Home + Sign In + Allow Access
Phase 3.3 — Device Discovery & Final Confirmation
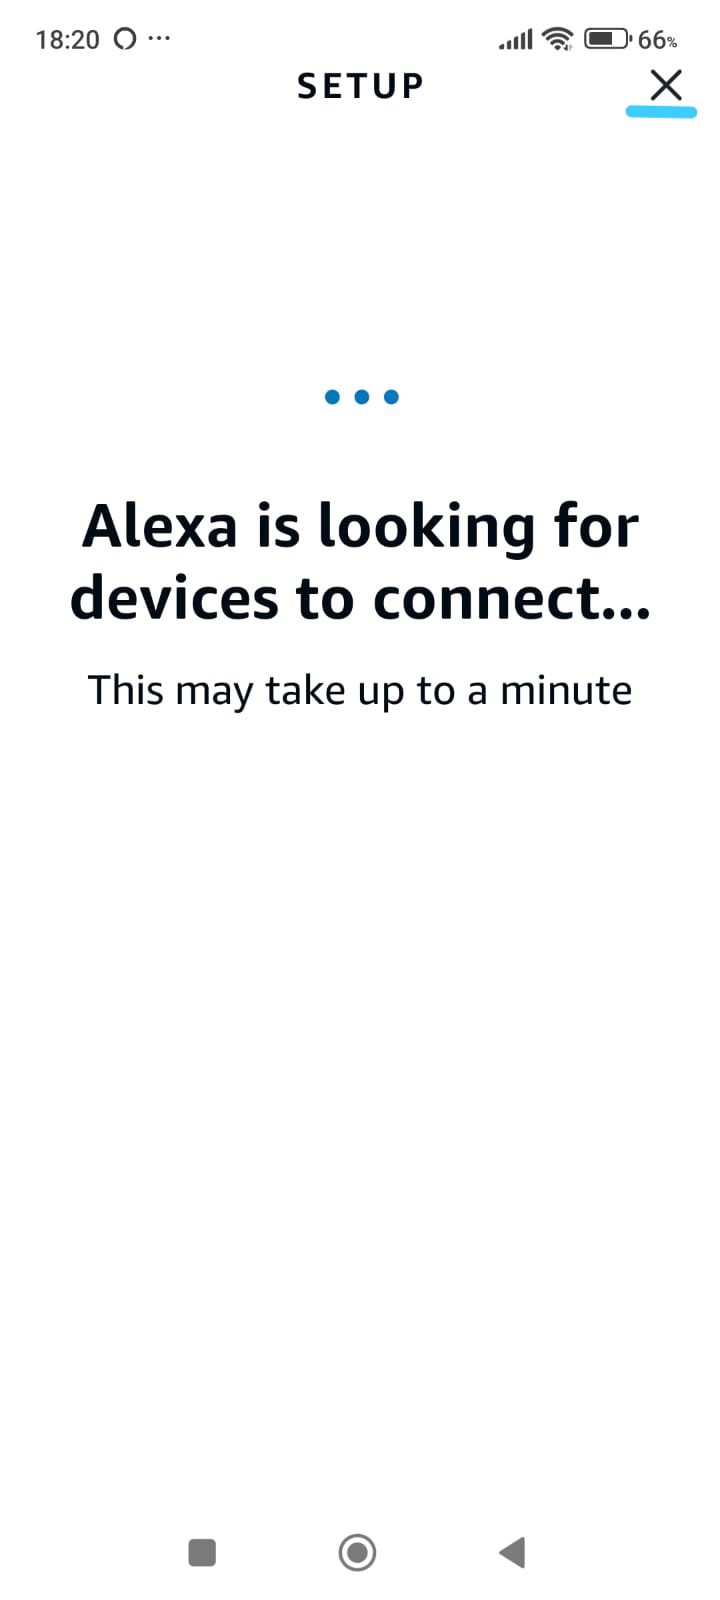
After completing the TRIGGERcmd account authorization, Alexa will automatically proceed to the device discovery step.
During this process, Alexa searches for the virtual smart home devices created by TRIGGERcmd.
While device discovery is in progress, you will see a screen indicating that Alexa is looking for devices.
This process may take up to one minute and requires no action from you.
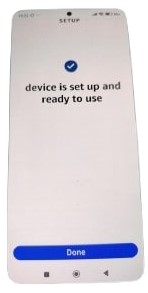
Once discovery is complete, Alexa will confirm that the device setup is finished and ready to use.
Tap Done to finalize the setup process.
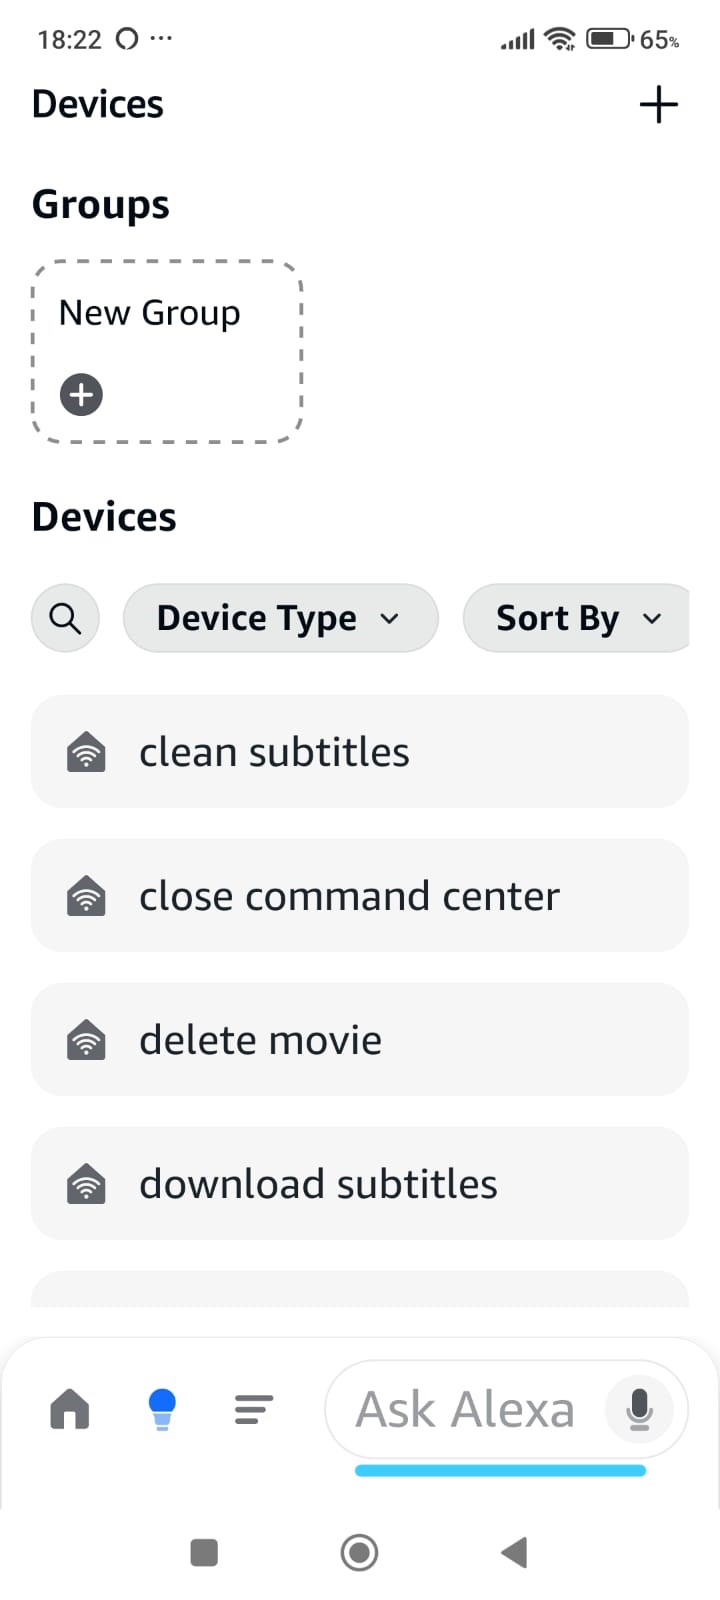
After tapping Done, you will be taken to the Alexa Devices section.
Here, you should see multiple new smart home devices created by TRIGGERcmd, each representing a Smart Home Cinema command
(for example: download subtitles, delete movie, clean subtitles).
The presence of these devices confirms that TRIGGERcmd is successfully connected to Alexa
and that Smart Home Cinema voice commands are now available.
This completes the Alexa–TRIGGERcmd integration.
You can now proceed to using voice commands or creating Alexa routines.
To send a voice command to TRIGGERcmd, tap the microphone button located in the bottom-right corner of the Alexa app.
This area is highlighted with a turquoise underline in the screenshot, making it easy to identify.
After tapping the microphone, simply speak your command.
Alternatively, if the Alexa app is already open and voice activation is enabled on your phone,
you can simply say “Alexa” without tapping the microphone.
When no Alexa routines are used, voice commands must follow the default smart home format.
For example:
“Alexa, turn on Play Movie”
This is the required command format before creating any Alexa routines.
Shorter commands without “turn on” can be used later by creating Alexa routines.
Phase 3.3
Device Discovery + Setup Complete + Devices List
Phase 3.4 — Alexa Routines (Short Voice Commands)
In the previous steps, you learned how to control Smart Home Cinema using the default voice command format:
“Alexa, turn on Play Movie”
Alexa routines allow you to use shorter and more natural voice commands,
such as “Alexa, Play Movie”,
by translating your phrase into a Smart Home action.
In this phase, you will create a simple Alexa routine from scratch.
This routine will let you say a shorter command while Alexa still sends the correct TRIGGERcmd action to your PC.
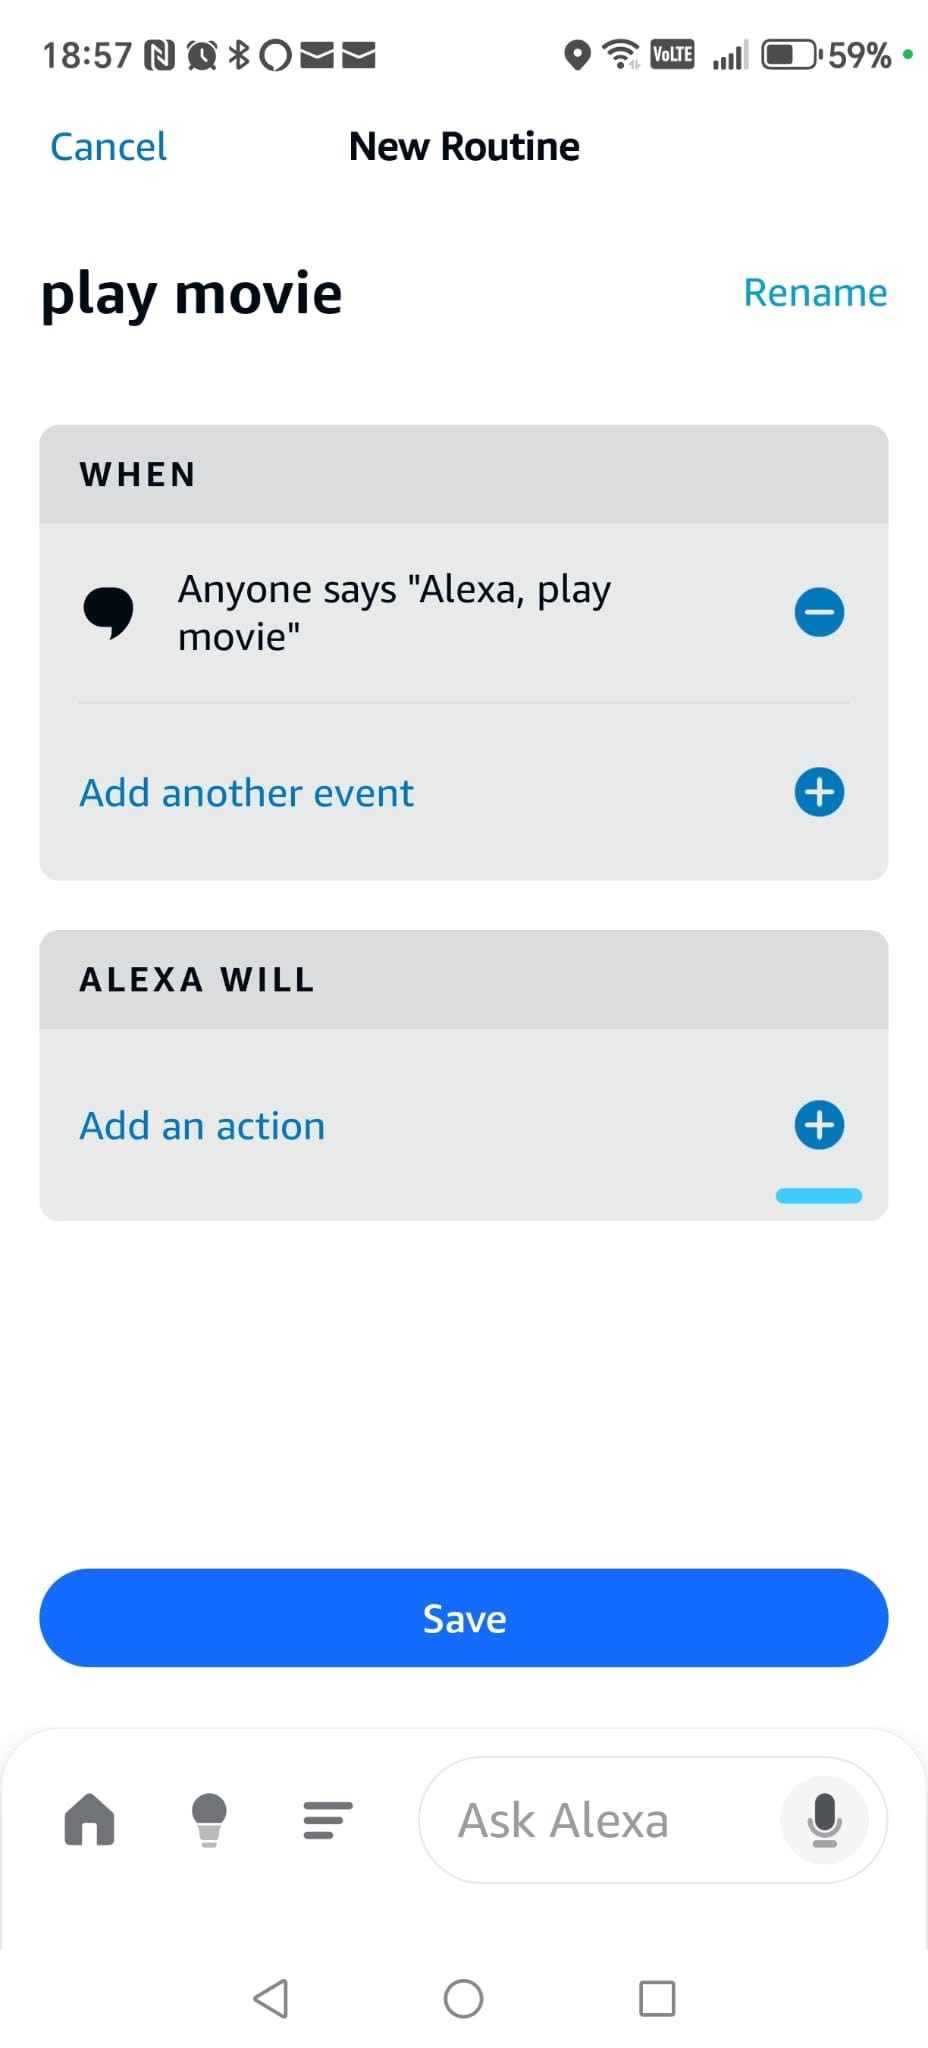
Step 1 — Create a new routine
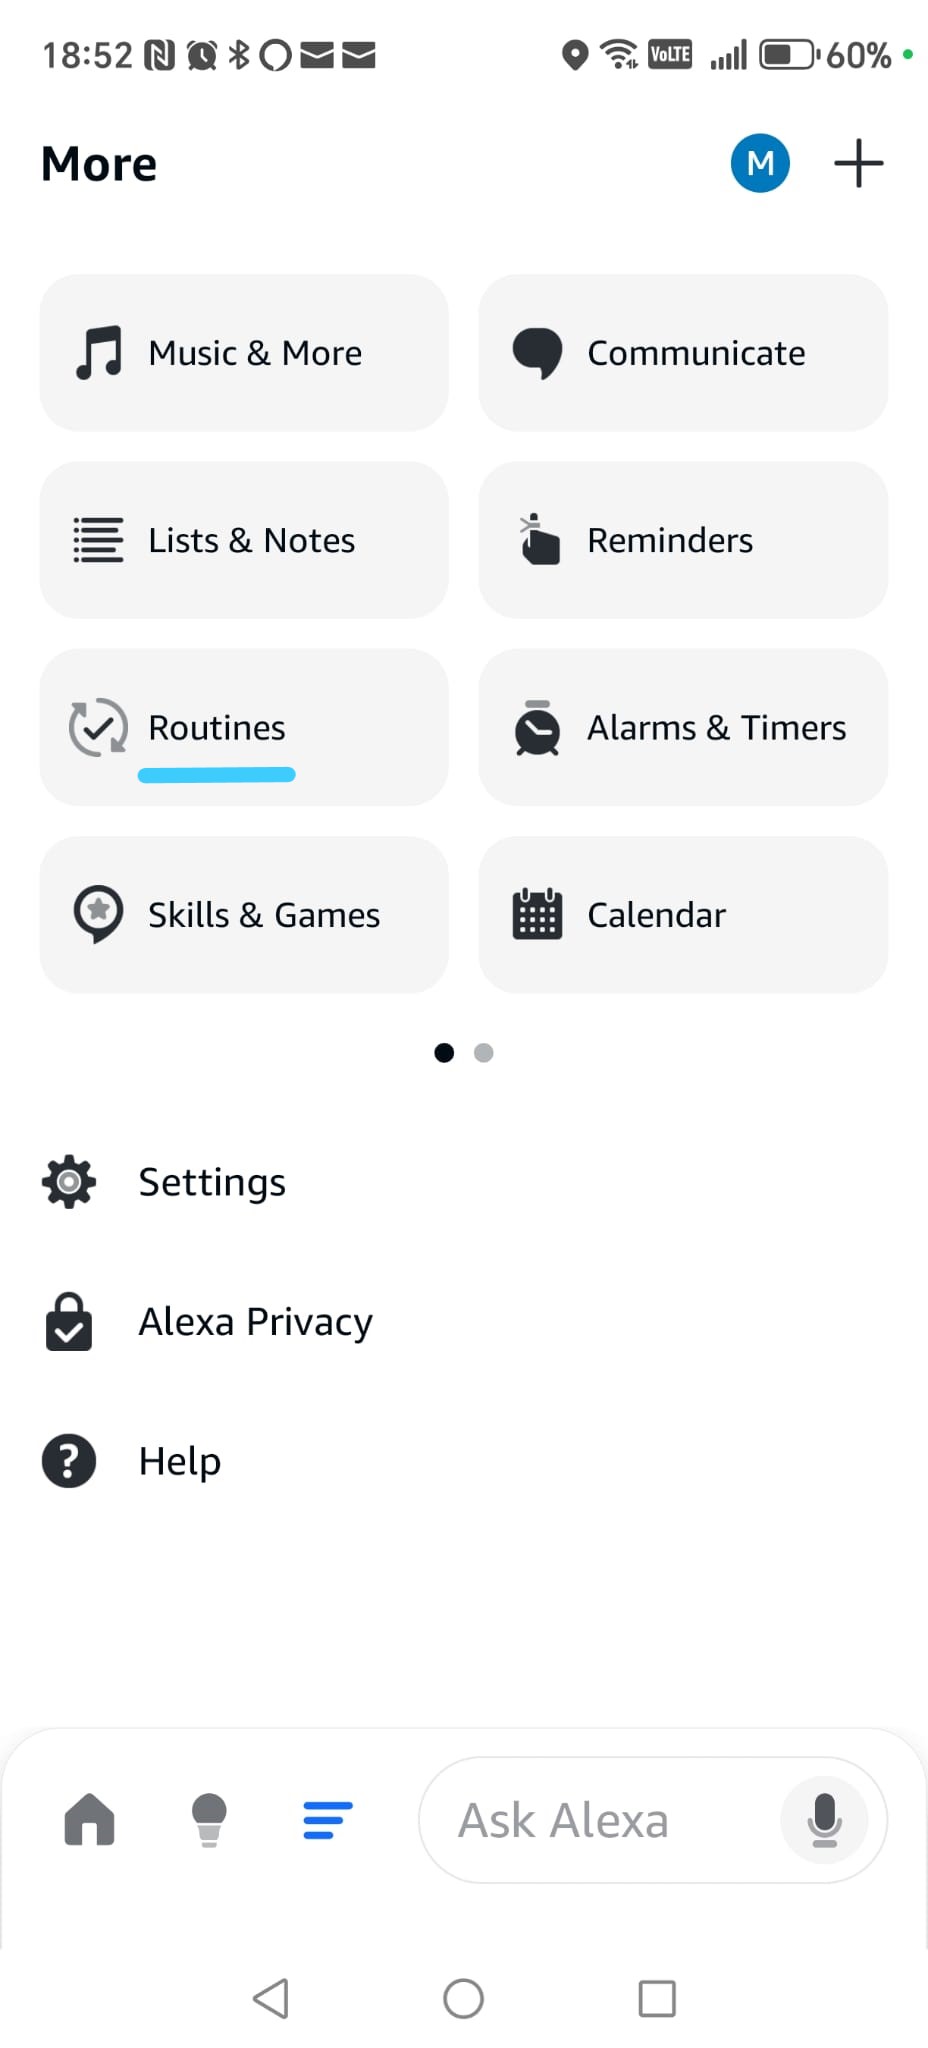
Open the Alexa app and make sure you are on the main screen.
Then open the menu and select Routines.
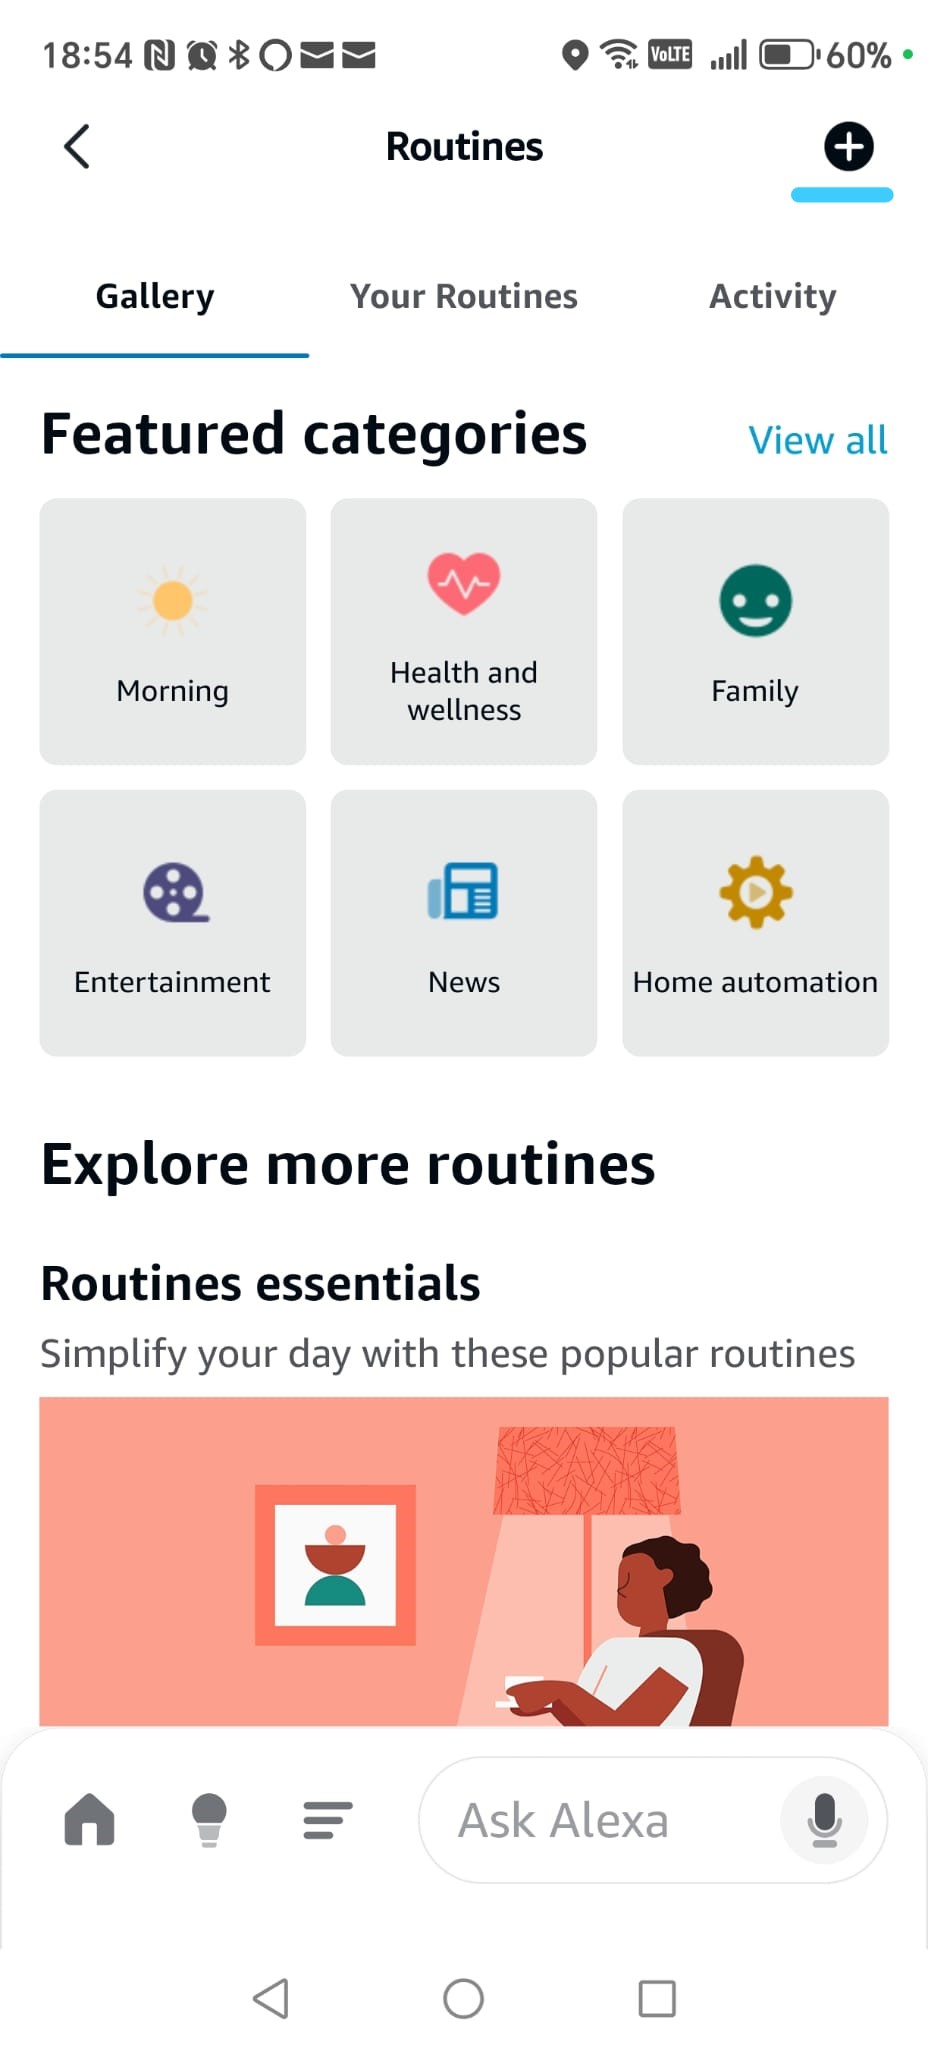
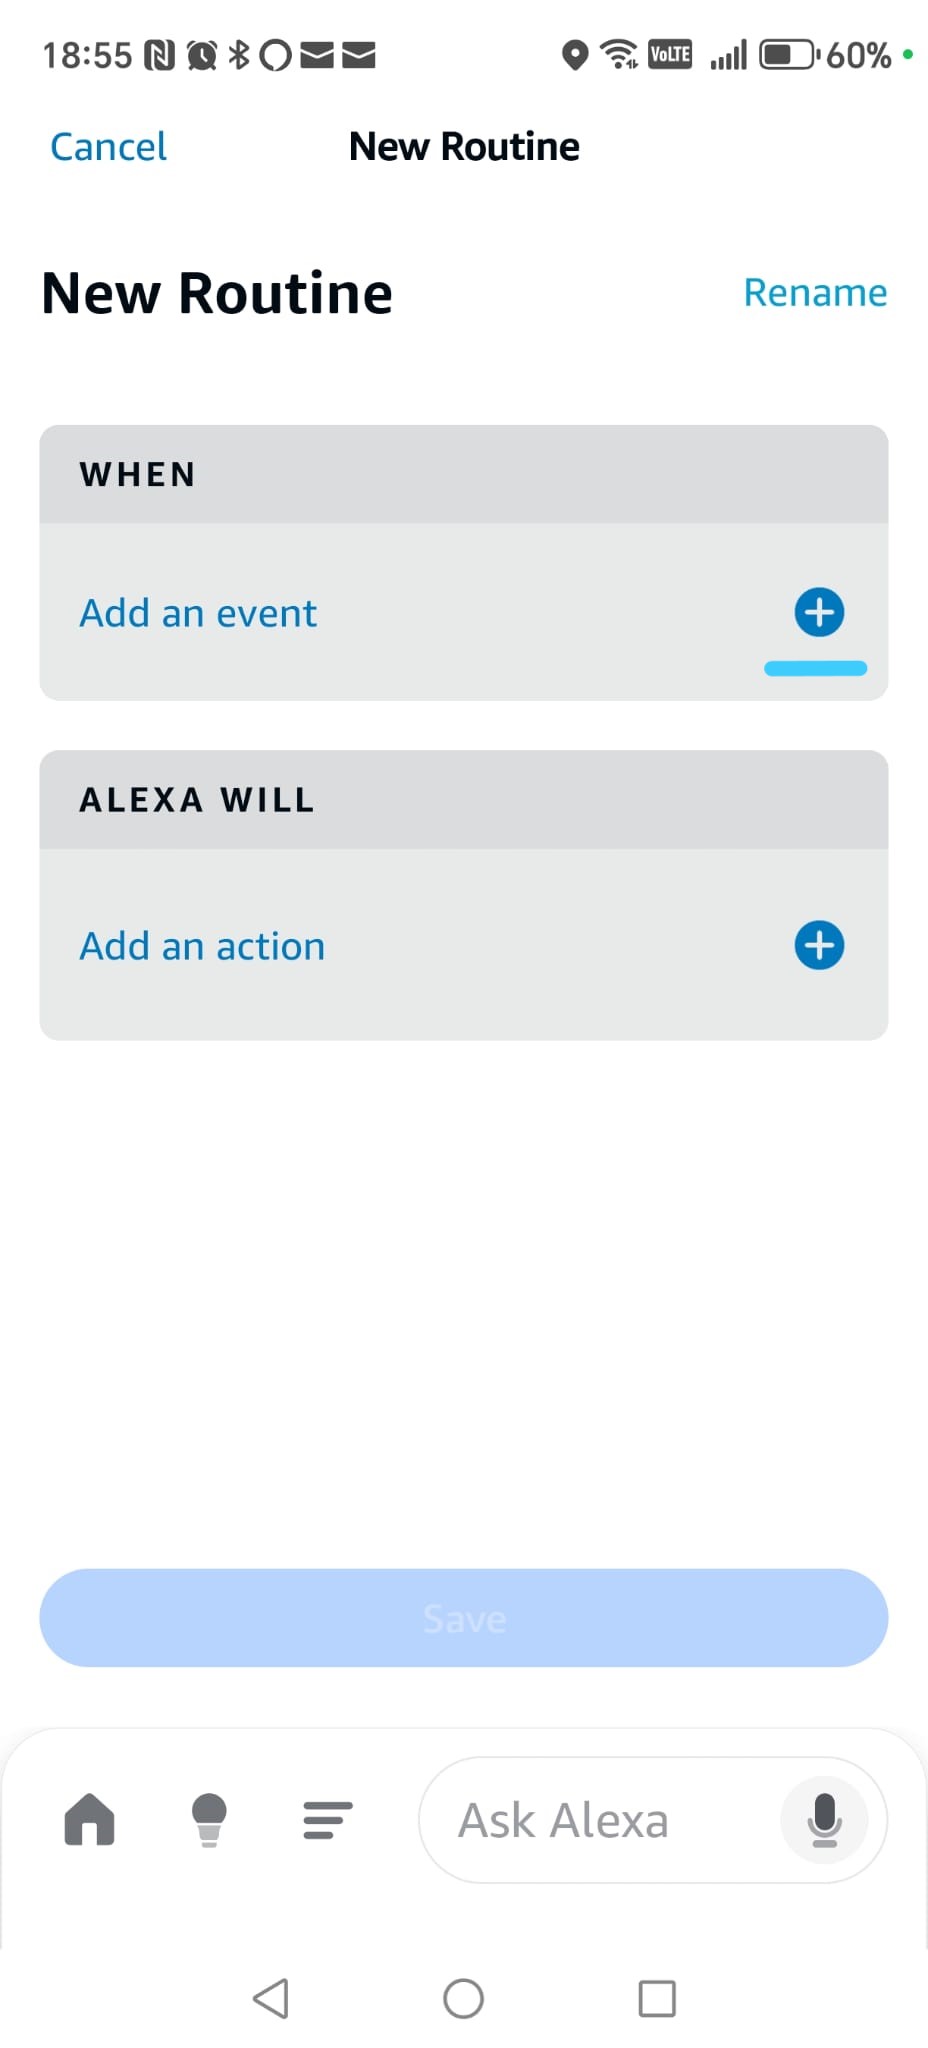
Next, tap the + button in the top-right corner to create a new routine.
You will now see the New Routine screen,
where we will configure the trigger and the action.
Step 2 — Define the voice trigger
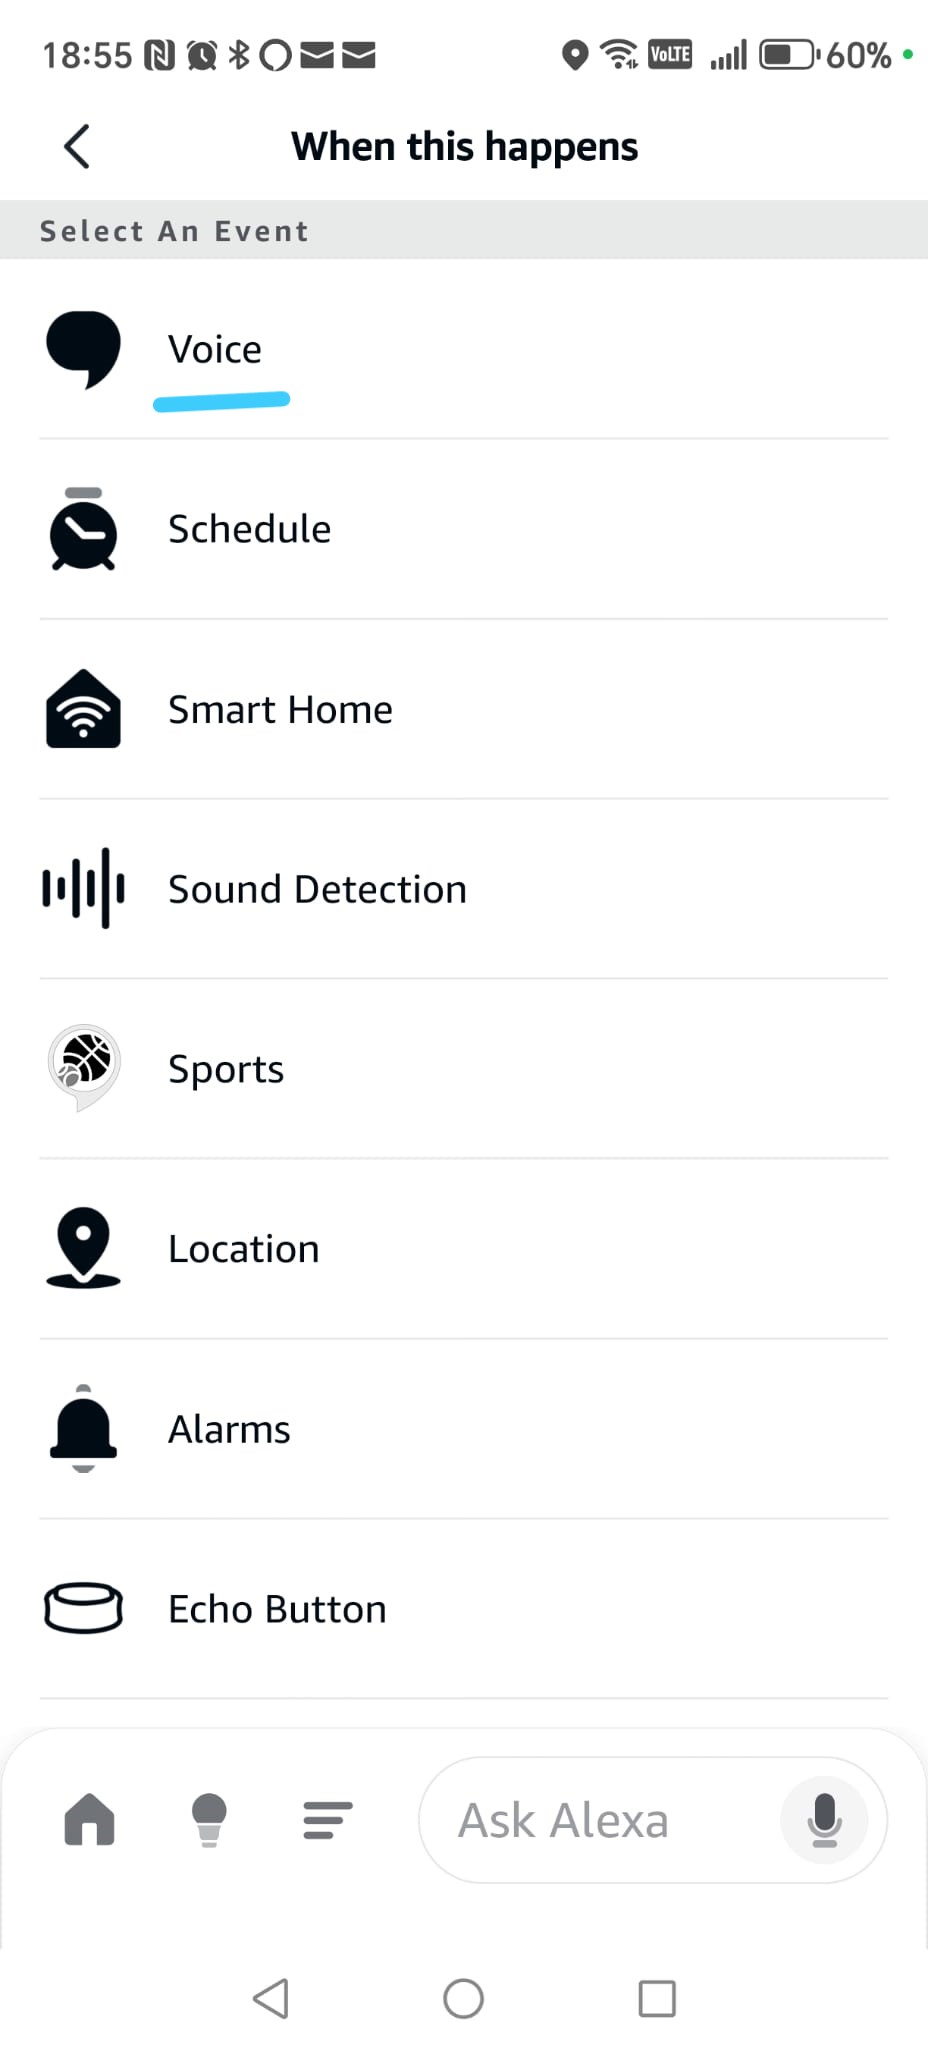
Tap When this happens, then tap the + button.
From the list, select Voice.
In the next step, you will choose the phrase that will activate this routine.
Phase 3.4
Create a new routine + select Voice trigger
Phase 3.4 — Create an Alexa Routine for “Play Movie” (Voice Trigger & Action)
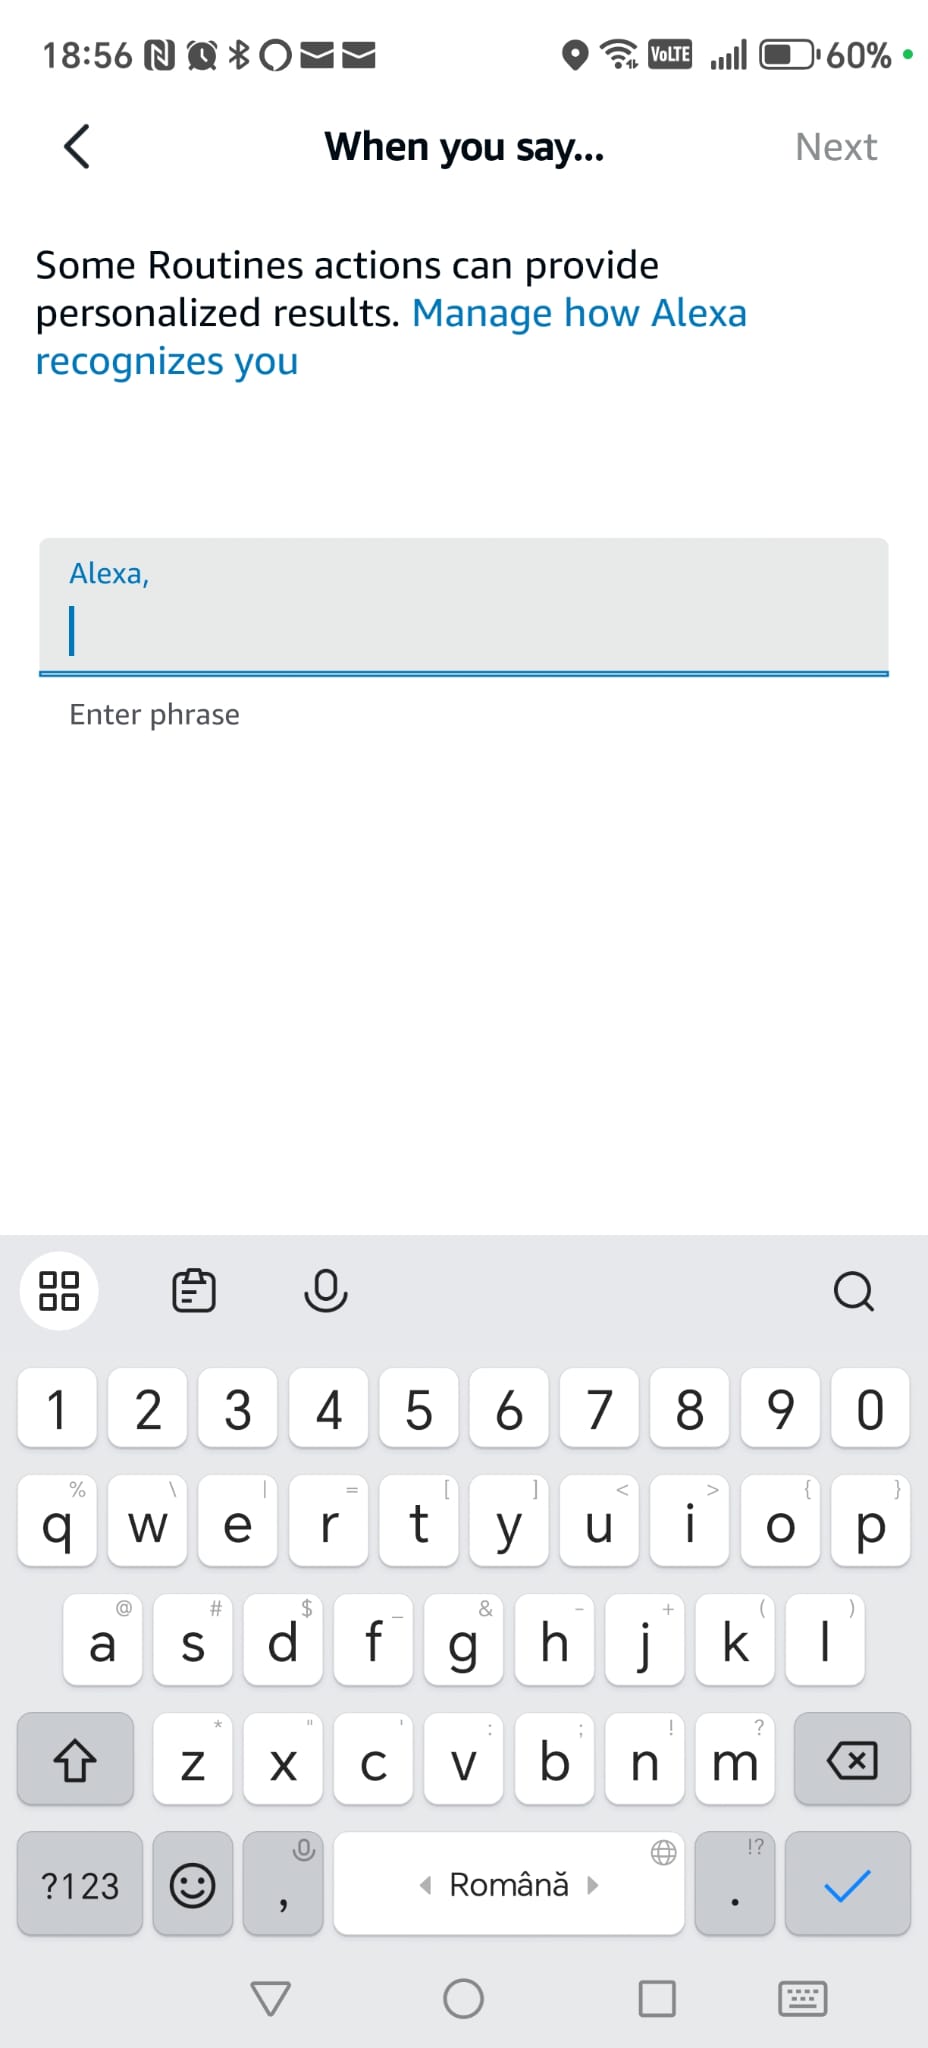
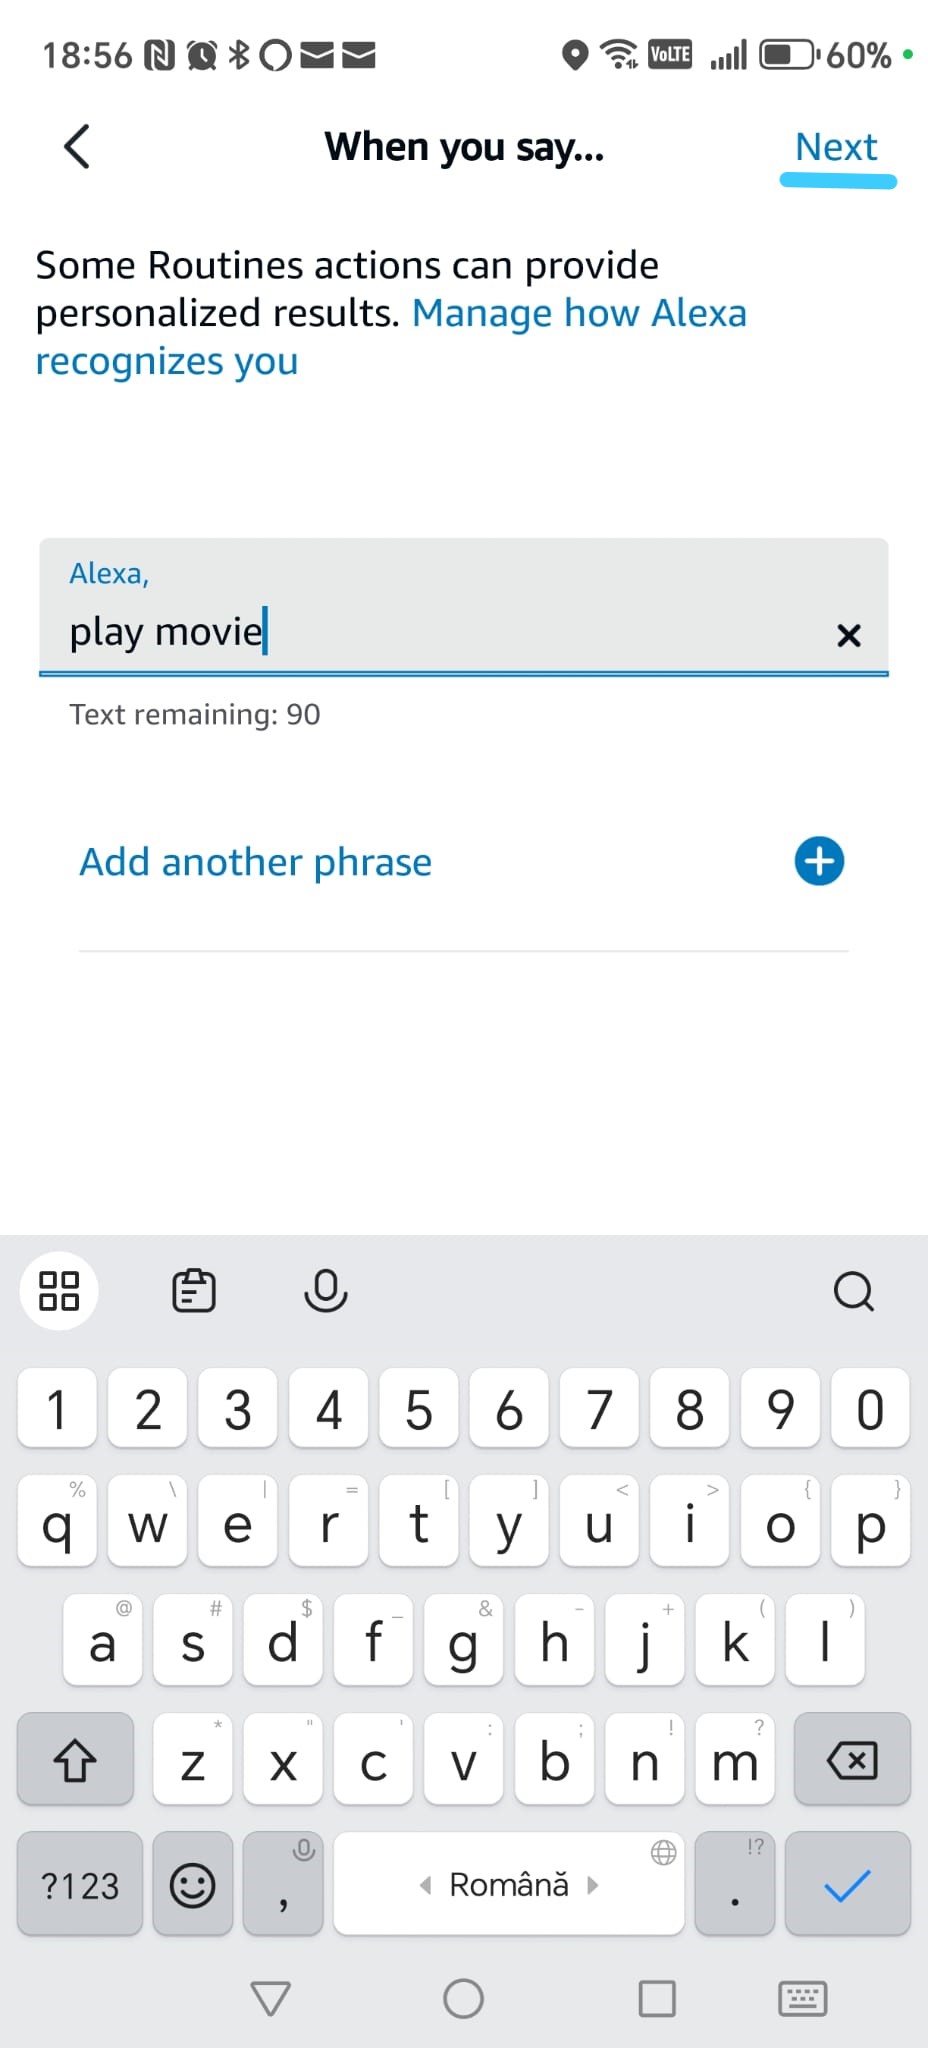
Step 3 — Define the voice trigger (continued)
Enter the phrase you want to say, for example:
Play Movie.
Tap Next in the top-right corner.
This phrase will become the voice command you say to Alexa.
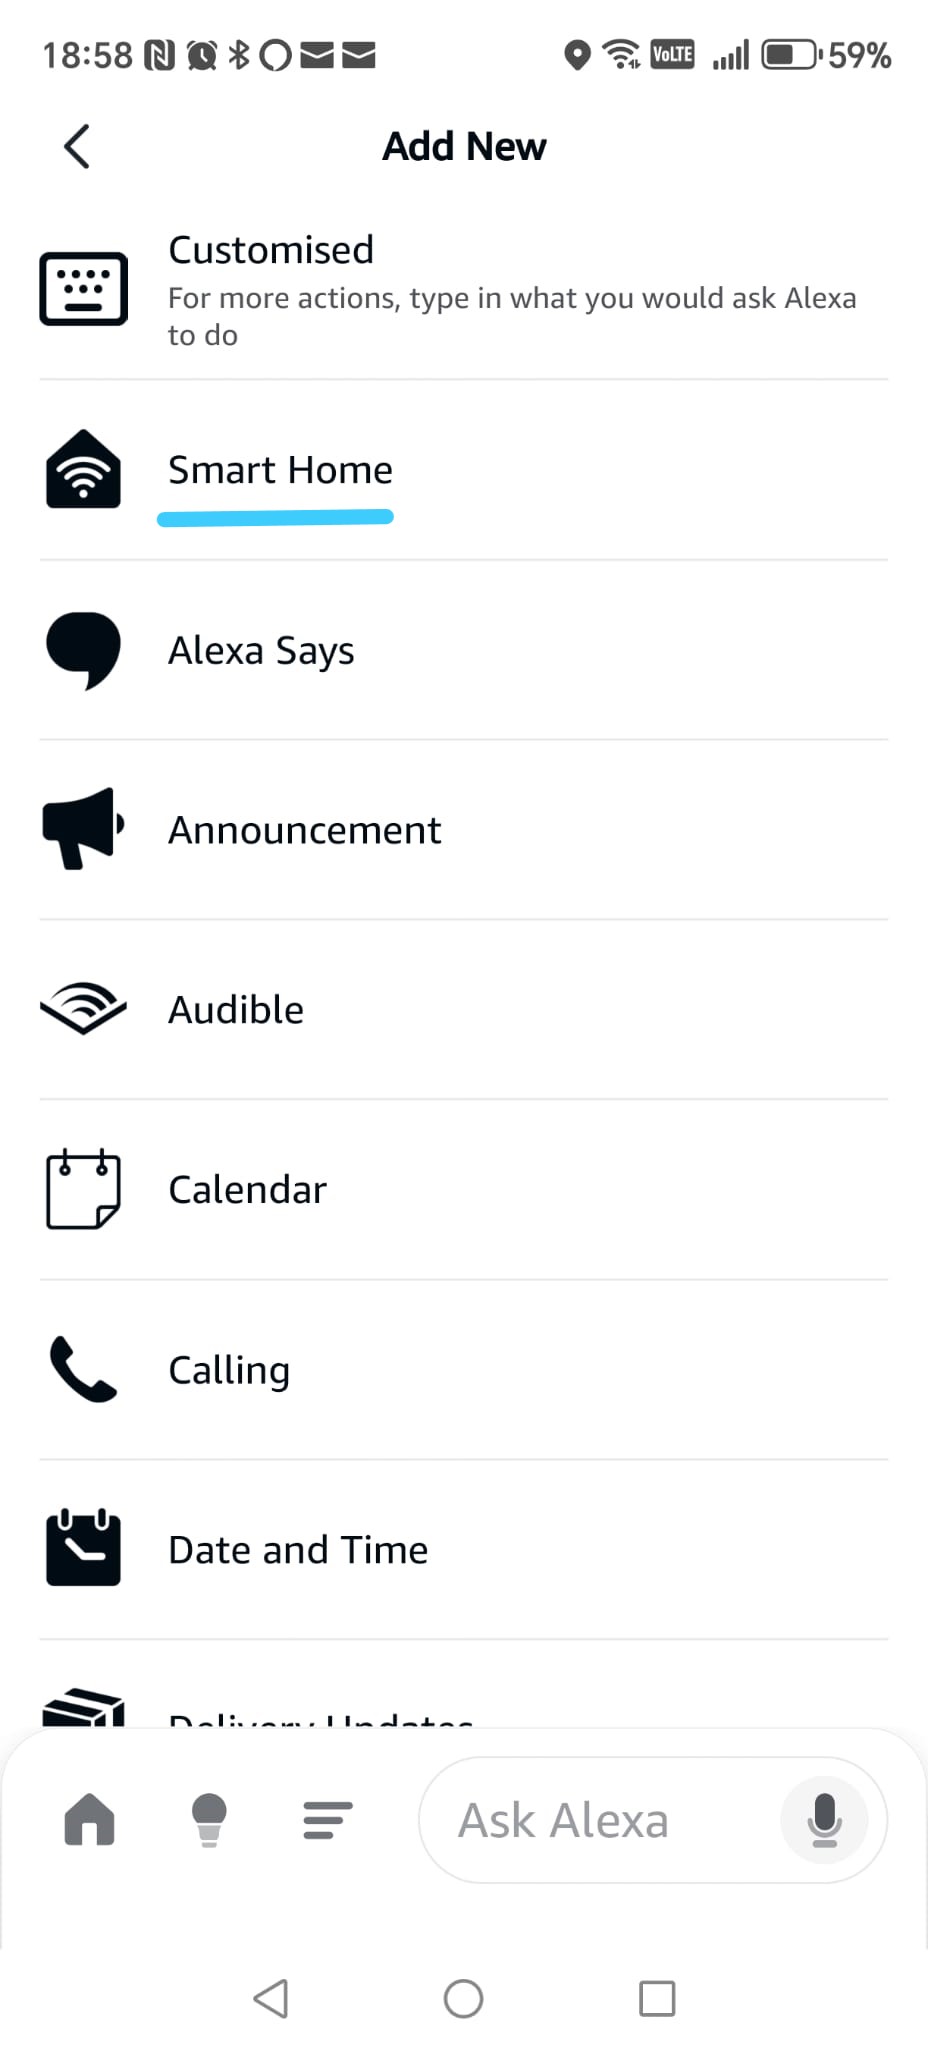
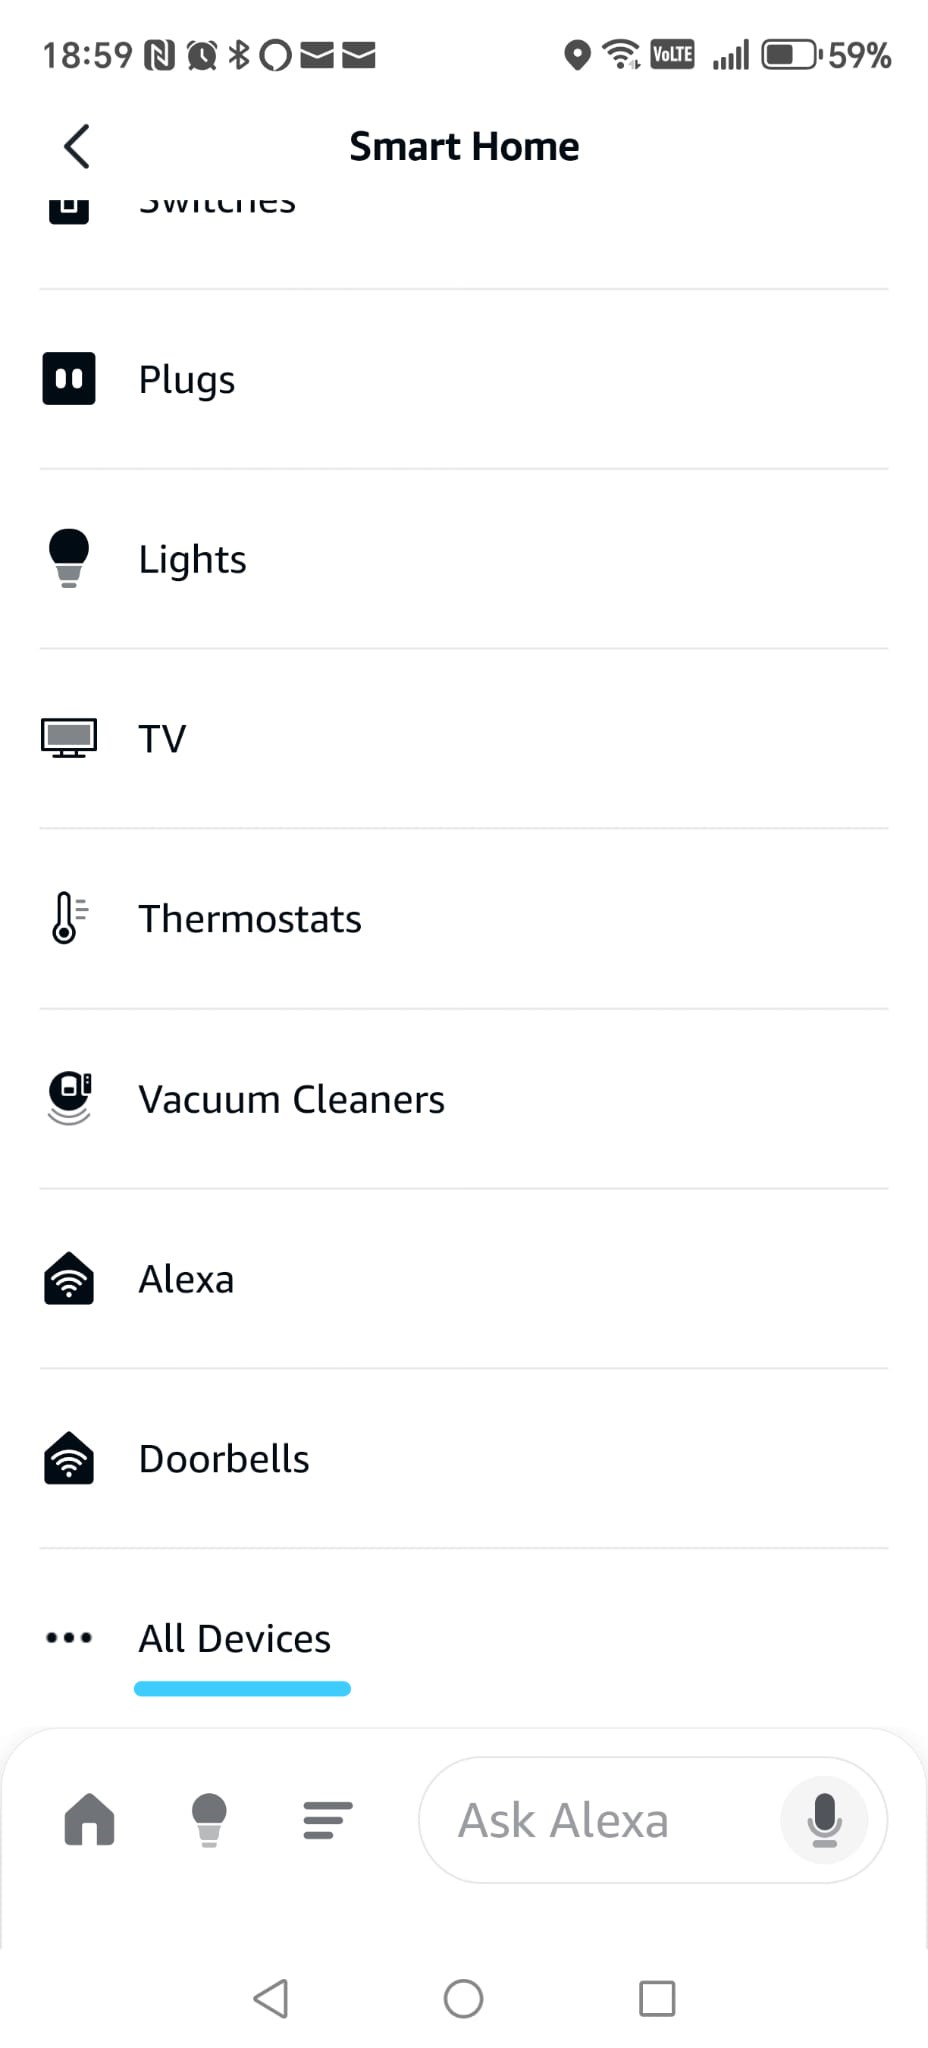
Step 4 — Add the Smart Home action
Tap Alexa Will, then tap the plus (+) button.
Select Smart Home.
Scroll down and choose All Devices.
Phase 3.4
Define voice phrase + Smart Home action
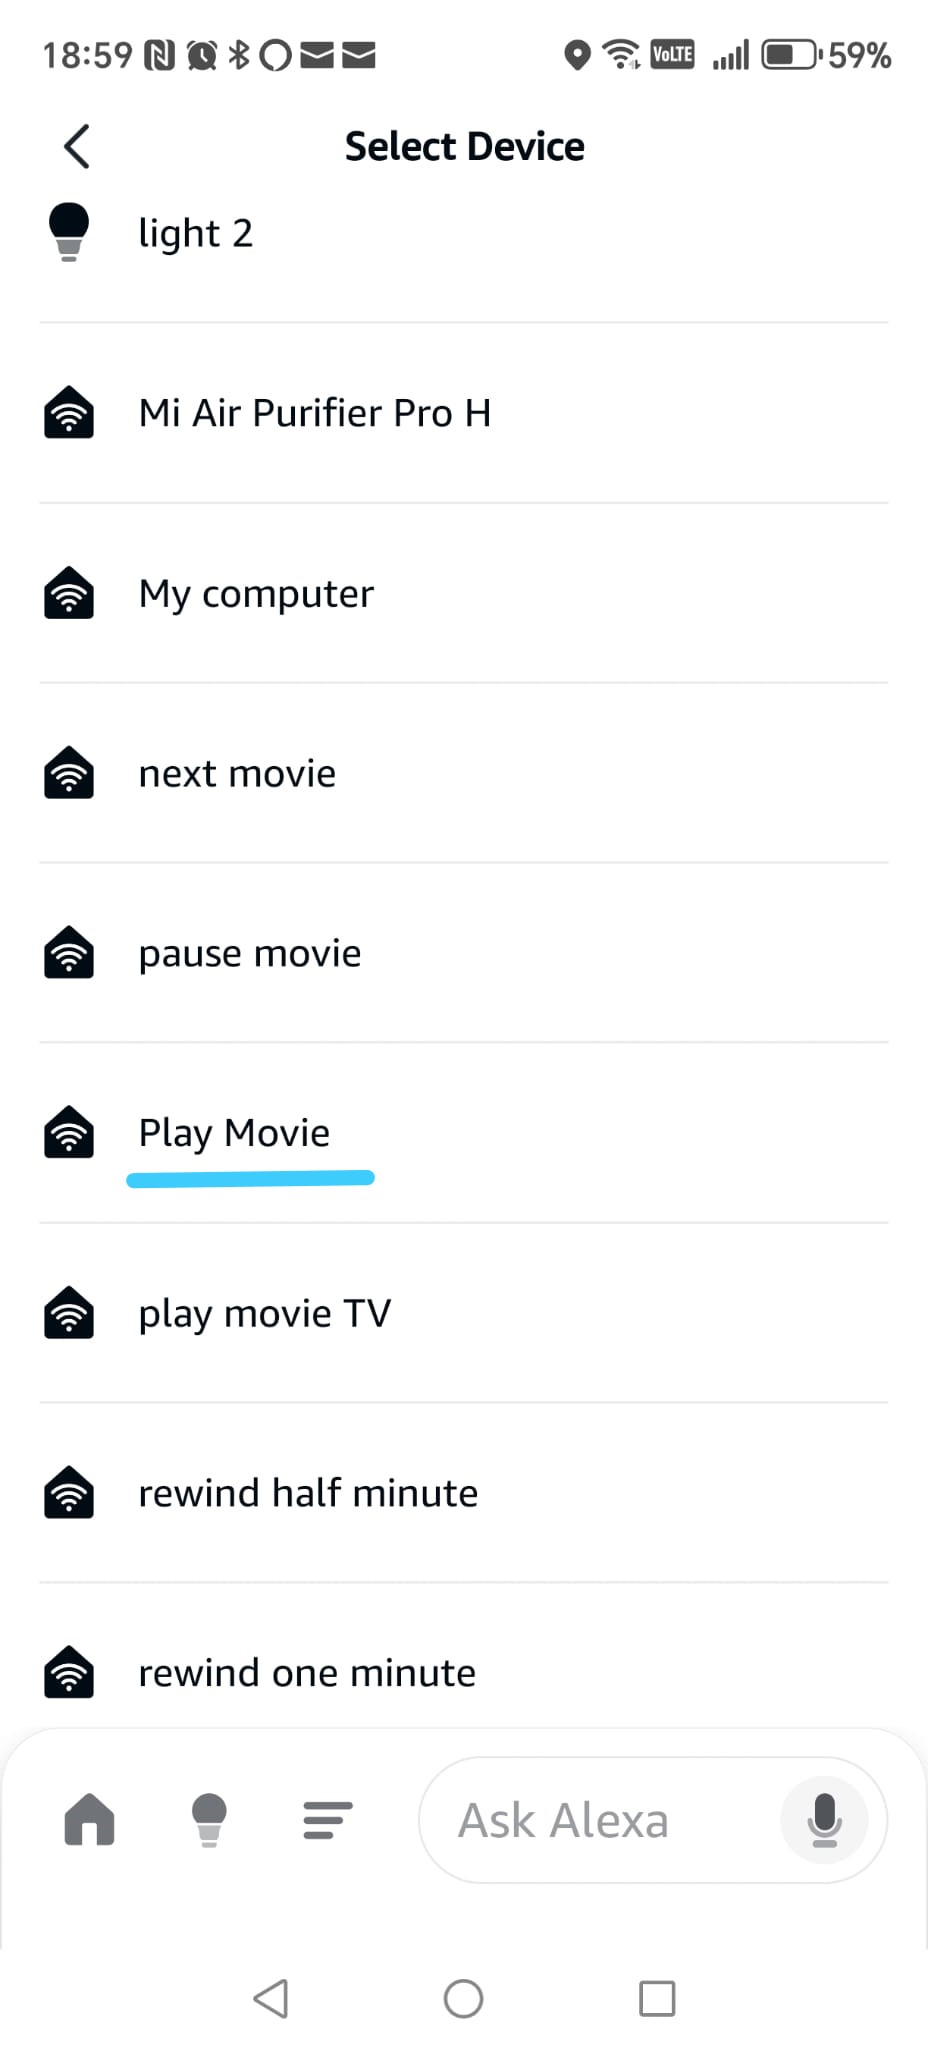
Phase 3.4 — Complete the “Play Movie” Routine
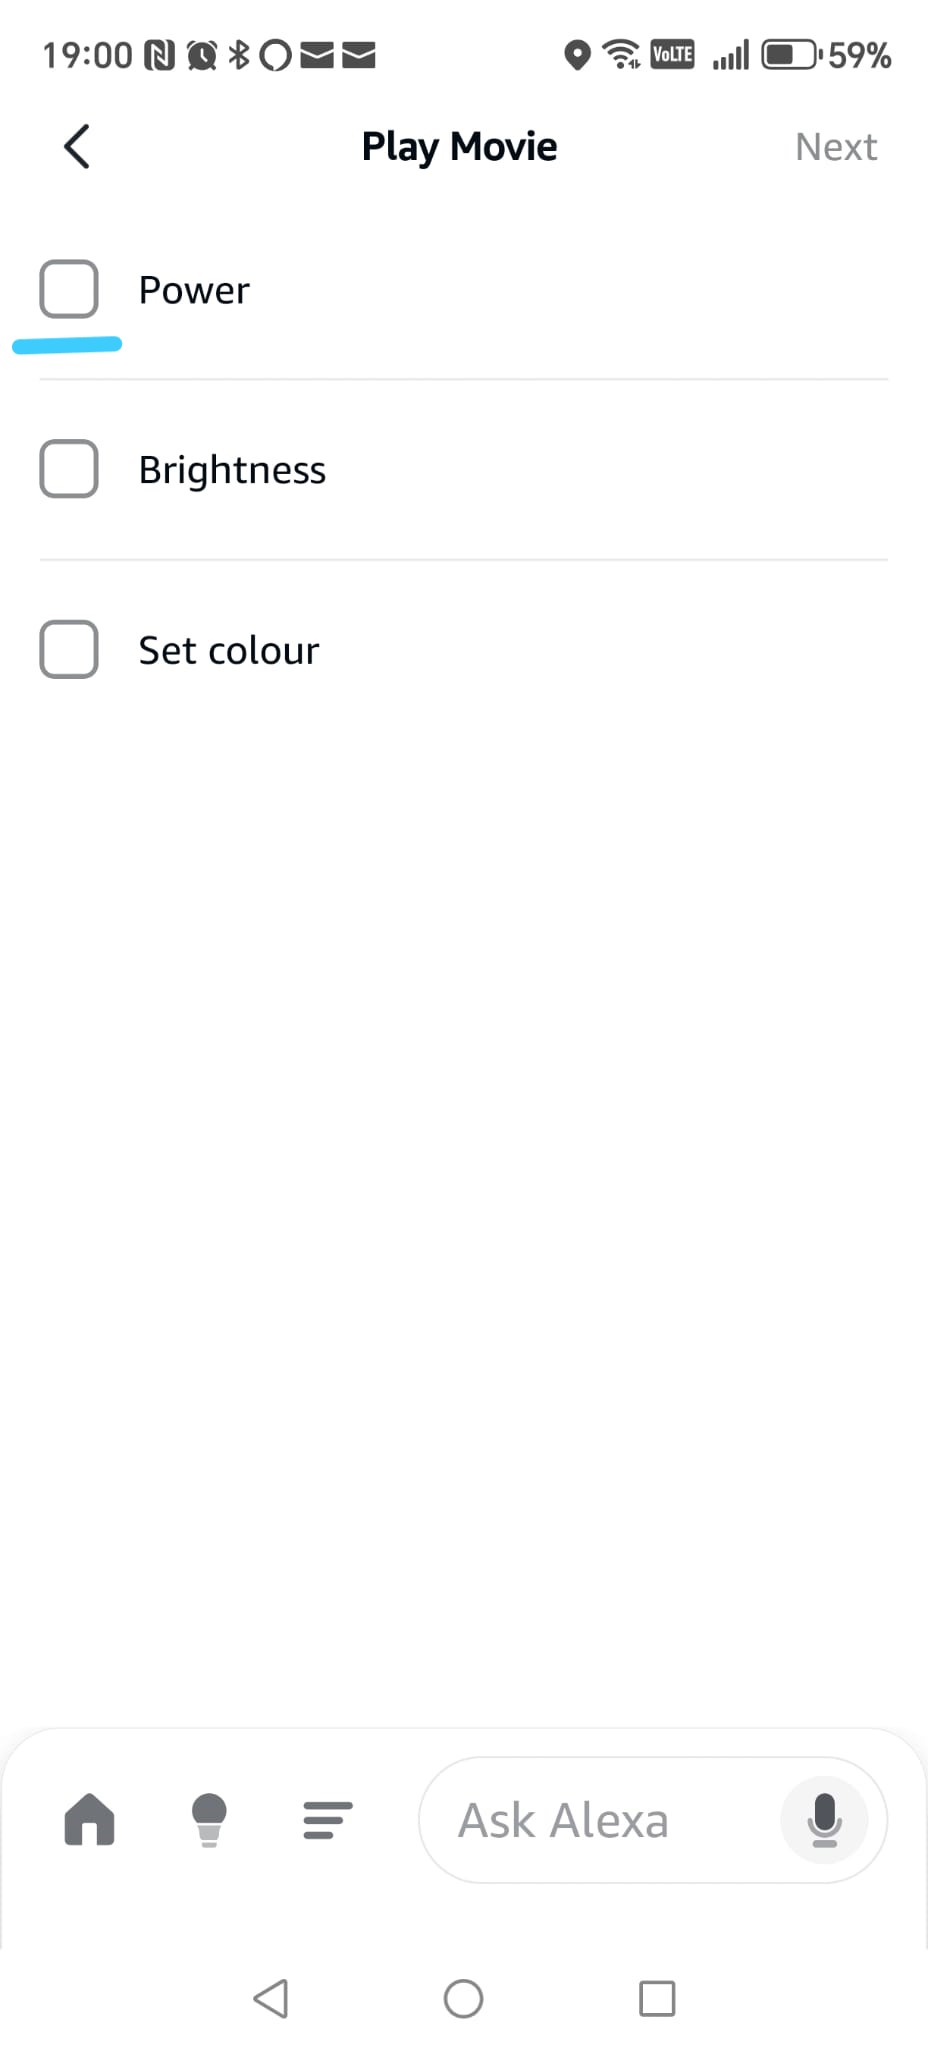
Step 5 — Select the Play Movie device
From the list of Smart Home devices, scroll until you find
Play Movie and tap on it.
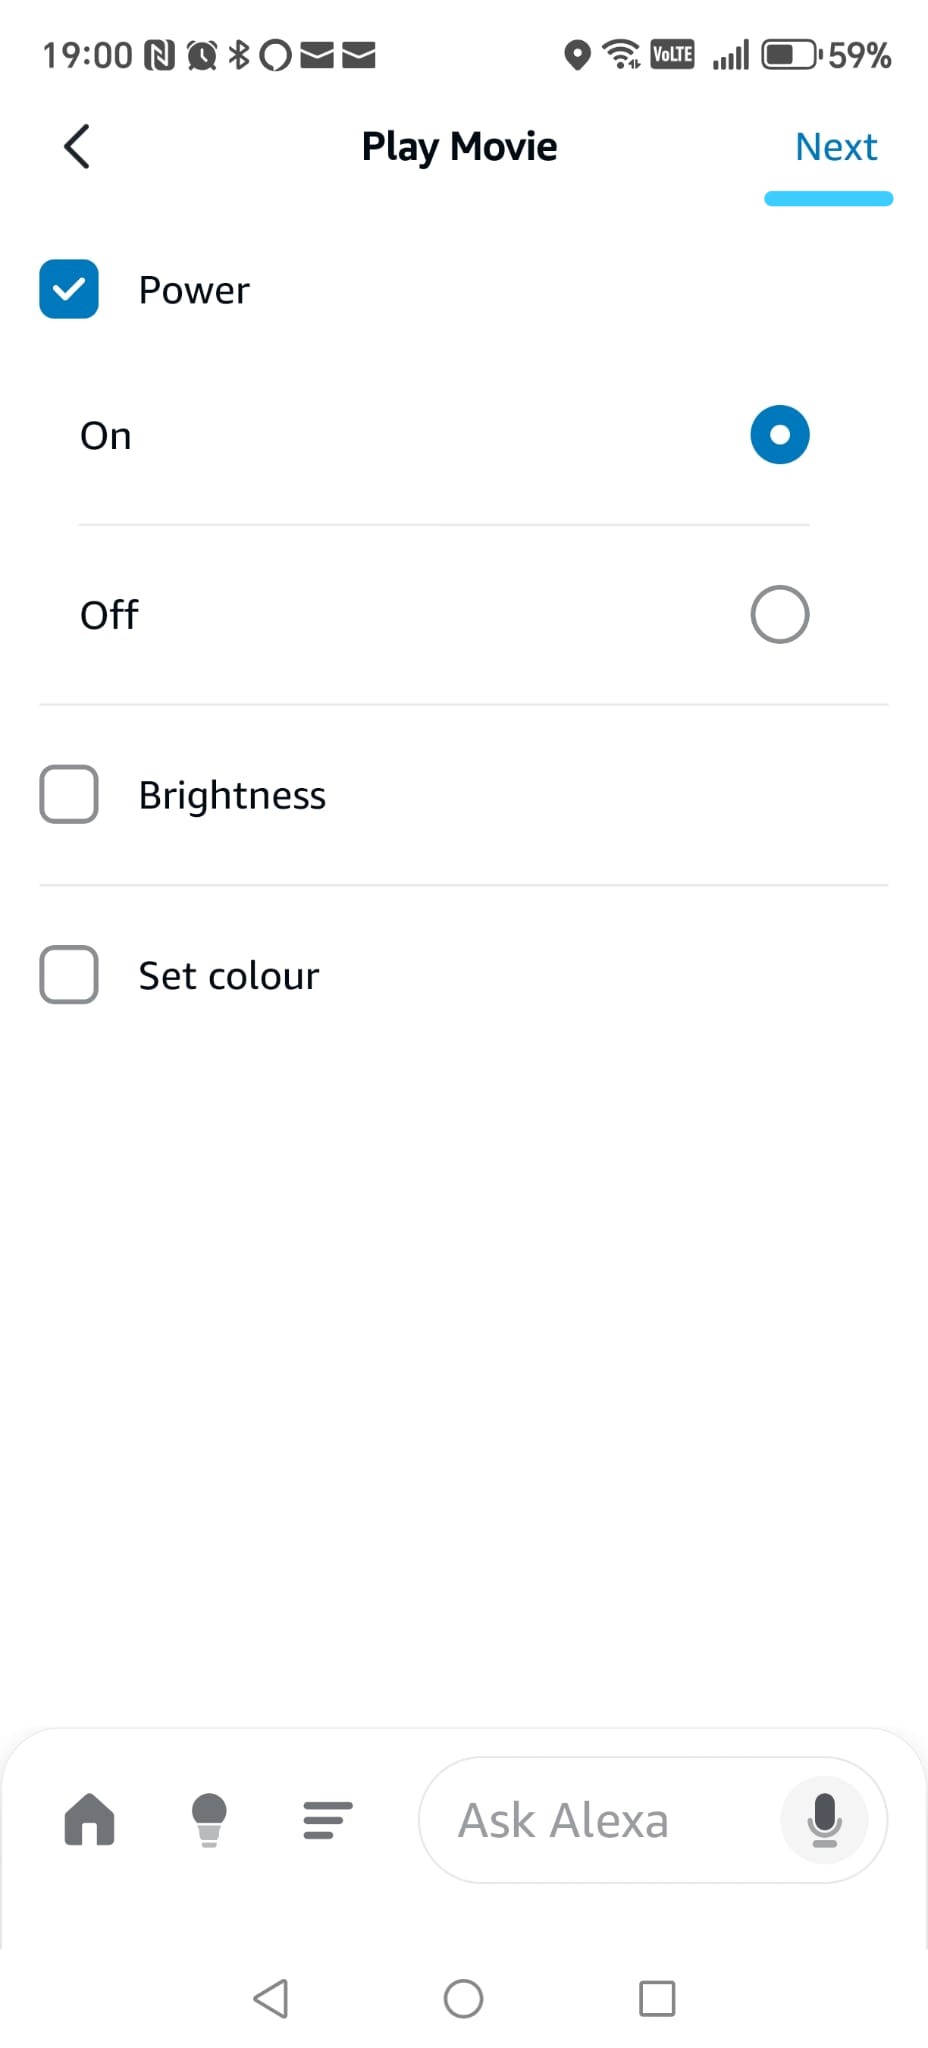
Step 6 — Set the action
On the next screen, enable the checkbox for Power,
then choose On.
Tap Next in the top-right corner.
This action tells Alexa to trigger the corresponding TRIGGERcmd command on your PC.
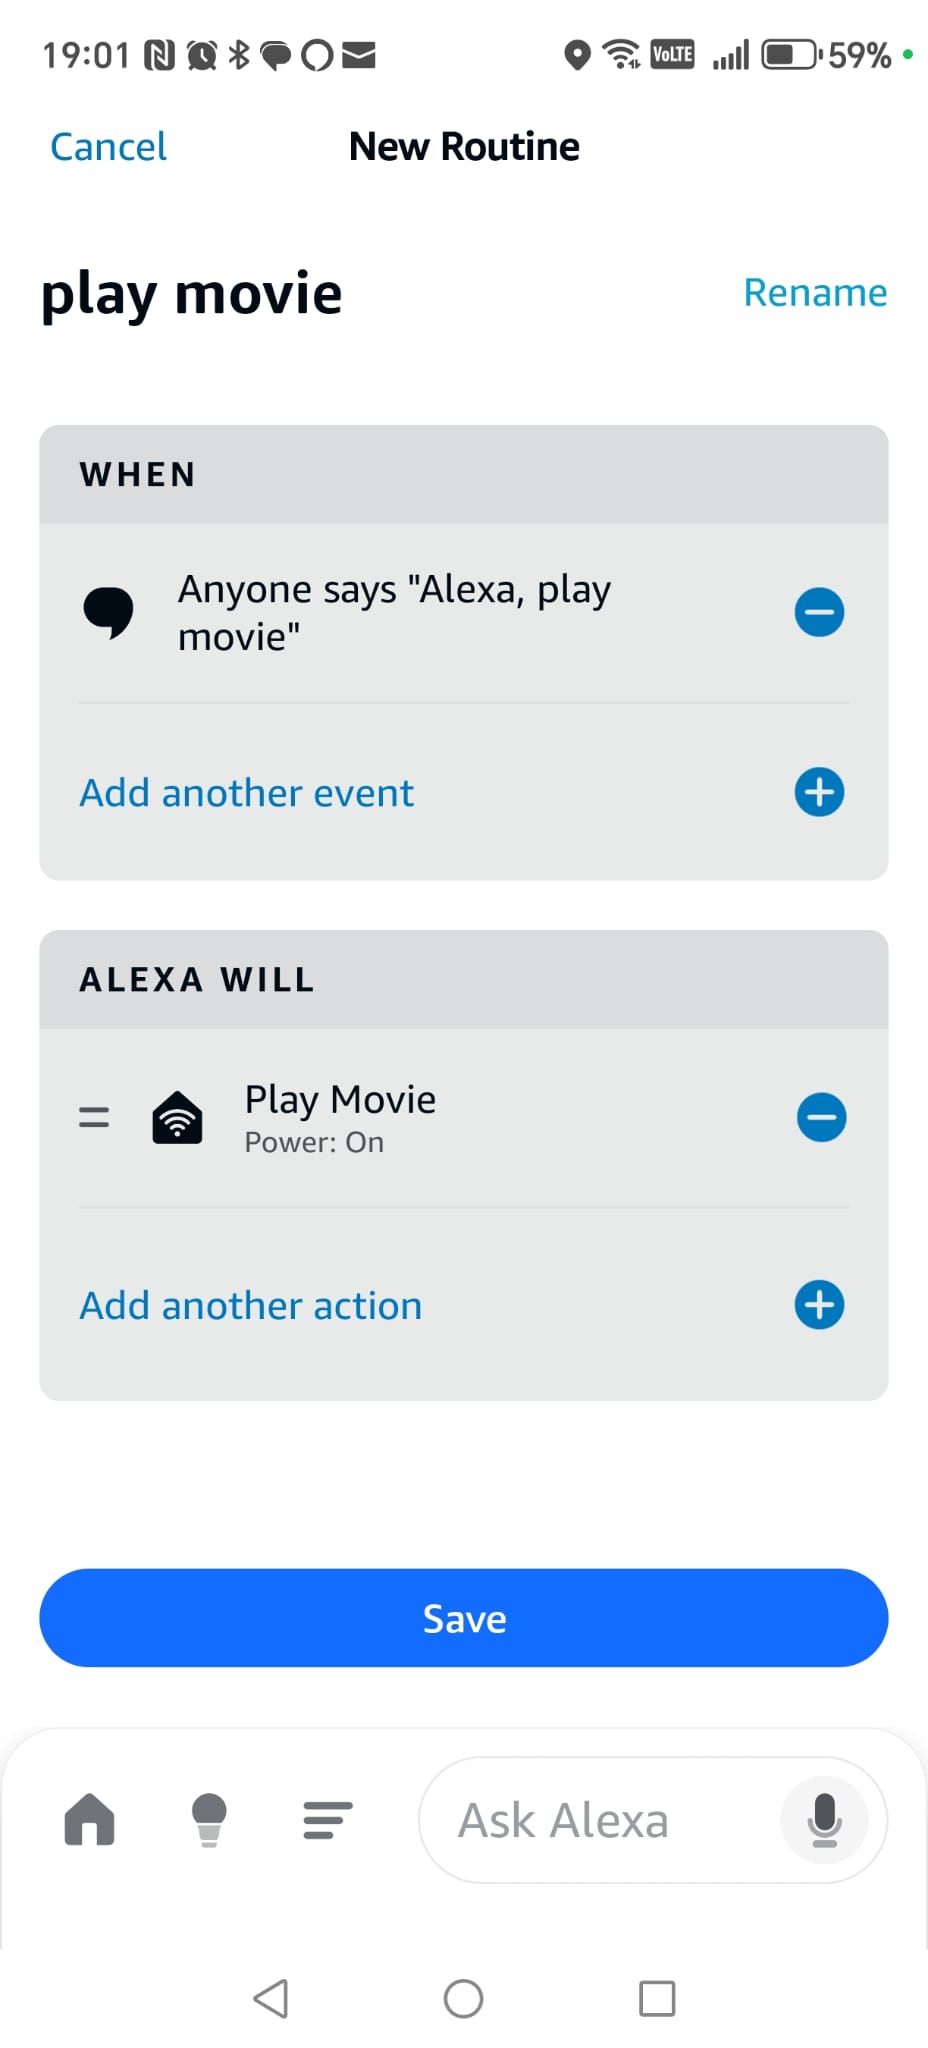
Step 7 — Save the routine
Tap Save to create the routine.
Once saved, your routine is ready to use.
You can now control Smart Home Cinema using the shorter voice command:
“Alexa, Play Movie”
💡
Tip:
If you make a mistake while creating the routine, don’t worry.
Simply delete the routine and create it again — it usually takes about one minute.
✔
Note:
After you create your first routine and understand the logic,
all other commands work the same way. You only need to select a different device
and repeat the same steps.
Phase 3.4
Select device + set Power ON + save routine
10) Google Assistant Setup (Full Tutorial)
Google Assistant is the second supported voice assistant for
Smart Home Cinema. In this chapter, you’ll learn how to connect
Google Assistant with TRIGGERcmd so your voice can control your
Windows PC.
If you were searching for
how to connect Google Assistant with TRIGGERcmd or
how to control a Windows PC using Google Assistant,
this guide will help as well — the steps below apply both to
Smart Home Cinema and to general TRIGGERcmd + Google setups.
This chapter explains how to connect Google Assistant with
Smart Home Cinema using TRIGGERcmd.
All configuration steps are performed inside the Google Home app.
If you want a simple explanation of how Google Assistant works with TRIGGERcmd and what role it plays in this setup, you can read the Google Assistant Beginner Guide.
⚠
Important — please read this first
Even if you already use Google Assistant or Google Home on your phone or on smart speakers,
Smart Home Cinema still requires one mandatory step:
linking your Google account with your TRIGGERcmd account.
This link allows Google Assistant to send commands to your PC.
Already using Google Assistant? Read carefully:
-
If you already use Google Assistant but have not linked TRIGGERcmd yet,
you can skip the basic setup and go directly to the account-linking section.
-
If your Google account is already linked with TRIGGERcmd,
you may skip most of this chapter and continue with the routines section.
-
If this is your first time using Google Assistant,
follow the steps from the beginning.
Important:
Google must be configured correctly; otherwise Smart Home Cinema will not receive your voice commands.
ℹ
Important — when new Smart Home Cinema commands are added
If you already used TRIGGERcmd before installing Smart Home Cinema,
Google Assistant may not detect the new commands automatically.
First, try the quick sync:
Simply say:
“Hey Google, sync my devices.”
If everything works correctly, Google will refresh your TRIGGERcmd
devices and the new Smart Home Cinema commands will appear.
If that does not work, use the safe method:
The safest solution is to re-link TRIGGERcmd
inside Google Home. This forces Google Assistant to reload all virtual devices.
Simply follow again the same steps where we connected Google Home
with TRIGGERcmd (disable the TRIGGERcmd link, then enable it again).
After re-linking, all Smart Home Cinema commands will appear correctly
and can be used inside your Google routines.
ℹ
Short note — Google Nest devices are optional
Google Nest speakers and displays are not required for Smart Home Cinema.
You can control everything directly from your phone using Google Assistant.
A Google Nest device simply makes daily use easier and more comfortable,
but it does not affect functionality.
✔
About routines
With Google, routines are highly recommended and sometimes
necessary. They help Google understand commands correctly
and avoid misunderstandings (forward, rewind, next movie, etc.).
We will create the routines later in this chapter, step by step.
10.1 What you will do in this chapter
In this chapter you will install the Google Home app and connect:
- your Google account
- with your TRIGGERcmd account
This connection is required so Google Assistant can send your voice commands to Smart Home Cinema.
After we finish the link, Google will recognize your commands and Smart Home Cinema will execute them automatically.
Part 1 — Install the Google Home app
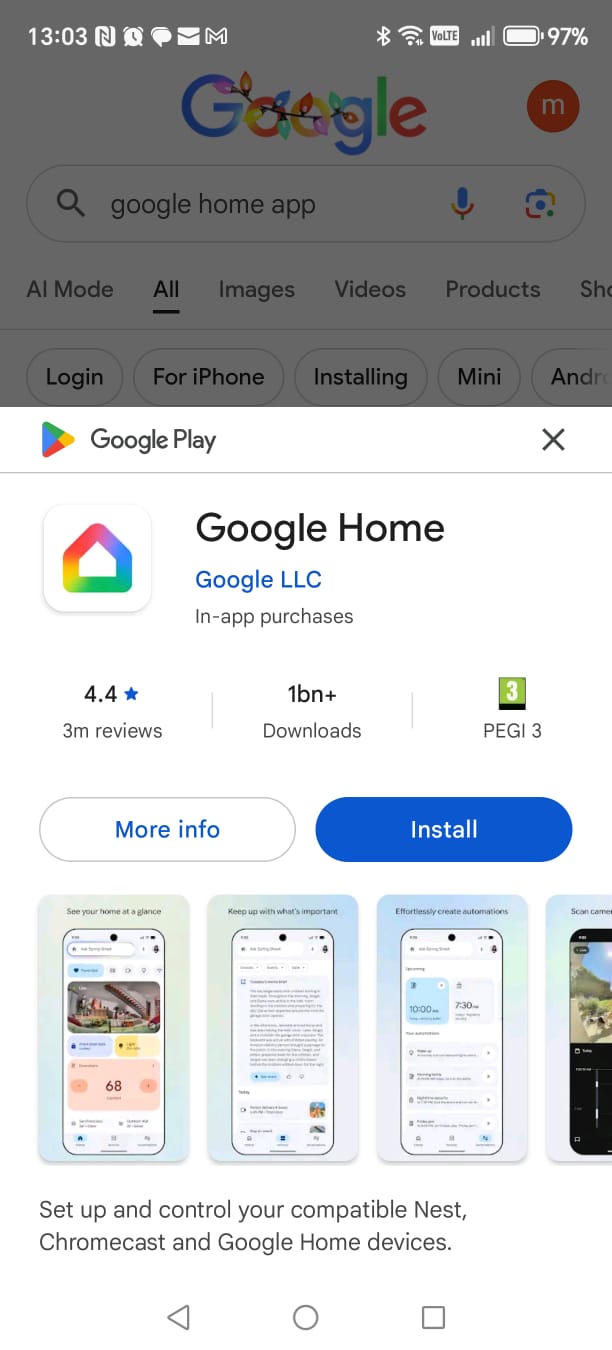
-
Install Google Home
- Open Google Play on your phone.
- Search for "Google Home" by Google LLC.
- Tap Install.
-
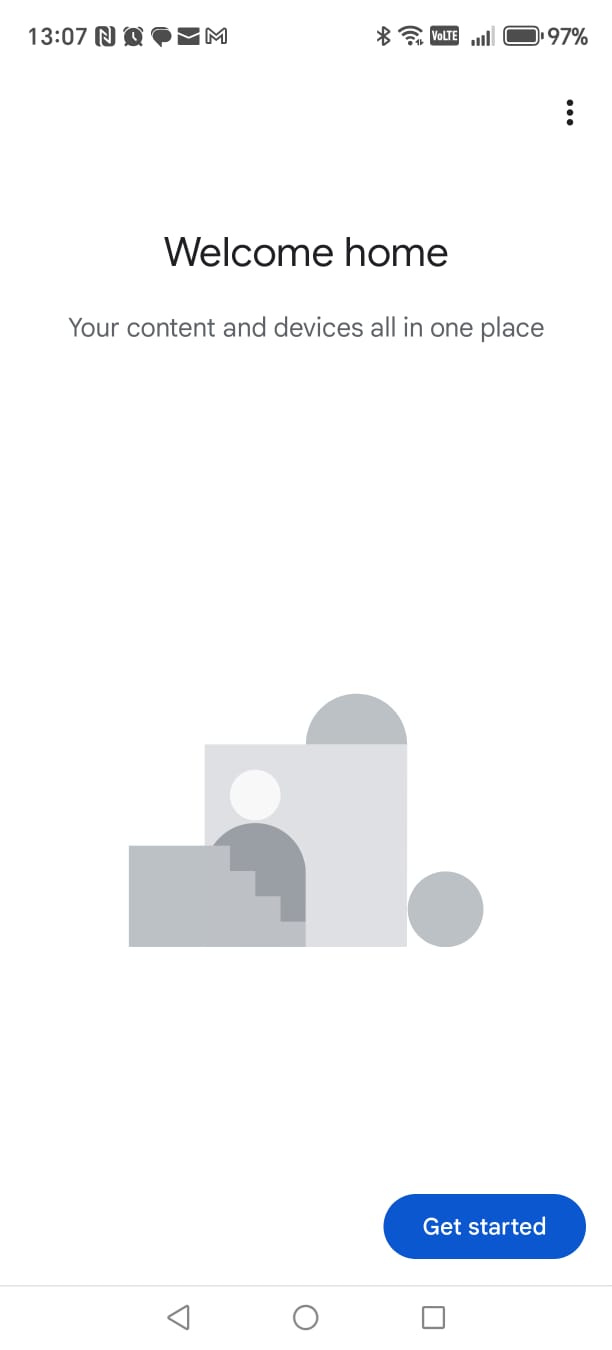
Open Google Home
- When the installation finishes, open the Google Home app.
- On the first screen, tap Get started.
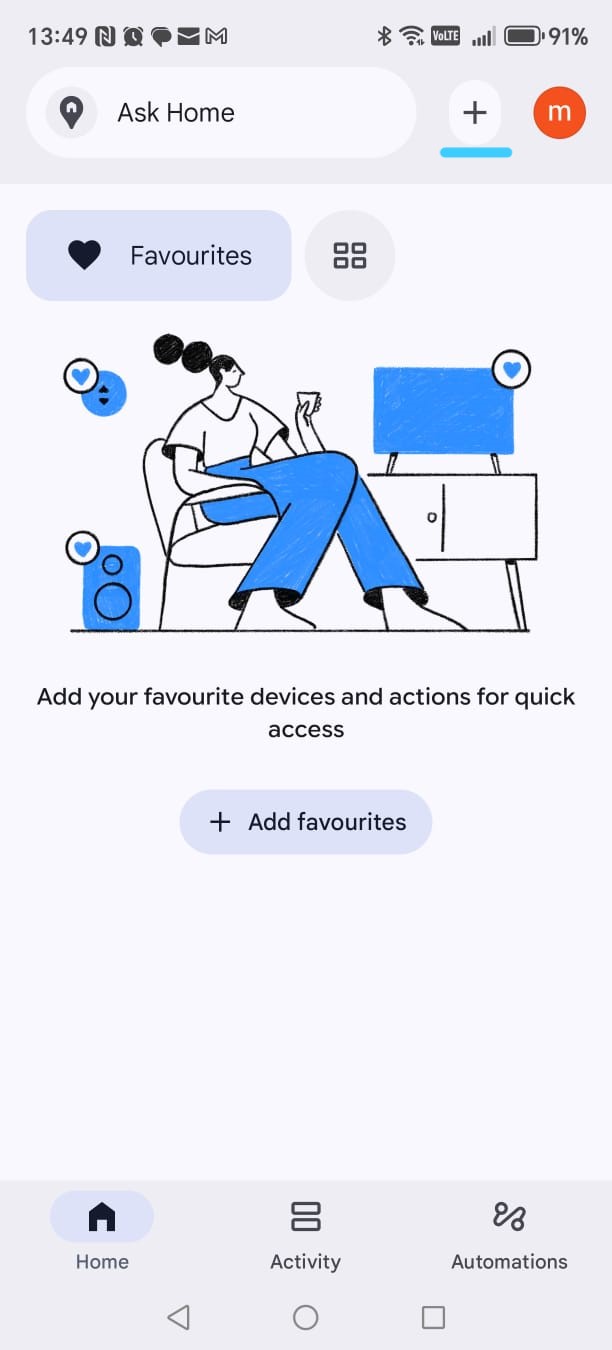
Part 2 — Create your “Home”
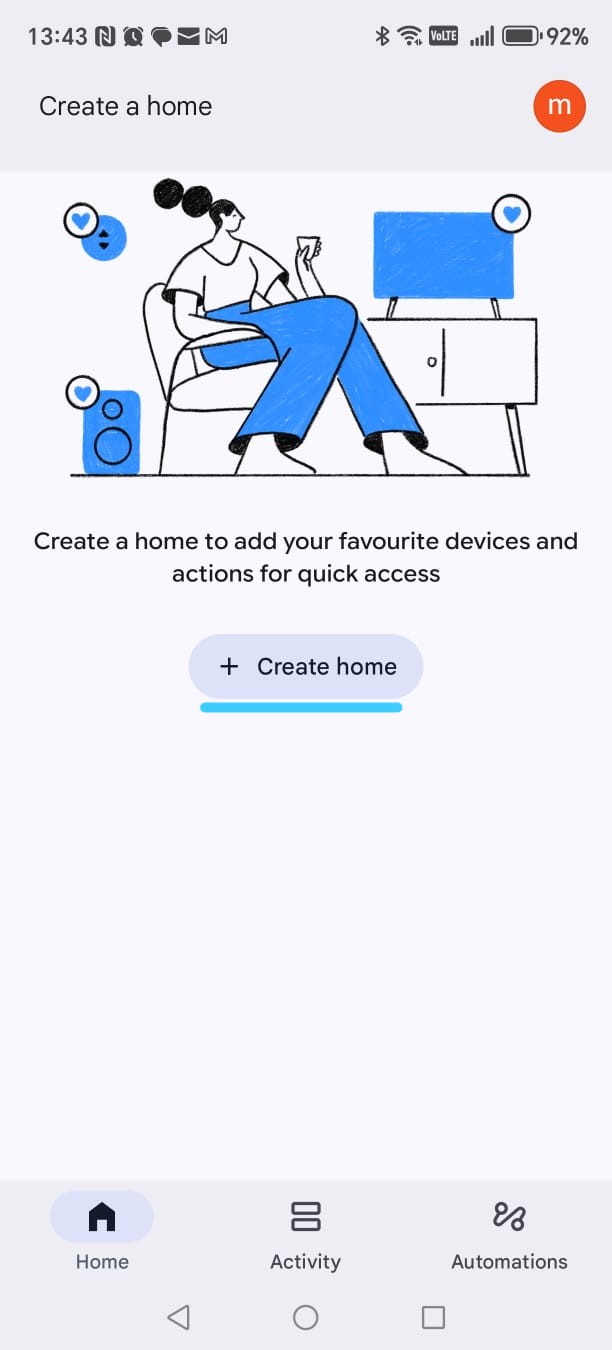
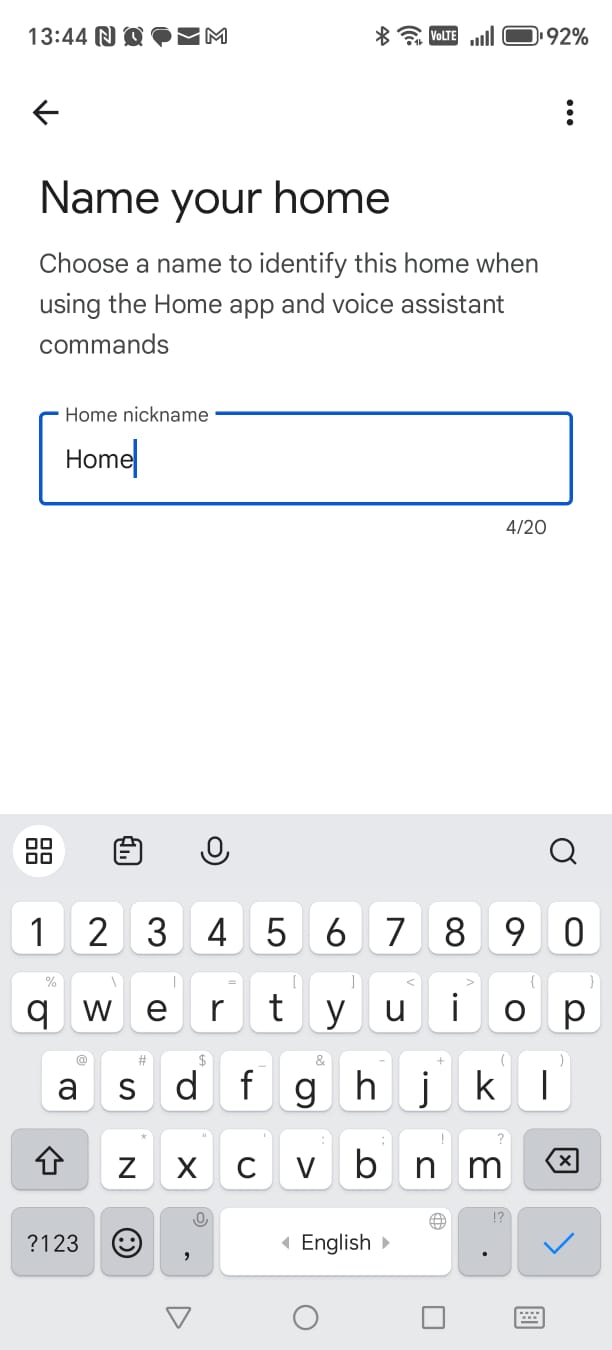
-
Create a Home
- On the Create a home screen, tap Create home.
- Enter a simple name, for example Home, then continue.
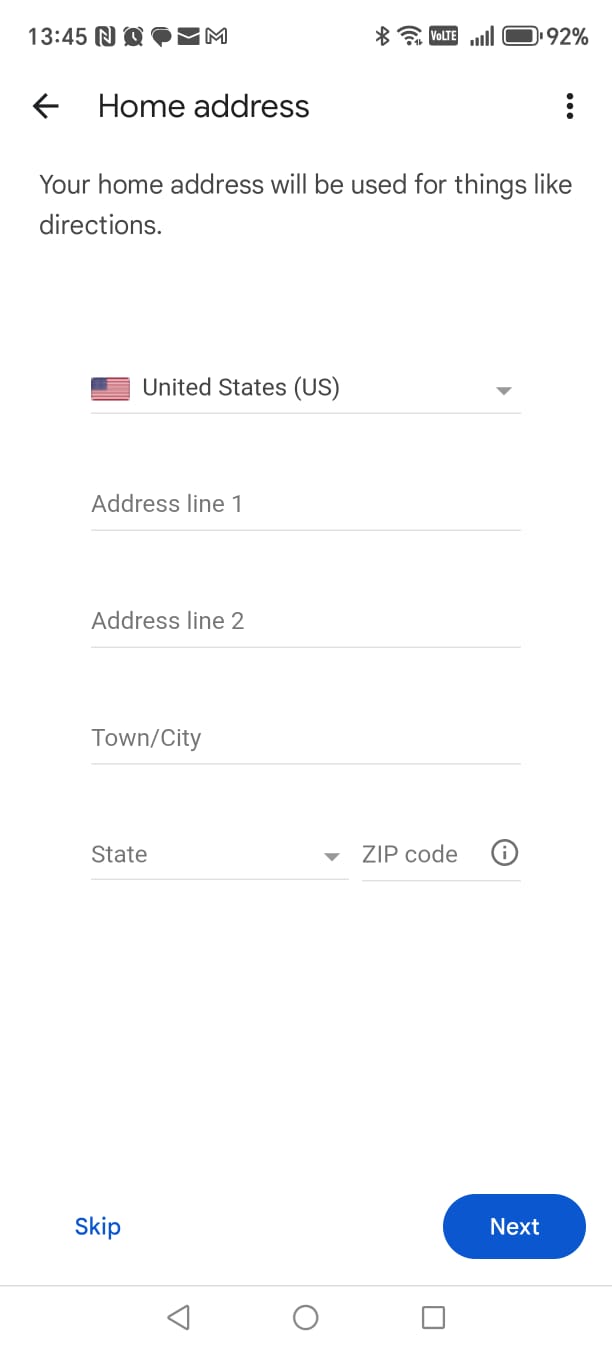
-
Home address (optional)
- You can enter your real address if you want better local results (weather, directions, etc.).
- If you prefer not to share your address, simply tap Skip.
- This choice does not affect Smart Home Cinema.
-
Bluetooth request (optional)
- If Google Home asks to enable Bluetooth, you can tap Turn on or Cancel.
- Bluetooth is used to detect nearby devices, but it is not required for Smart Home Cinema.
Part 3 — Link your TRIGGERcmd account
-
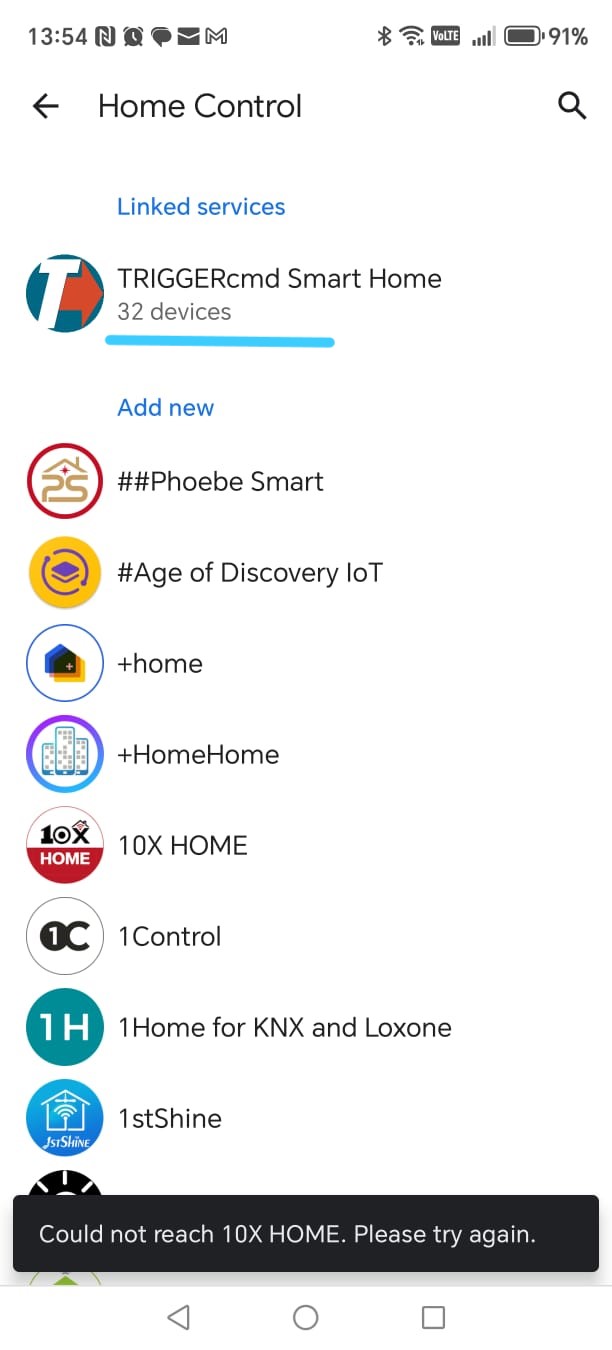
Open the Add menu
- From the main Google Home screen, tap the “+” (Add) button at the top.
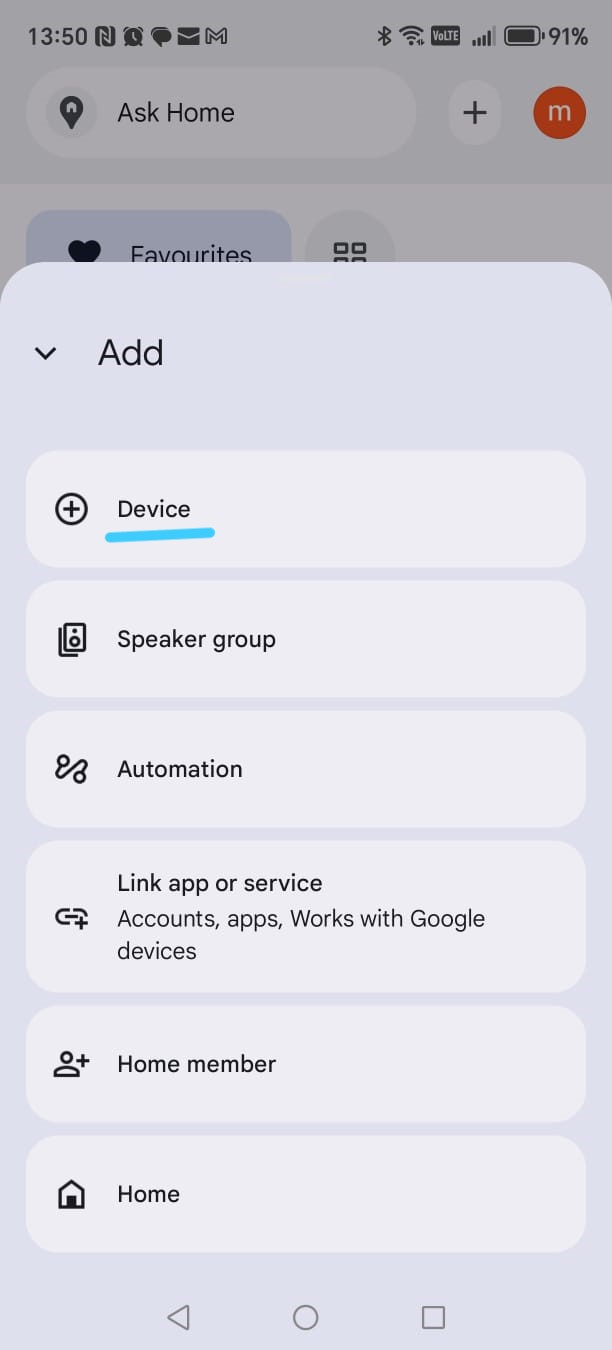
-
Select “Device”
- In the Add menu, tap Device.
- We choose this because TRIGGERcmd is used to control devices, including your PC.
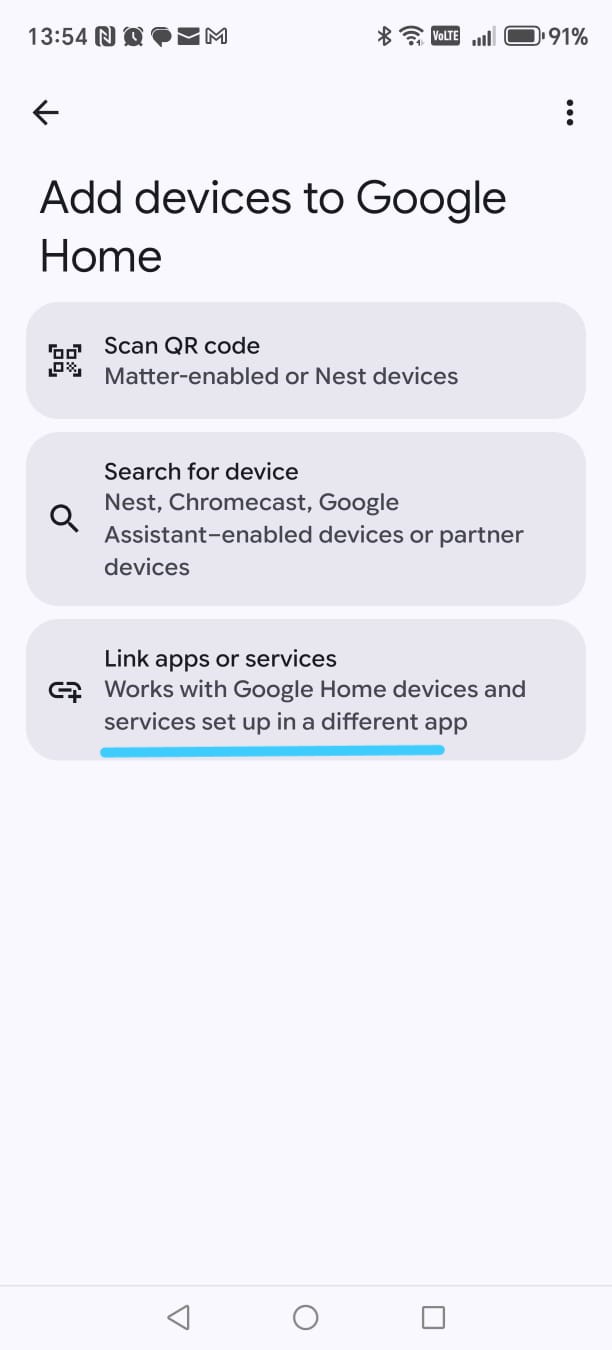
-
Choose “Link app or service”
- On the next screen, tap Link app or service.
- This opens the list of services that can be connected to Google Home.
-
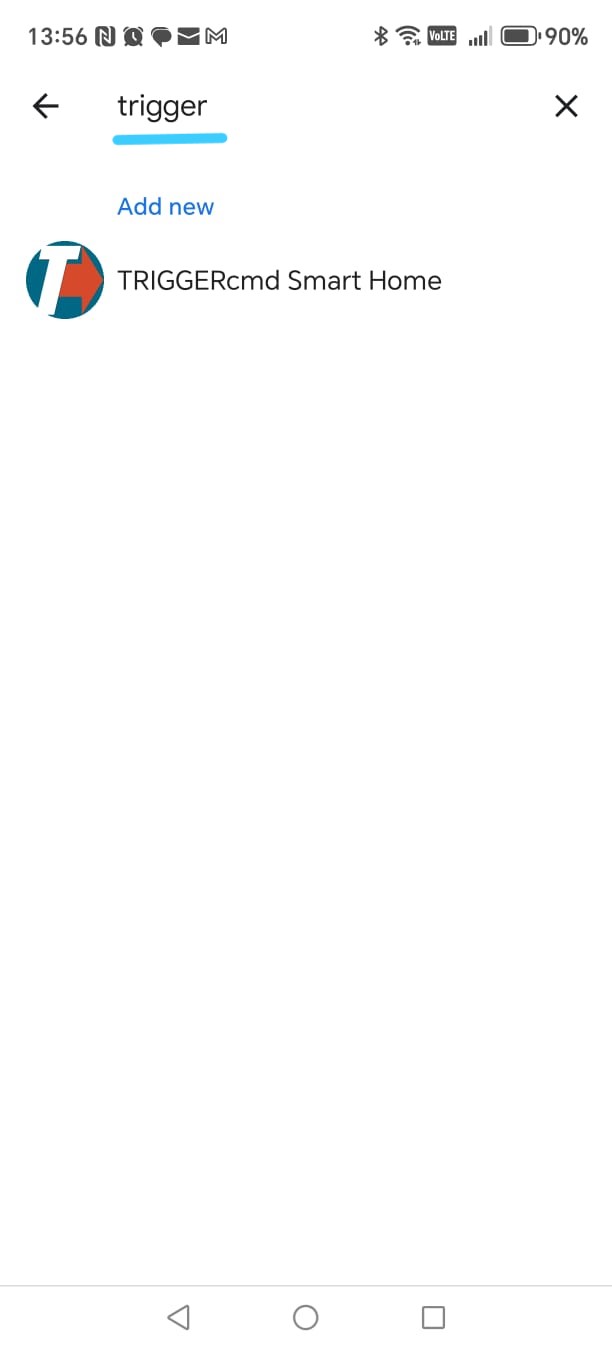
Find and select TRIGGERcmd
- In the search field, type trigger.
- Select TRIGGERcmd Smart Home from the results.
- Sign in with your TRIGGERcmd account and authorize the connection.
After this step, your Google account is successfully linked to TRIGGERcmd.
▶
The next step is to create Google routines. Routines shorten your voice commands and
make sure Google interprets them correctly, especially for actions like forward and rewind.
Google Assistant — Screenshot Gallery (Steps 1–10)
These screenshots are displayed as thumbnails. Click any image to enlarge it.
Google Assistant
Clickable screenshots
Phase 2 — Link TRIGGERcmd to Google Home
In this section you will connect TRIGGERcmd with Google Home so Smart Home Cinema
commands can be controlled by your voice.
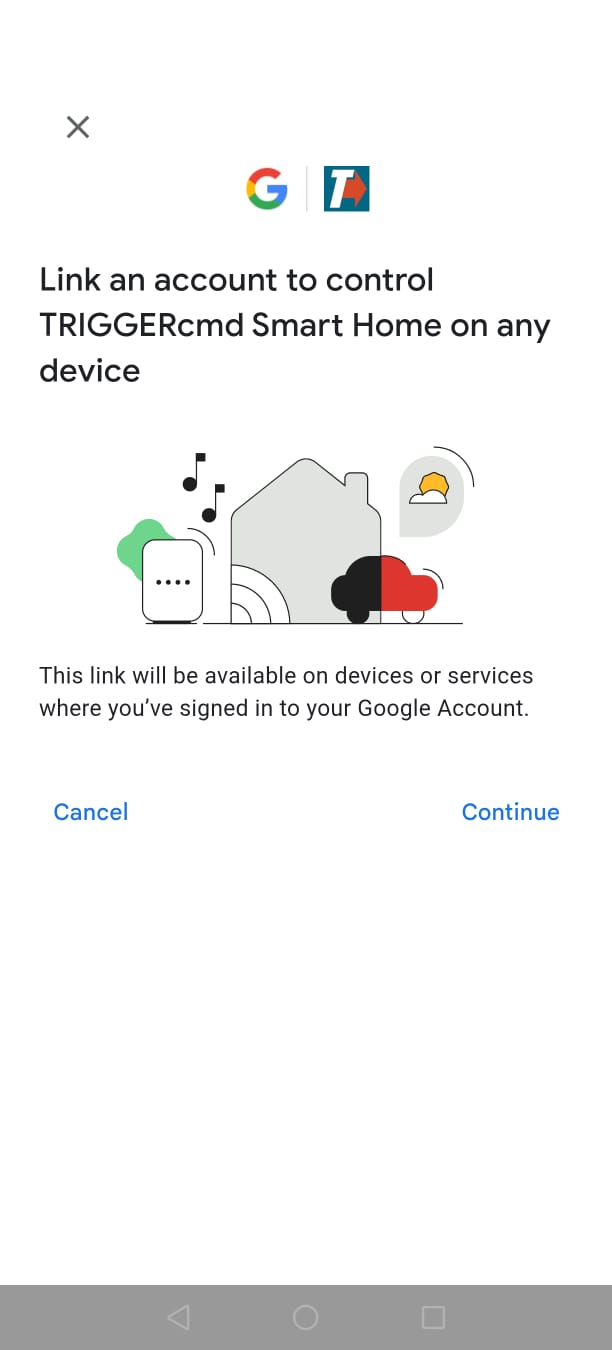
-
Step 1 — Open TRIGGERcmd
Tap TRIGGERcmd Smart Home.
-
Step 2 — Start linking
Tap Continue to begin linking your account.
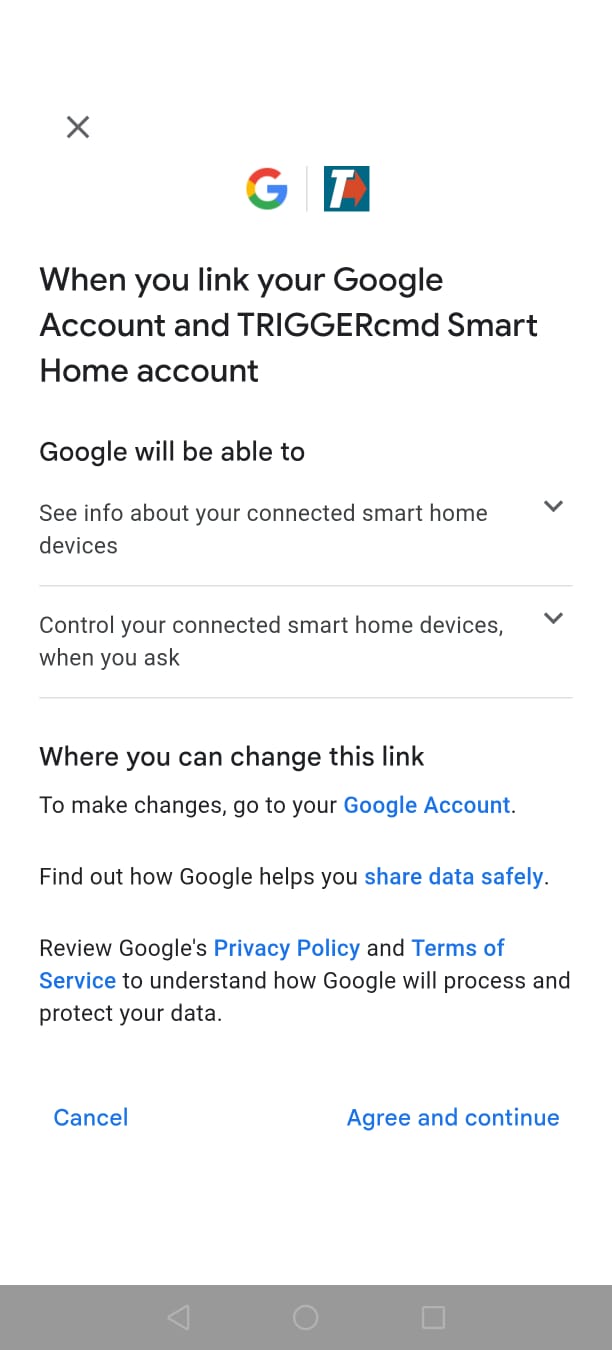
-
Step 3 — Review permissions
Google shows what this integration allows. Tap
Agree and continue.
-
Step 4 — Sign in to TRIGGERcmd
Sign in using the same TRIGGERcmd account you used before:
- Continue with Google
- or email + password
Then tap Sign In.
-
Step 5 — Approve Google access
Tap Allow so Google can trigger your commands.
-
Step 6 — Wait while devices are imported
Google loads all Smart Home Cinema devices automatically.
-
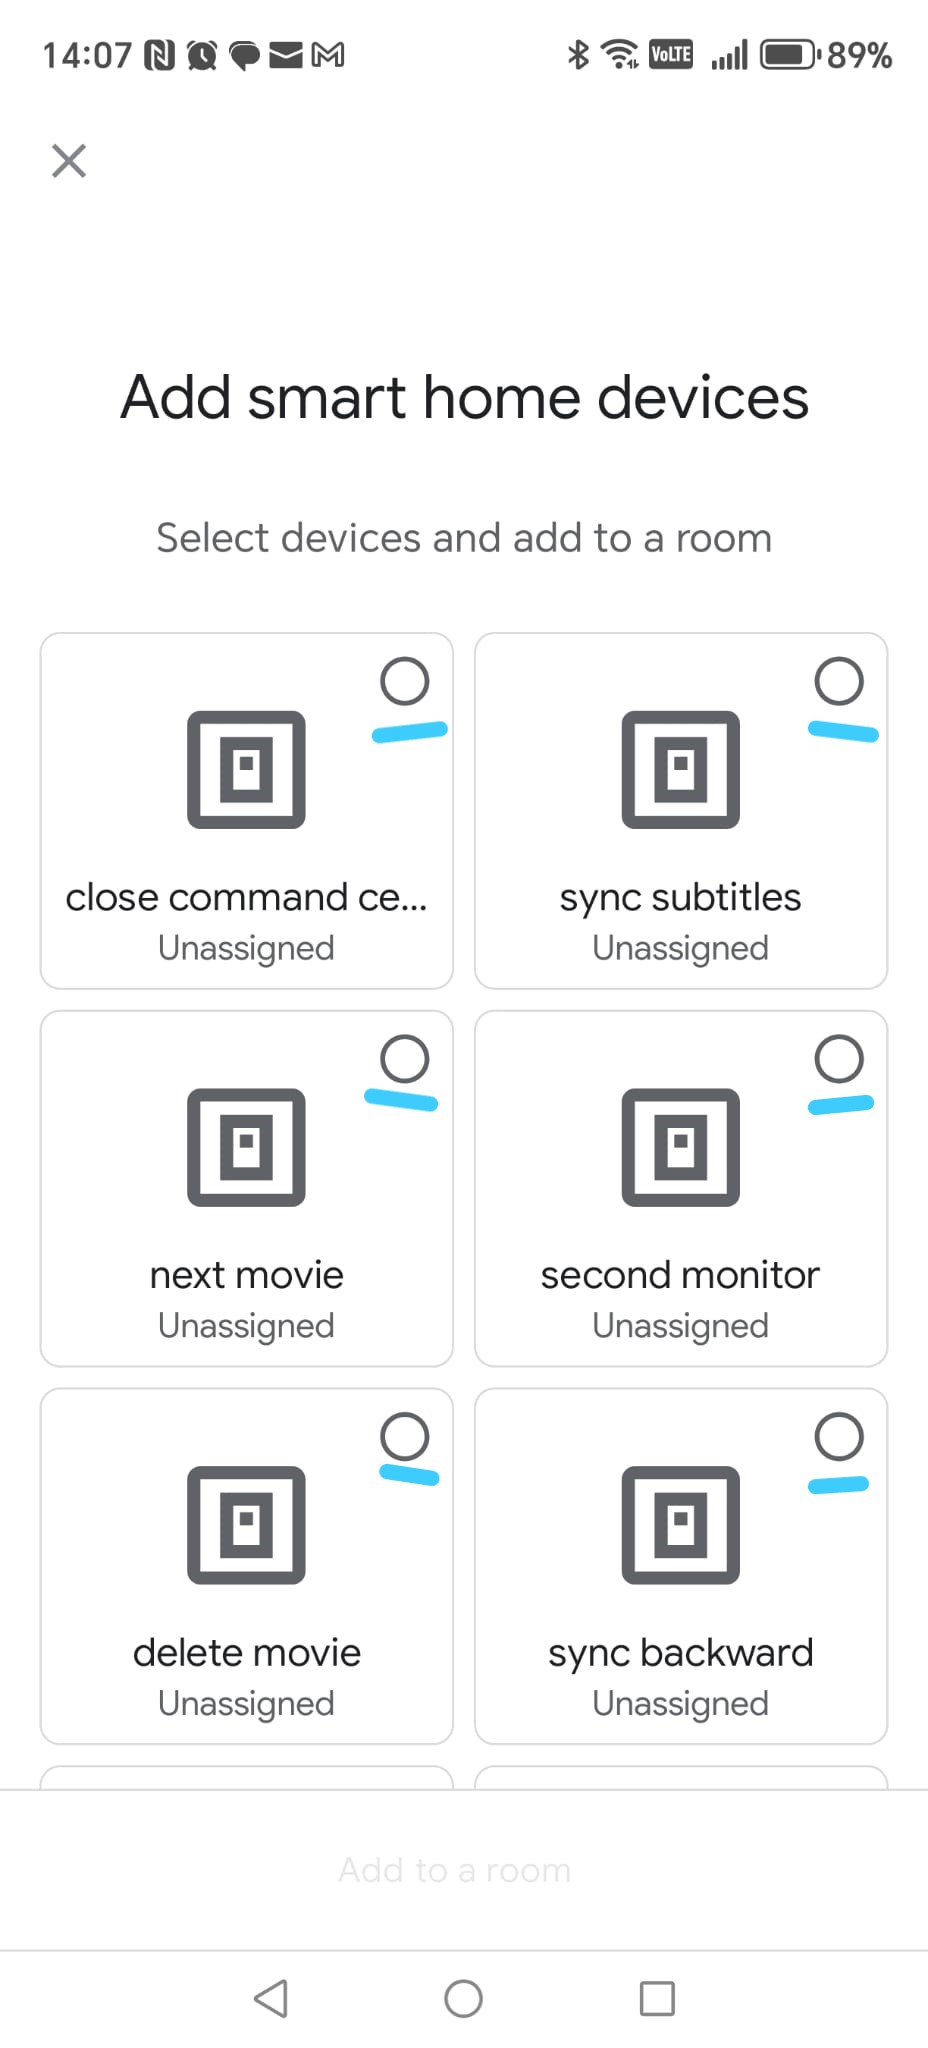
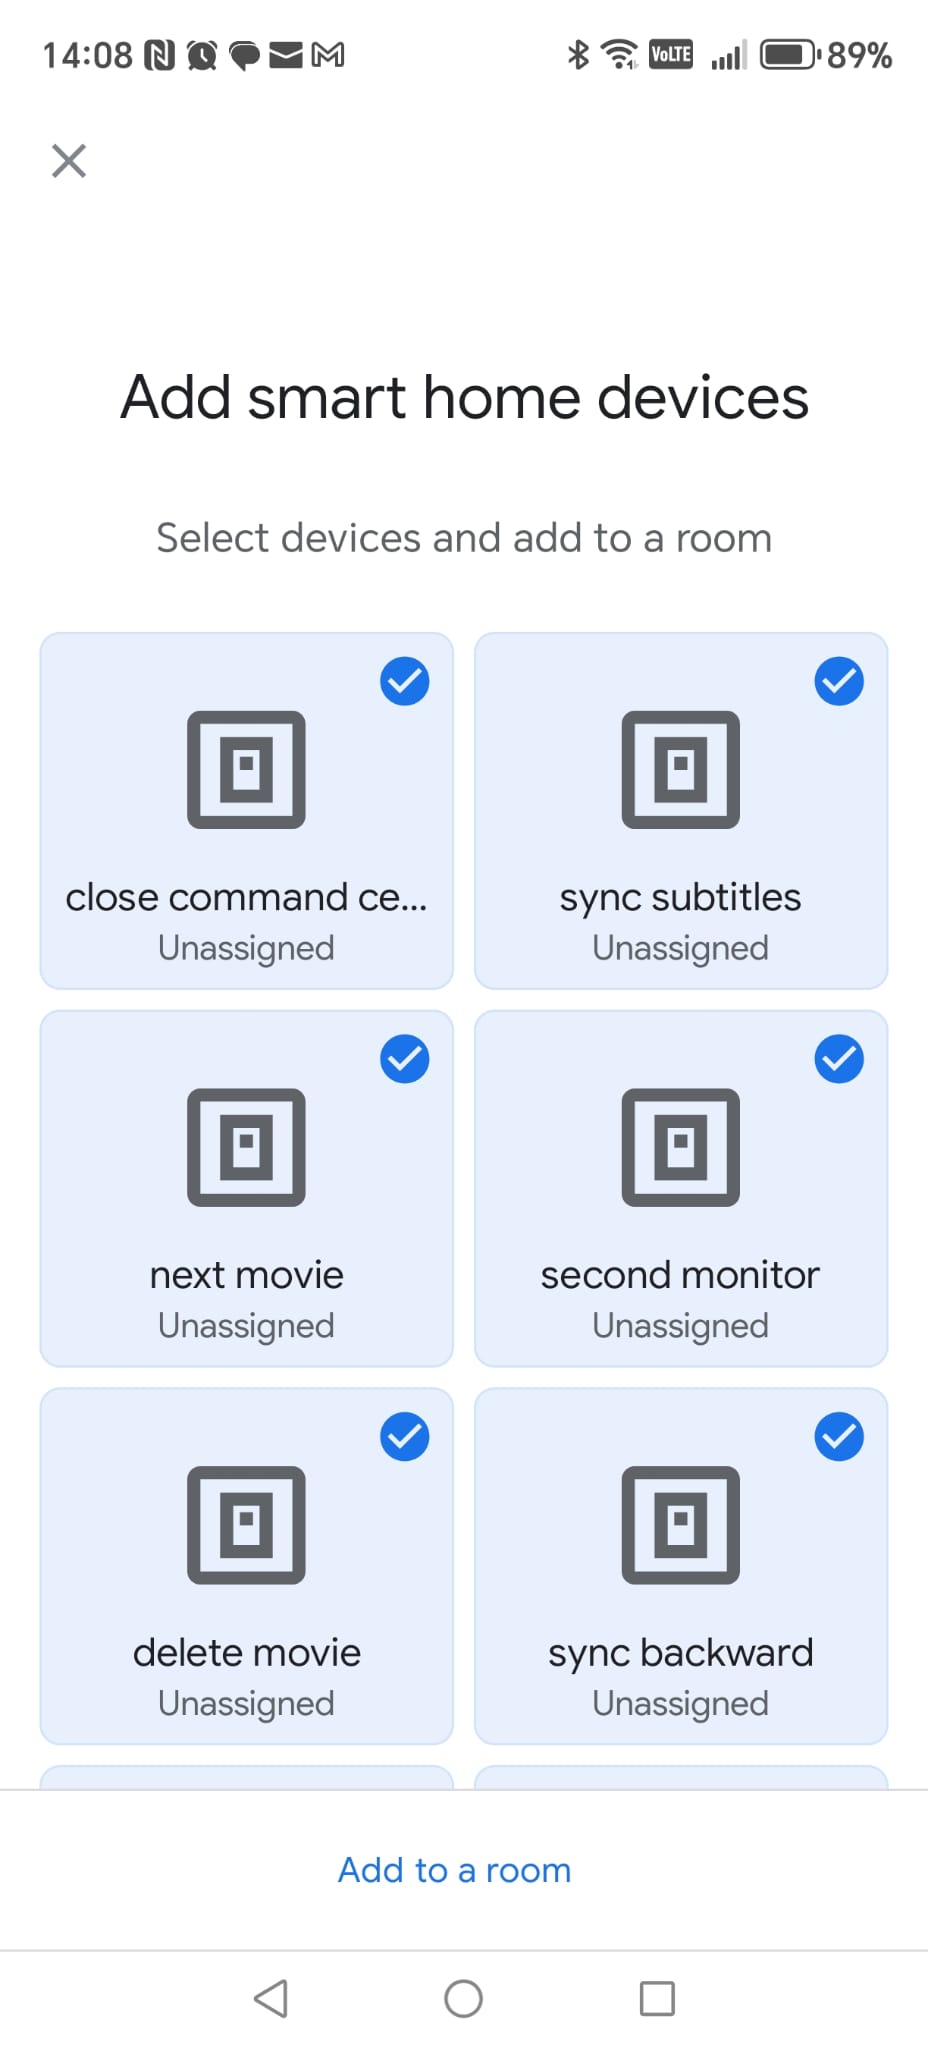
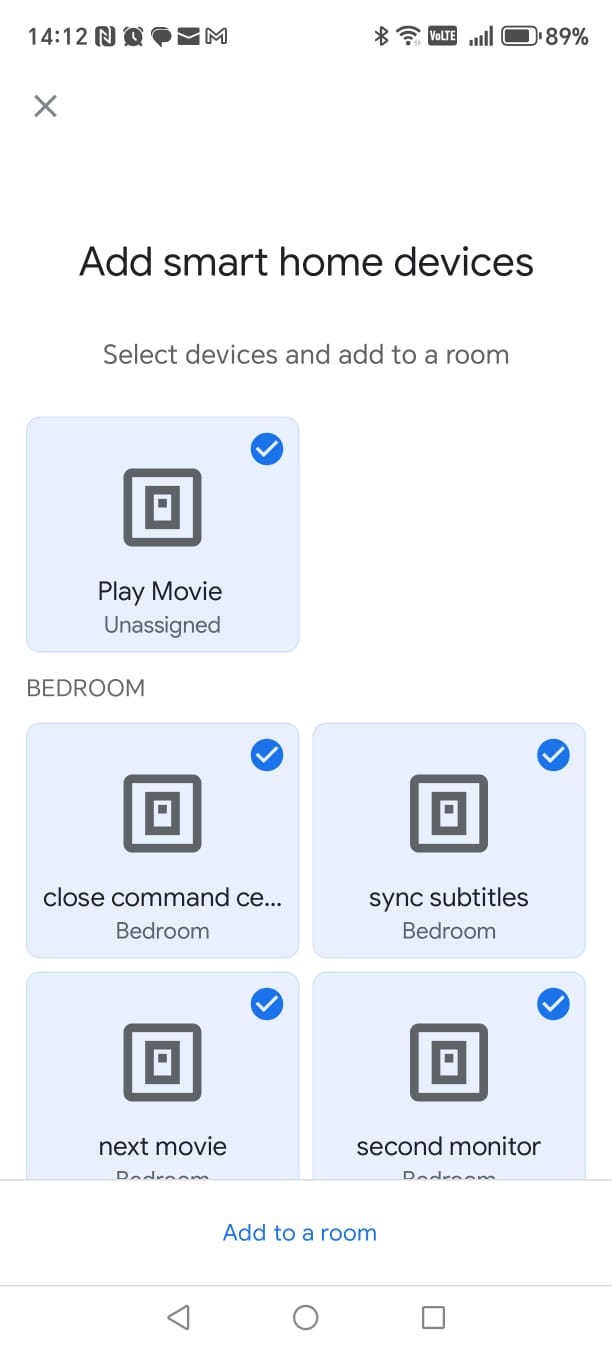
Step 7 — Select all Smart Home Cinema devices
Select (check) every single device.
⚠
Very important:
- scroll all the way down — there are about 24 commands
- enable (check) every single command
If you miss one, some routines may not work later.
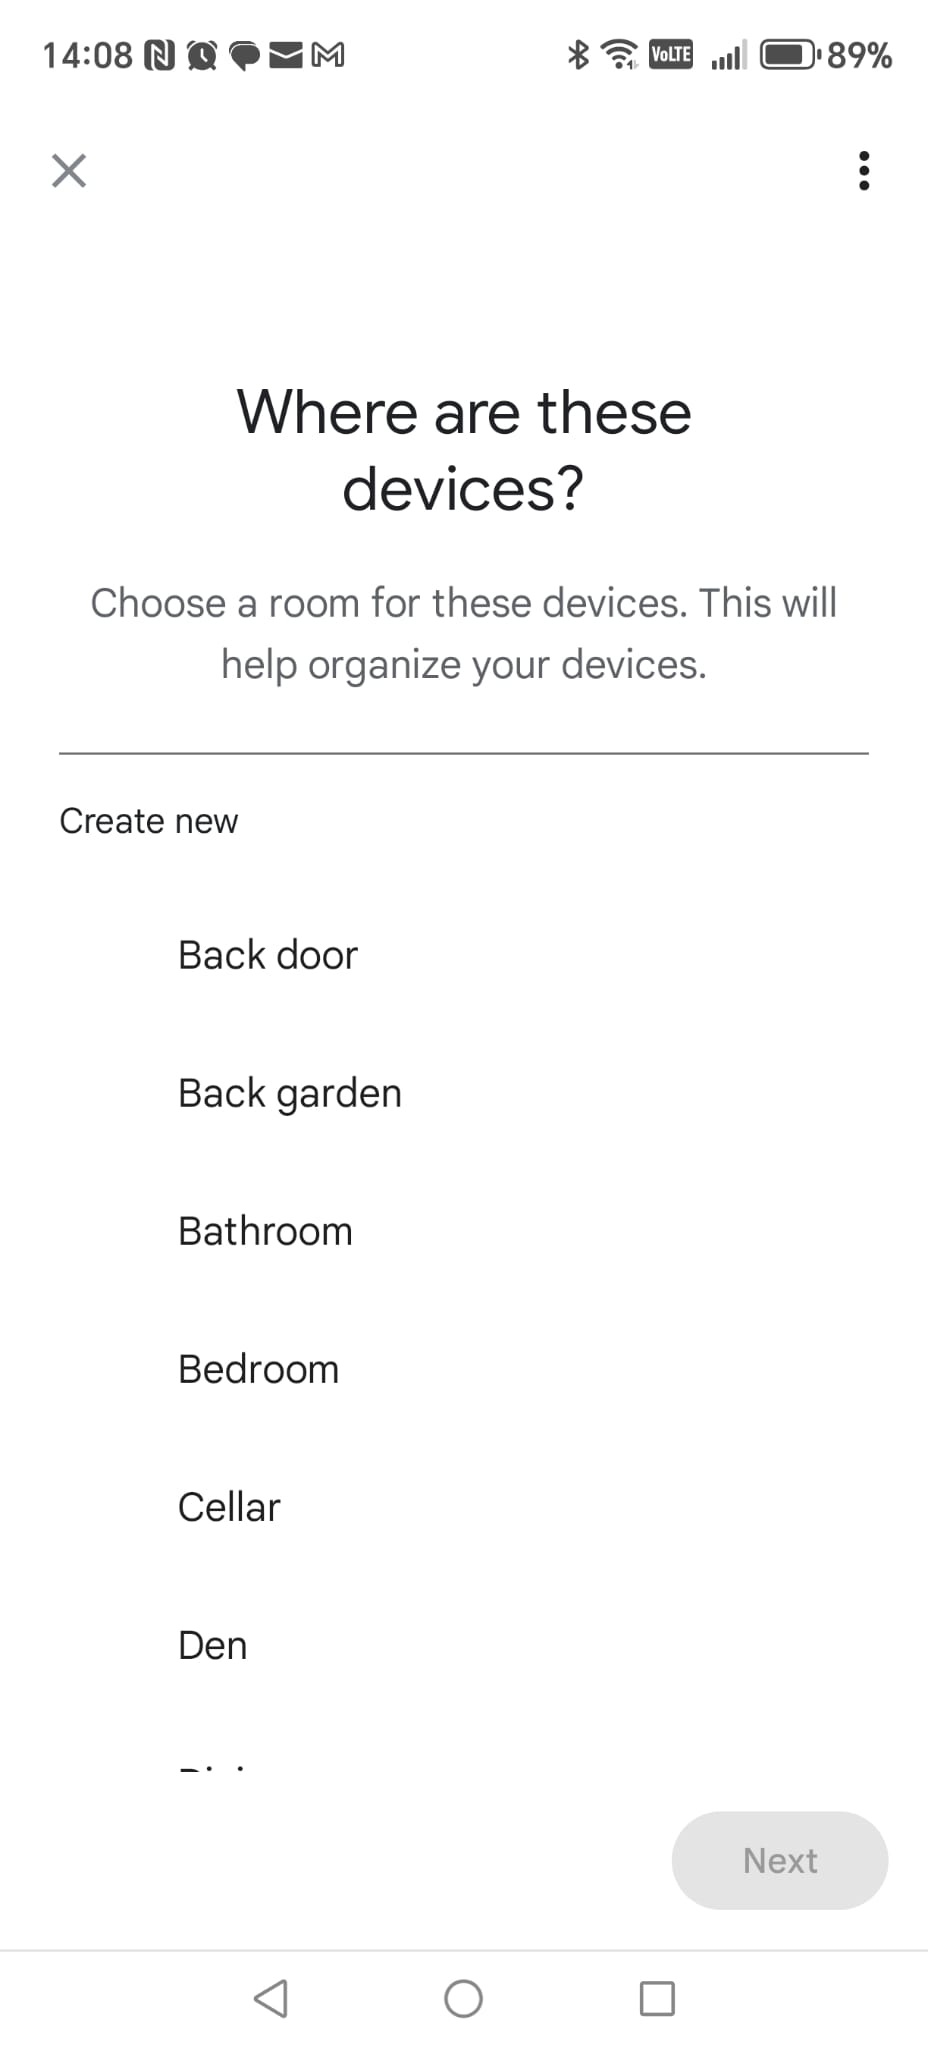
When finished, tap Add to a room.
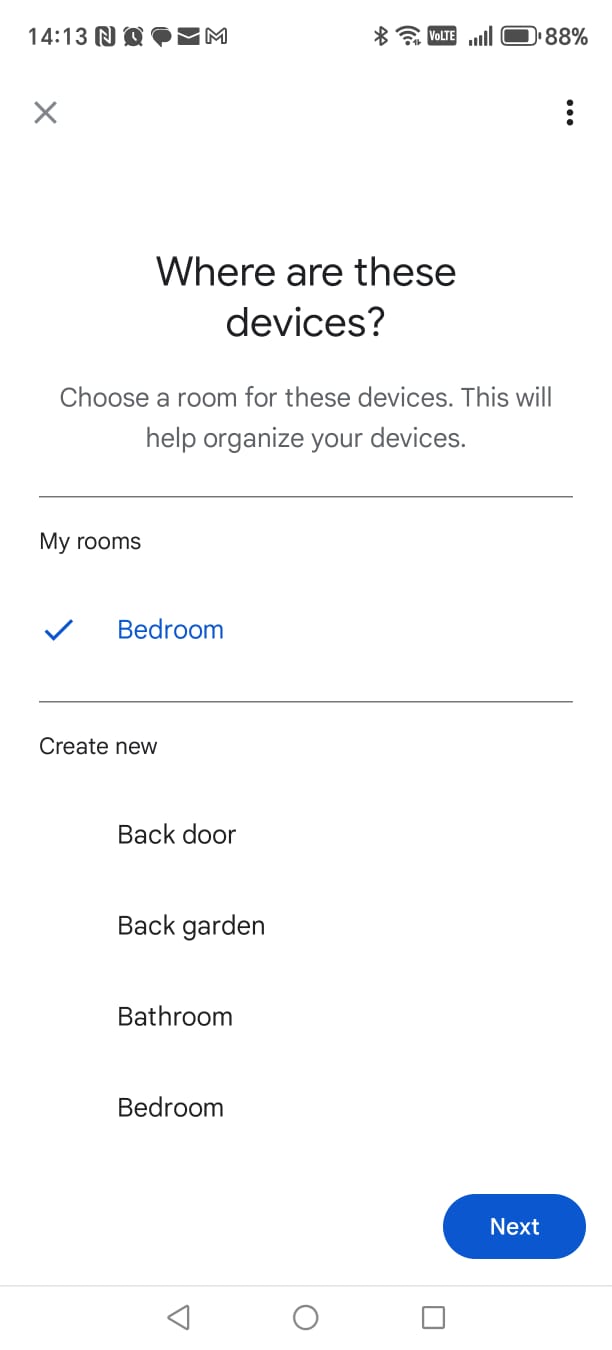
-
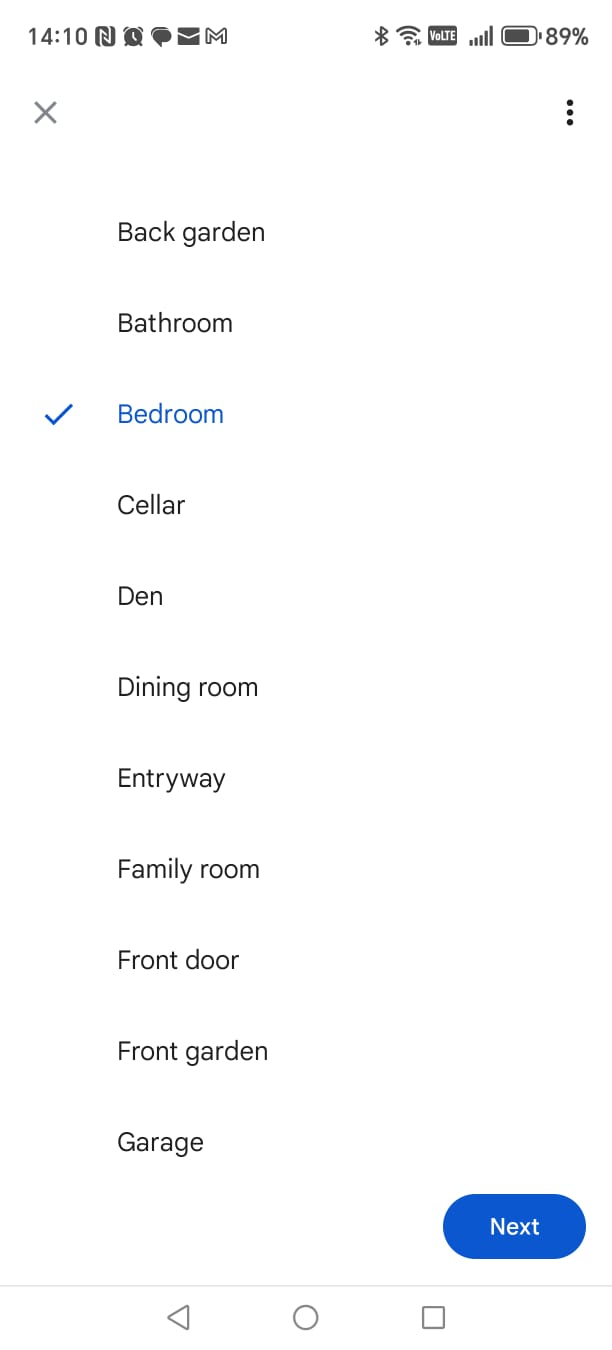
Step 8 — Choose the room
Select the room , then tap Next.
-
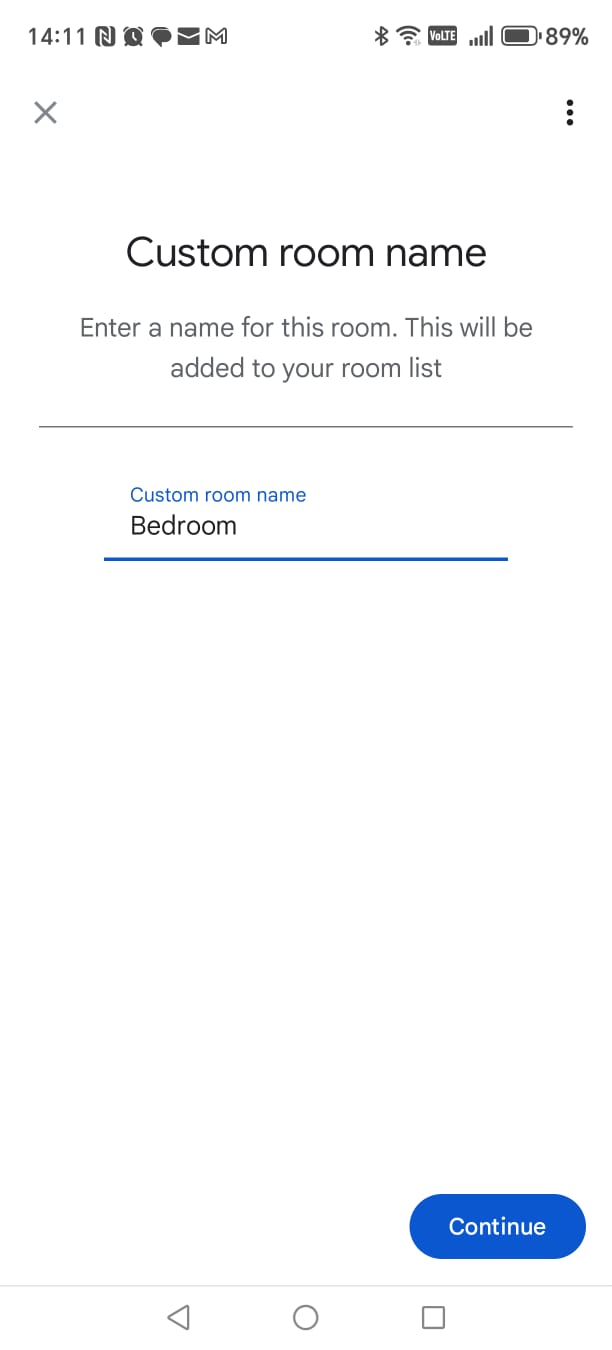
Step 9 — Confirm or create room name
If needed, type a custom room name and tap Continue.
Google Home — Screenshot Gallery (Screenshots 11–20)
Tap any screenshot to enlarge it.
Google Home
Clickable screenshots
10.3 Create Google Routines (Step-by-Step)
-
Step 1 — Select all Smart Home Cinema devices
On this screen, select all Smart Home Cinema devices.
Every icon must show a blue checkmark.
When everything is selected, tap Add to a room.
ℹ
This step only organizes the devices in Google Home.
It does not change how Smart Home Cinema works.
-
Step 2 — Choose the room
Choose the room ,
then tap Next.
-
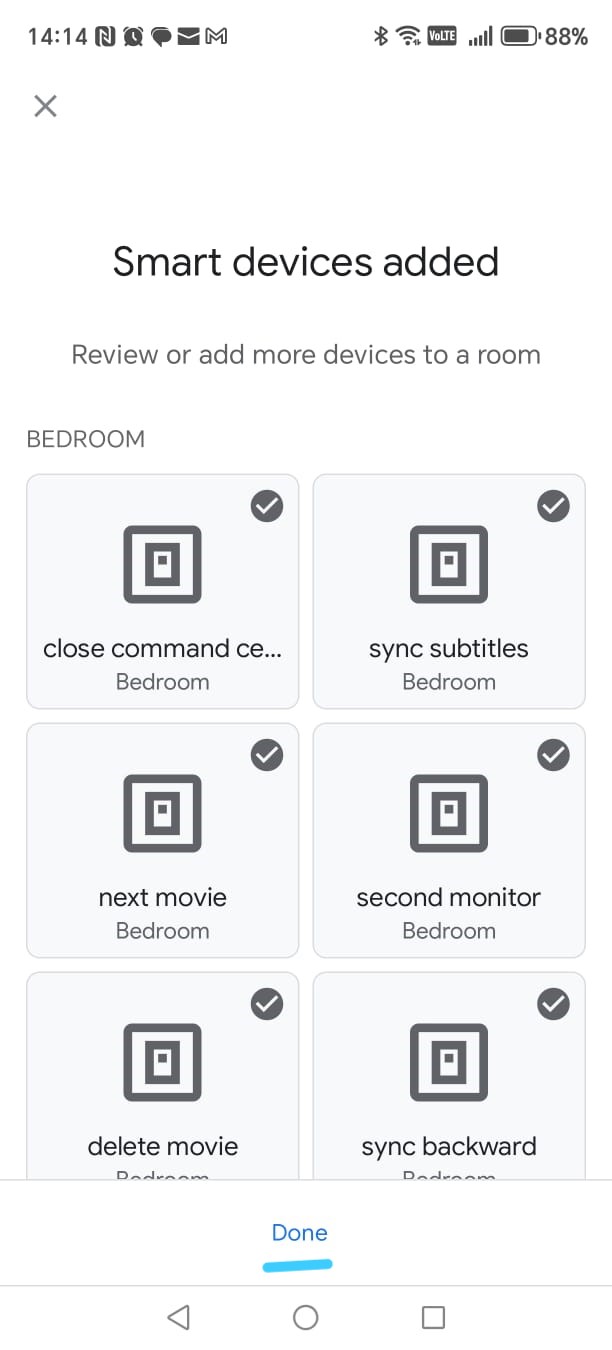
Step 3 — Finish adding devices
Google shows the final list of devices in that room.
If everything looks correct, tap Done.
-
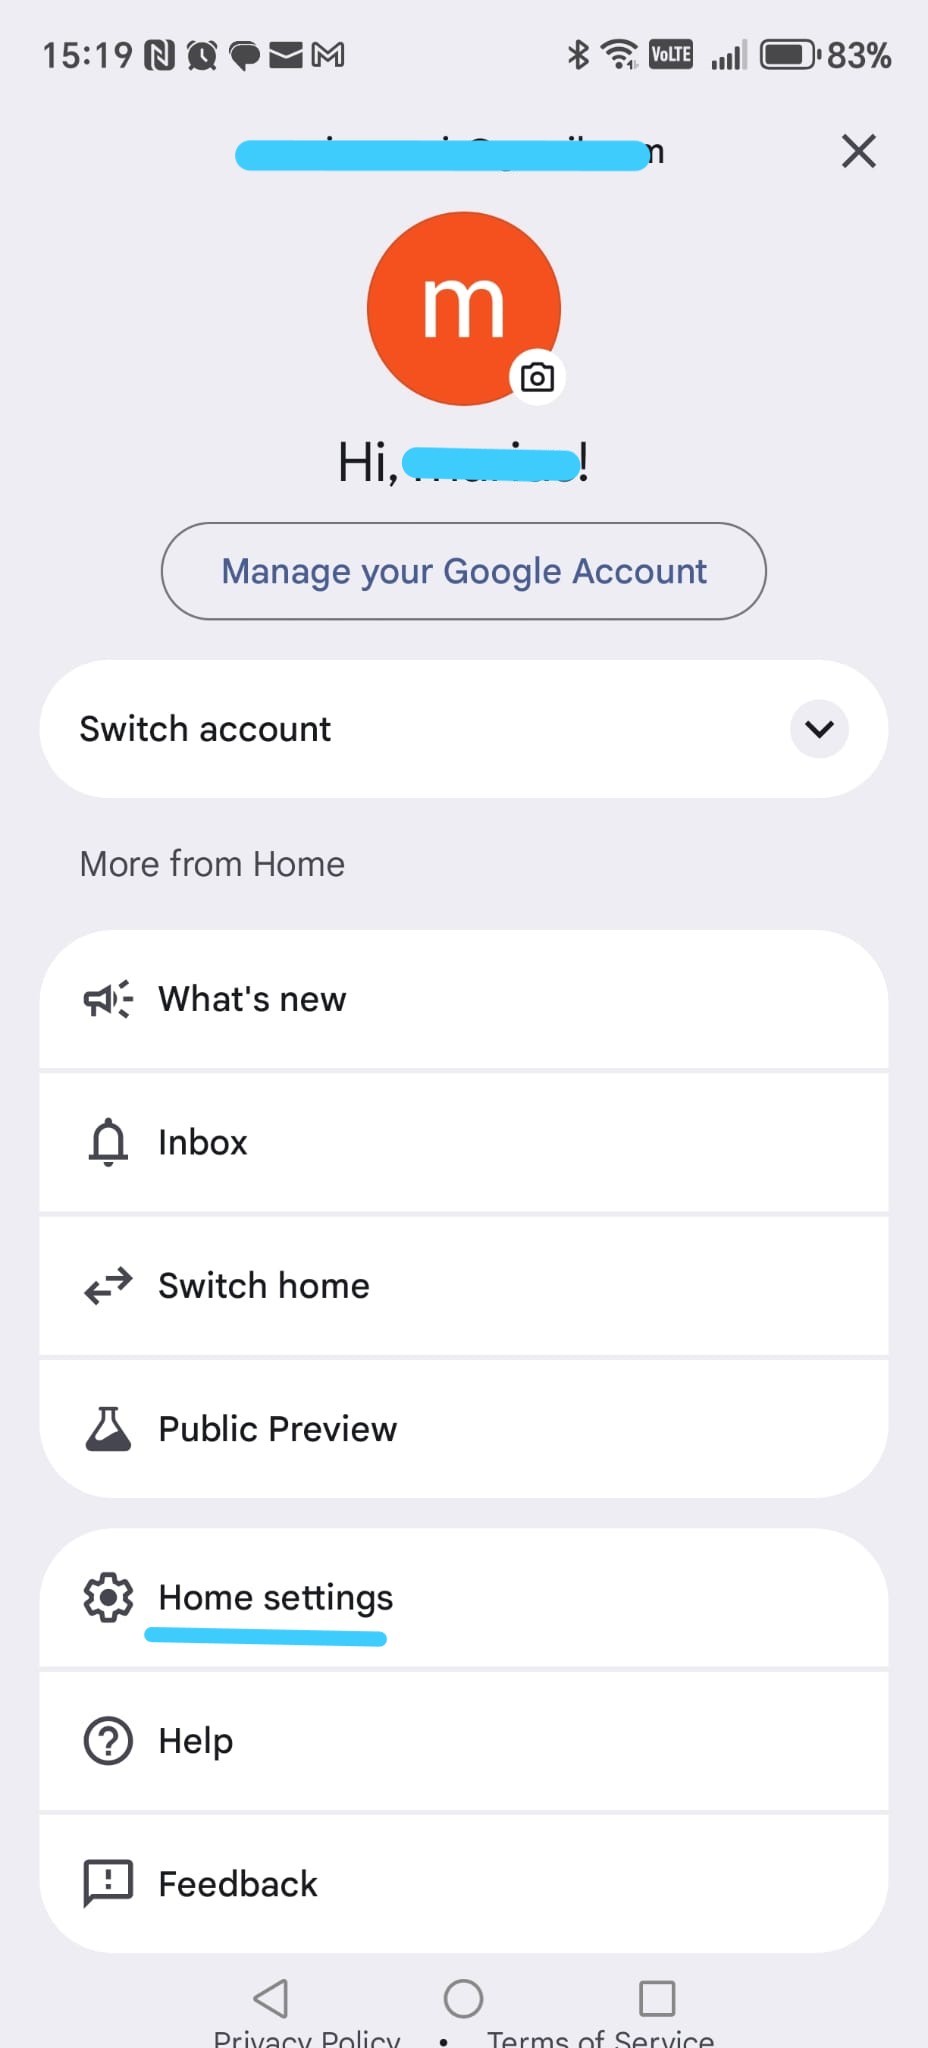
Step 4 — Open Home settings
Go back to the Google Home main screen.
- Tap your profile icon (top-right)
- Select Home settings
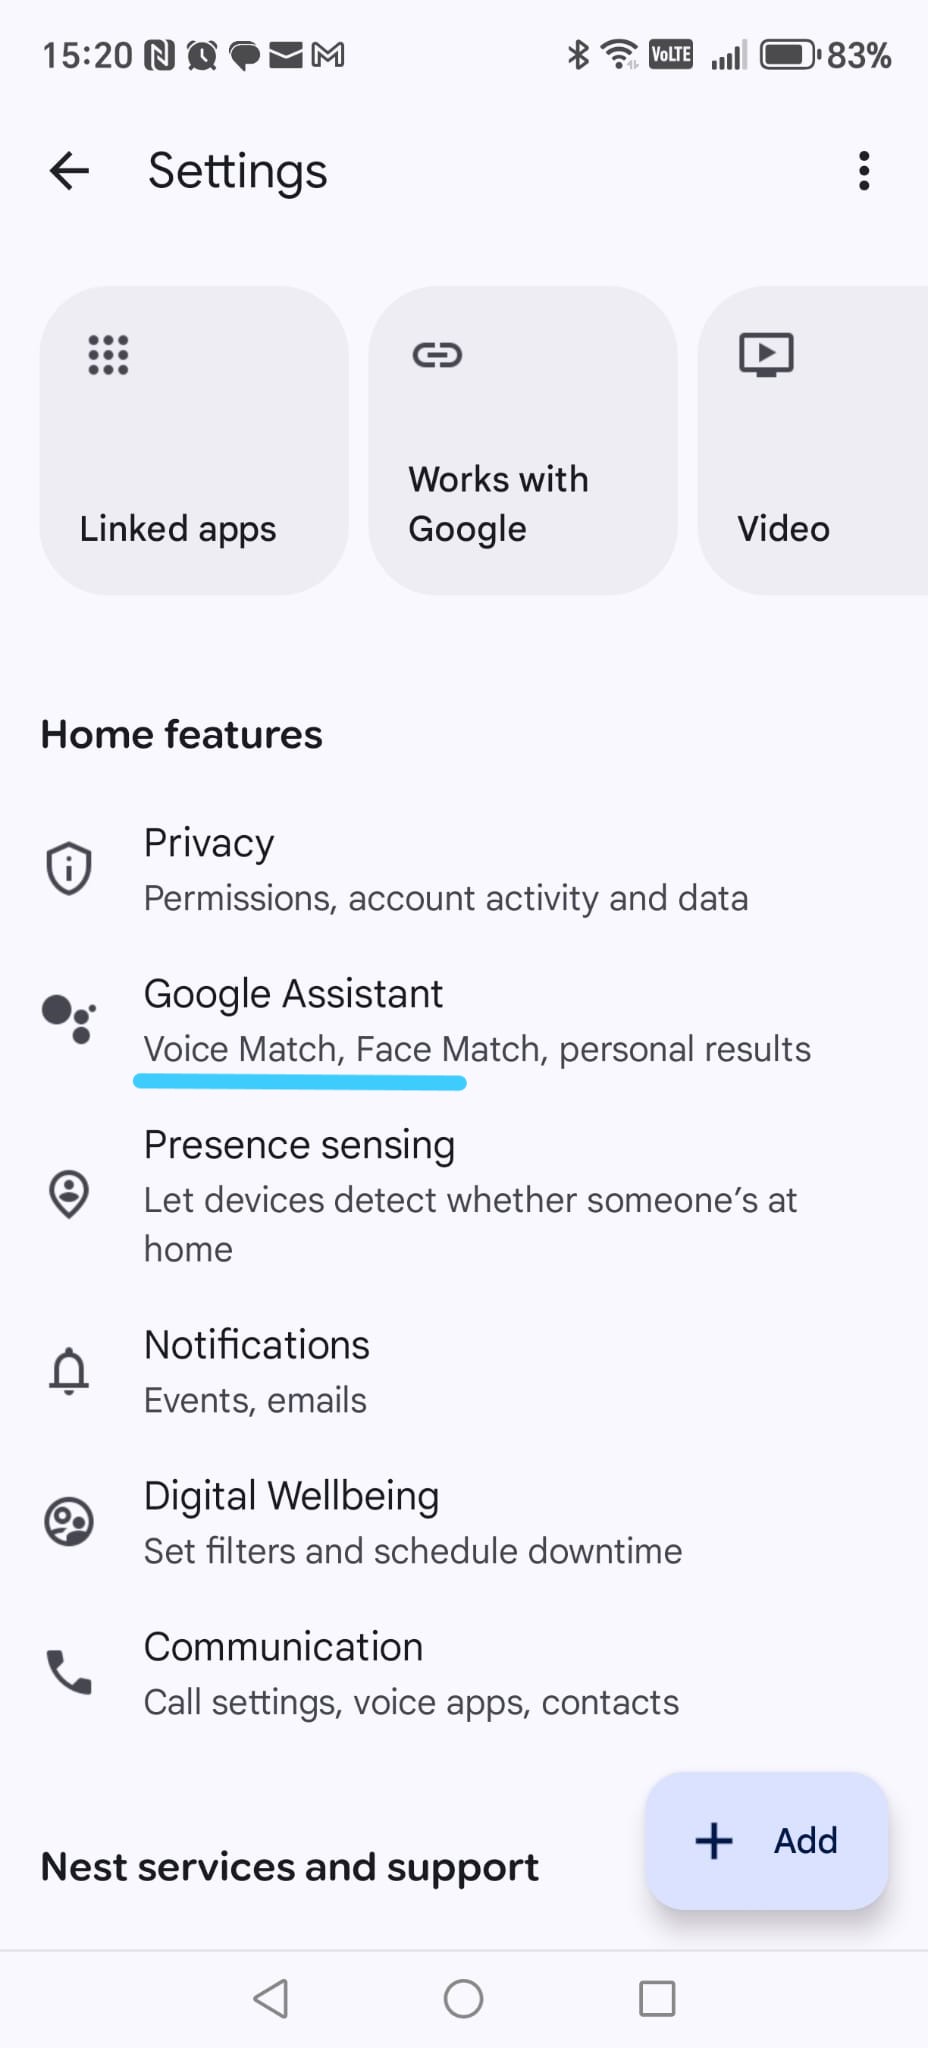
-
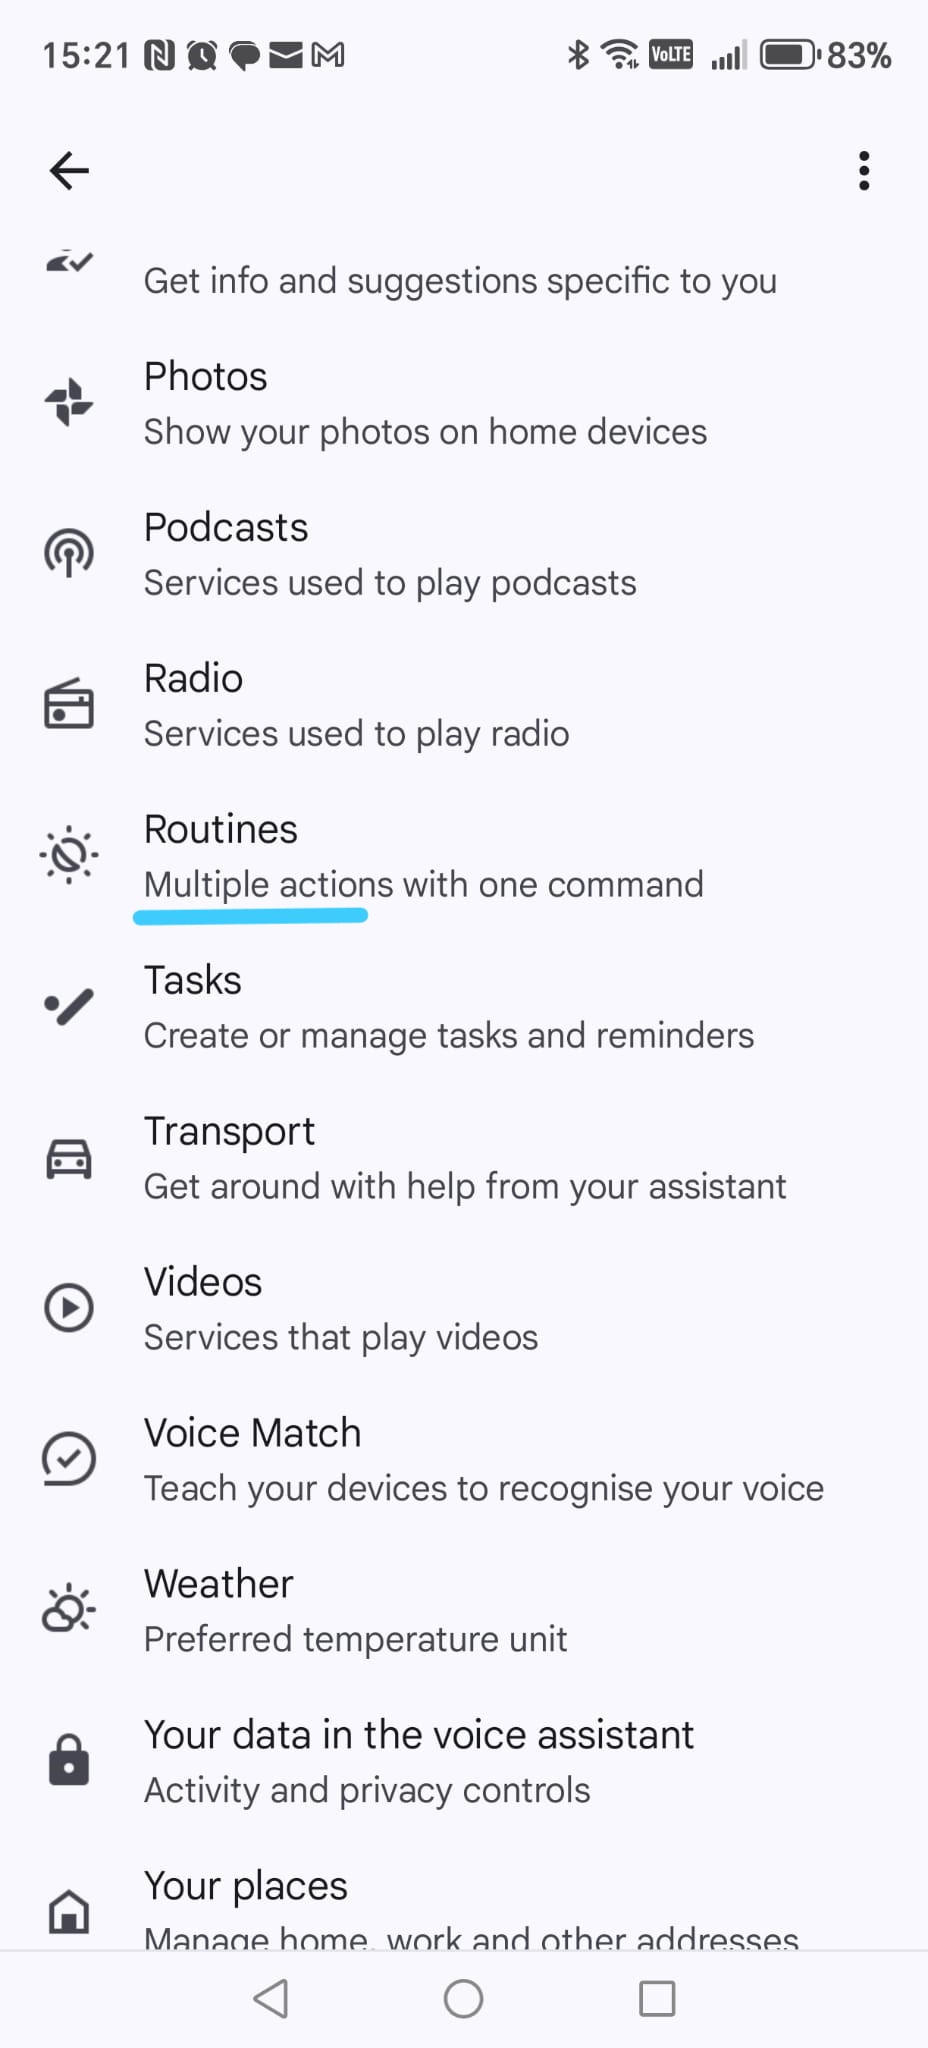
Step 5 — Open Google Assistant settings
In the settings list, tap Google Assistant.
-
Step 6 — Open Routines
Scroll until you find Routines, then tap it.
▶
Routines allow us to trigger Smart Home Cinema commands
using short and natural voice phrases.
-
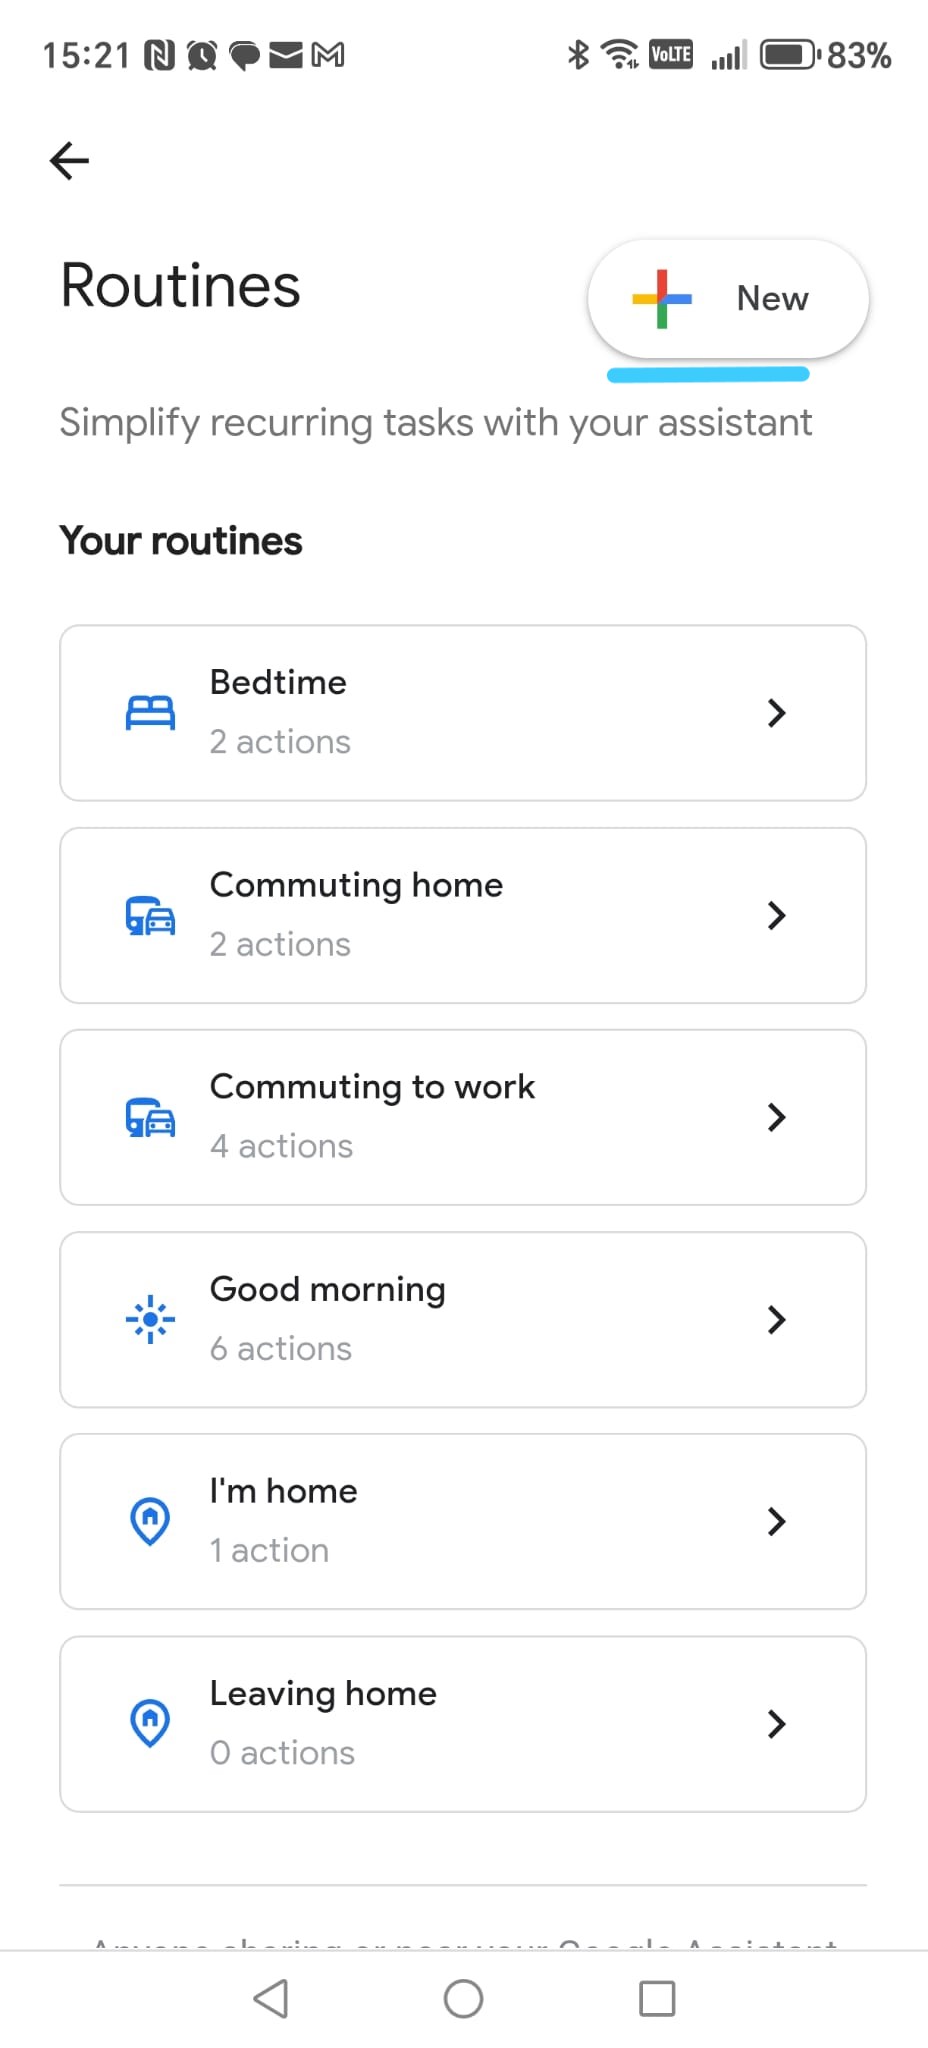
Step 7 — Create a new routine
Tap New (top-right).
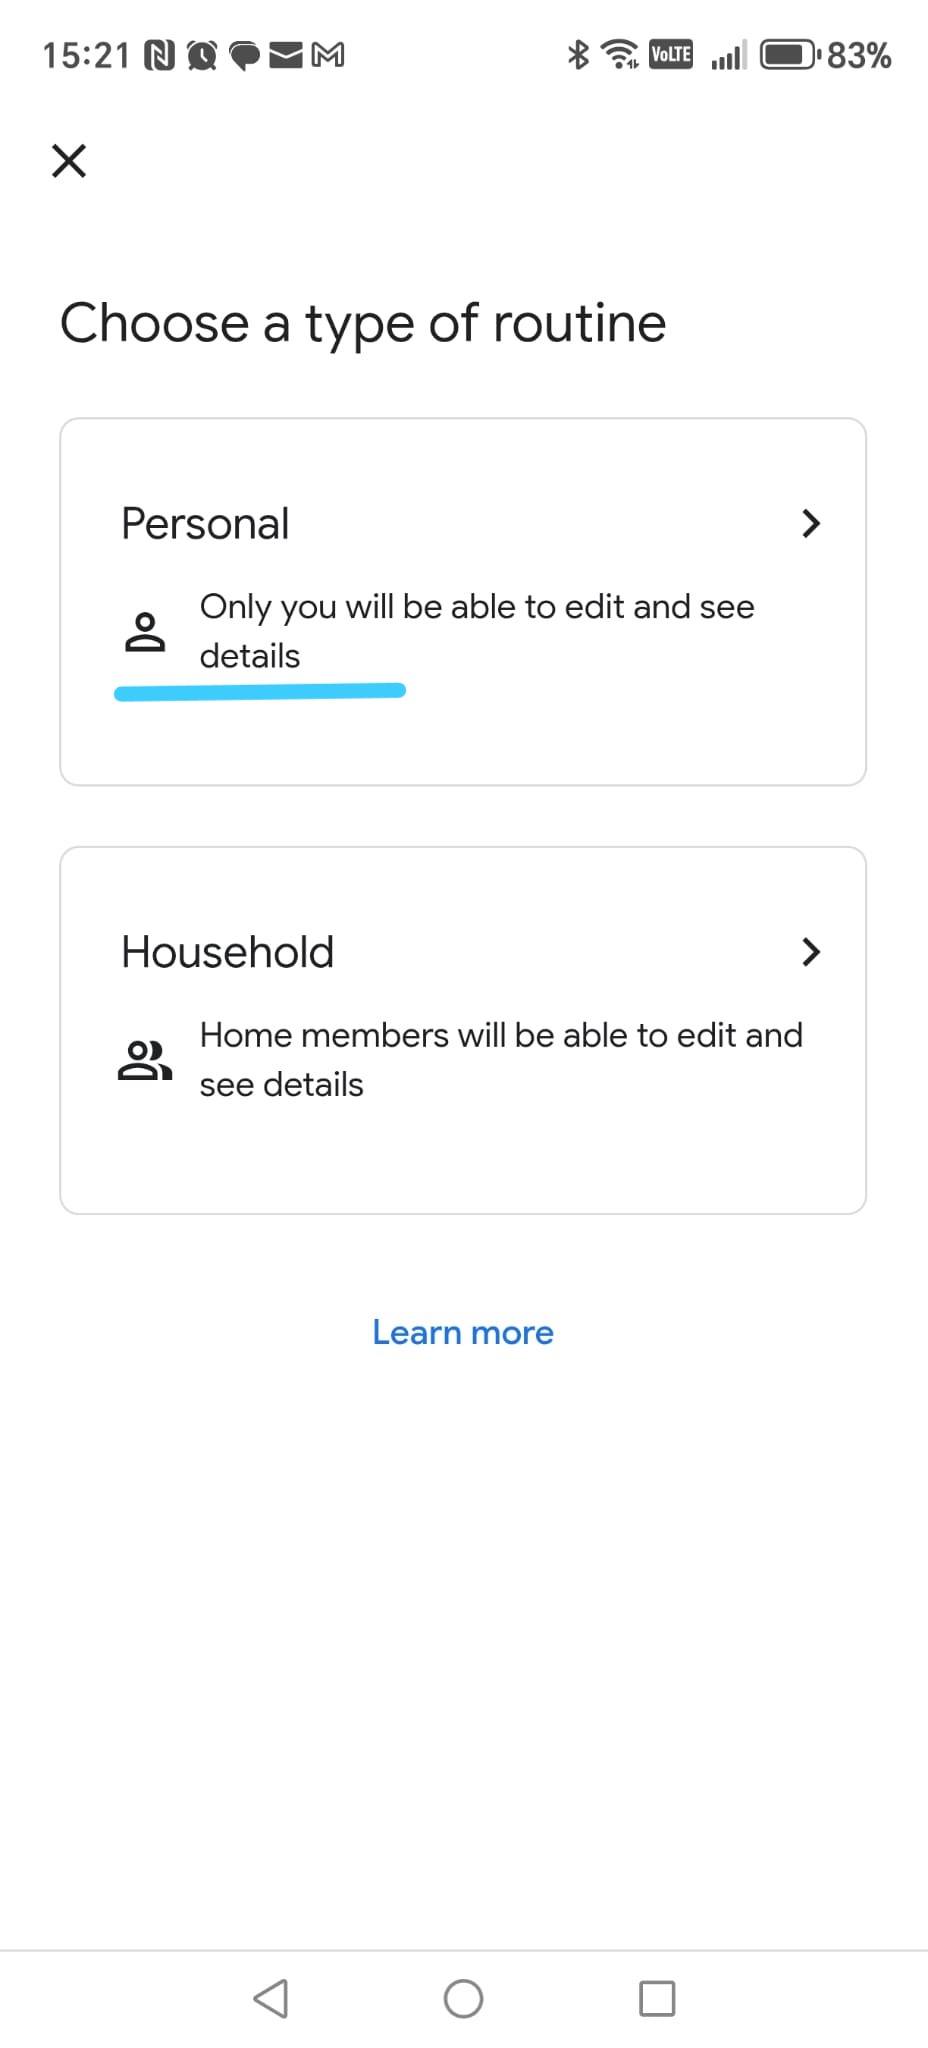
-
Step 8 — Choose Personal routine
Select Personal.
-
Step 9 — Routine editor
You now see the routine editor.
- Starters – what you say
- Actions – what Google will do
Tap Add starter to continue.
Google Assistant — Screenshot Gallery (Steps 21–30)
These screenshots are displayed as thumbnails. Click any image to enlarge it.
Google Assistant
Clickable screenshots
Step 4 — Create the “Play movie” routine
-
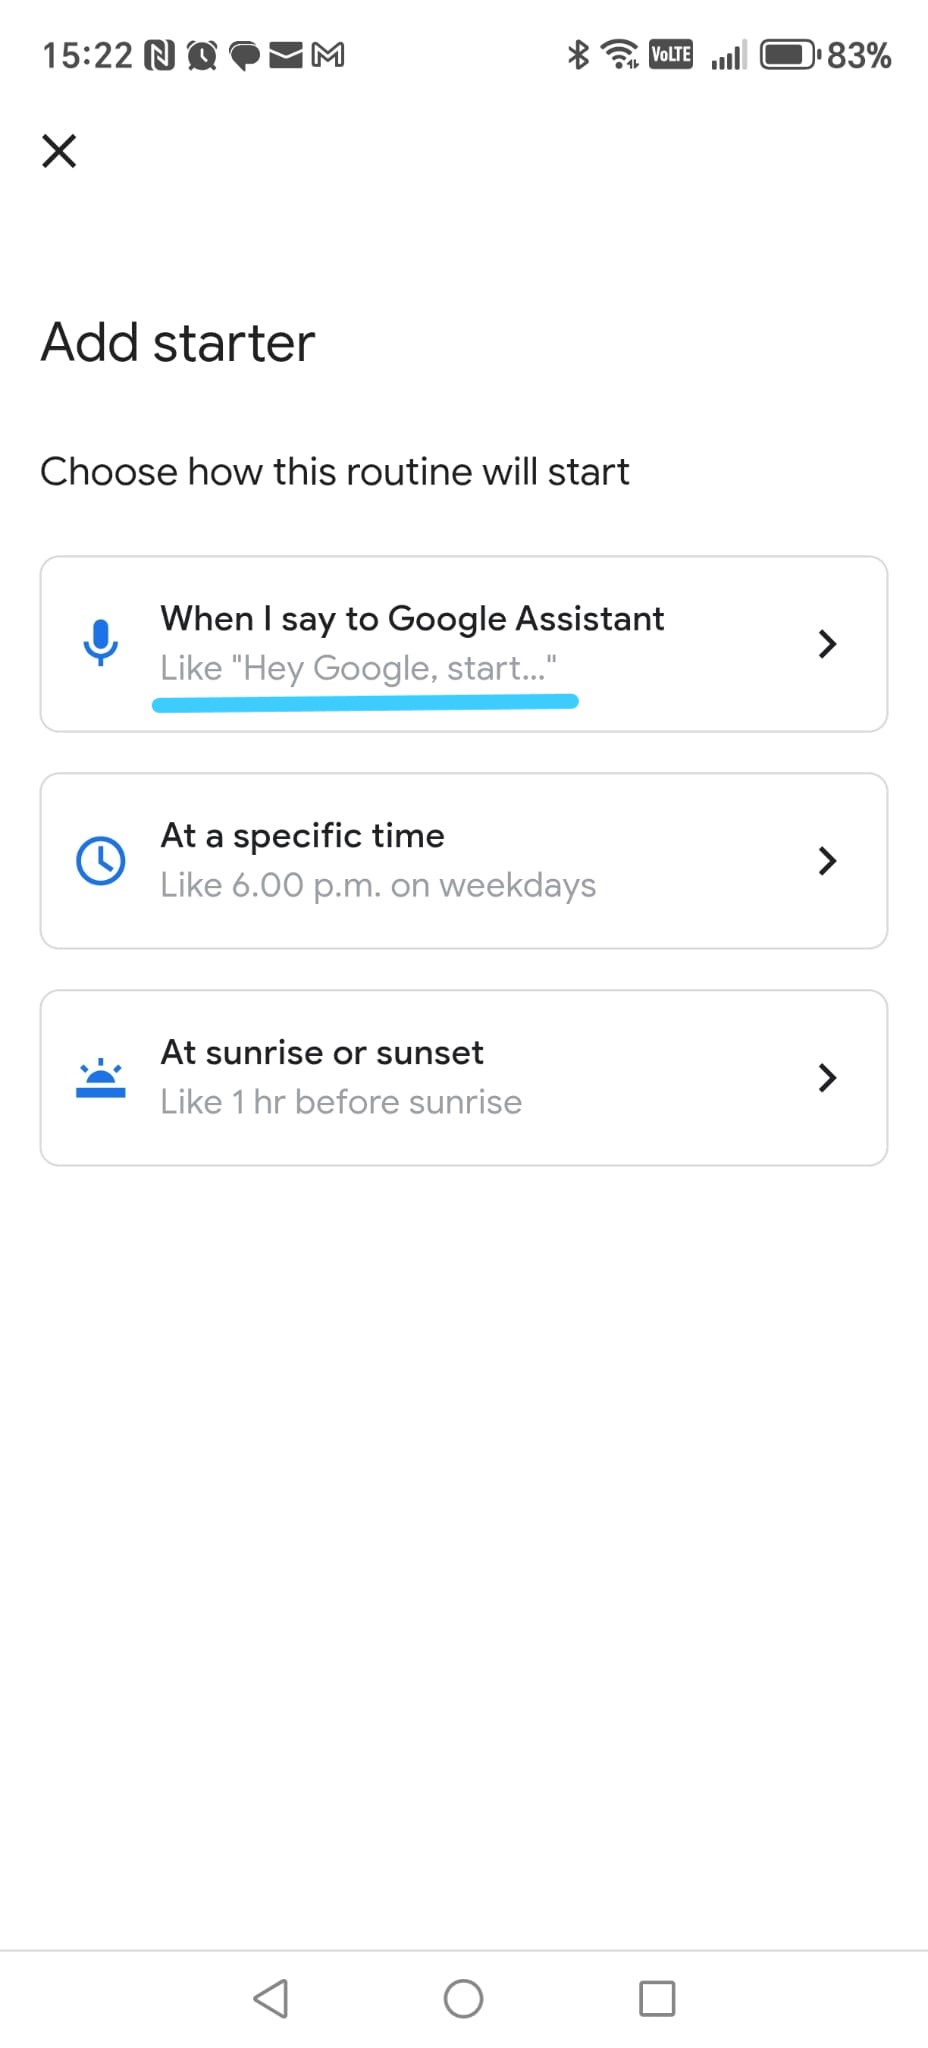
Step 1 - Choose a voice-based starter
In the Add starter screen, tap
When I say to Google Assistant
(first option with the blue microphone icon).
-
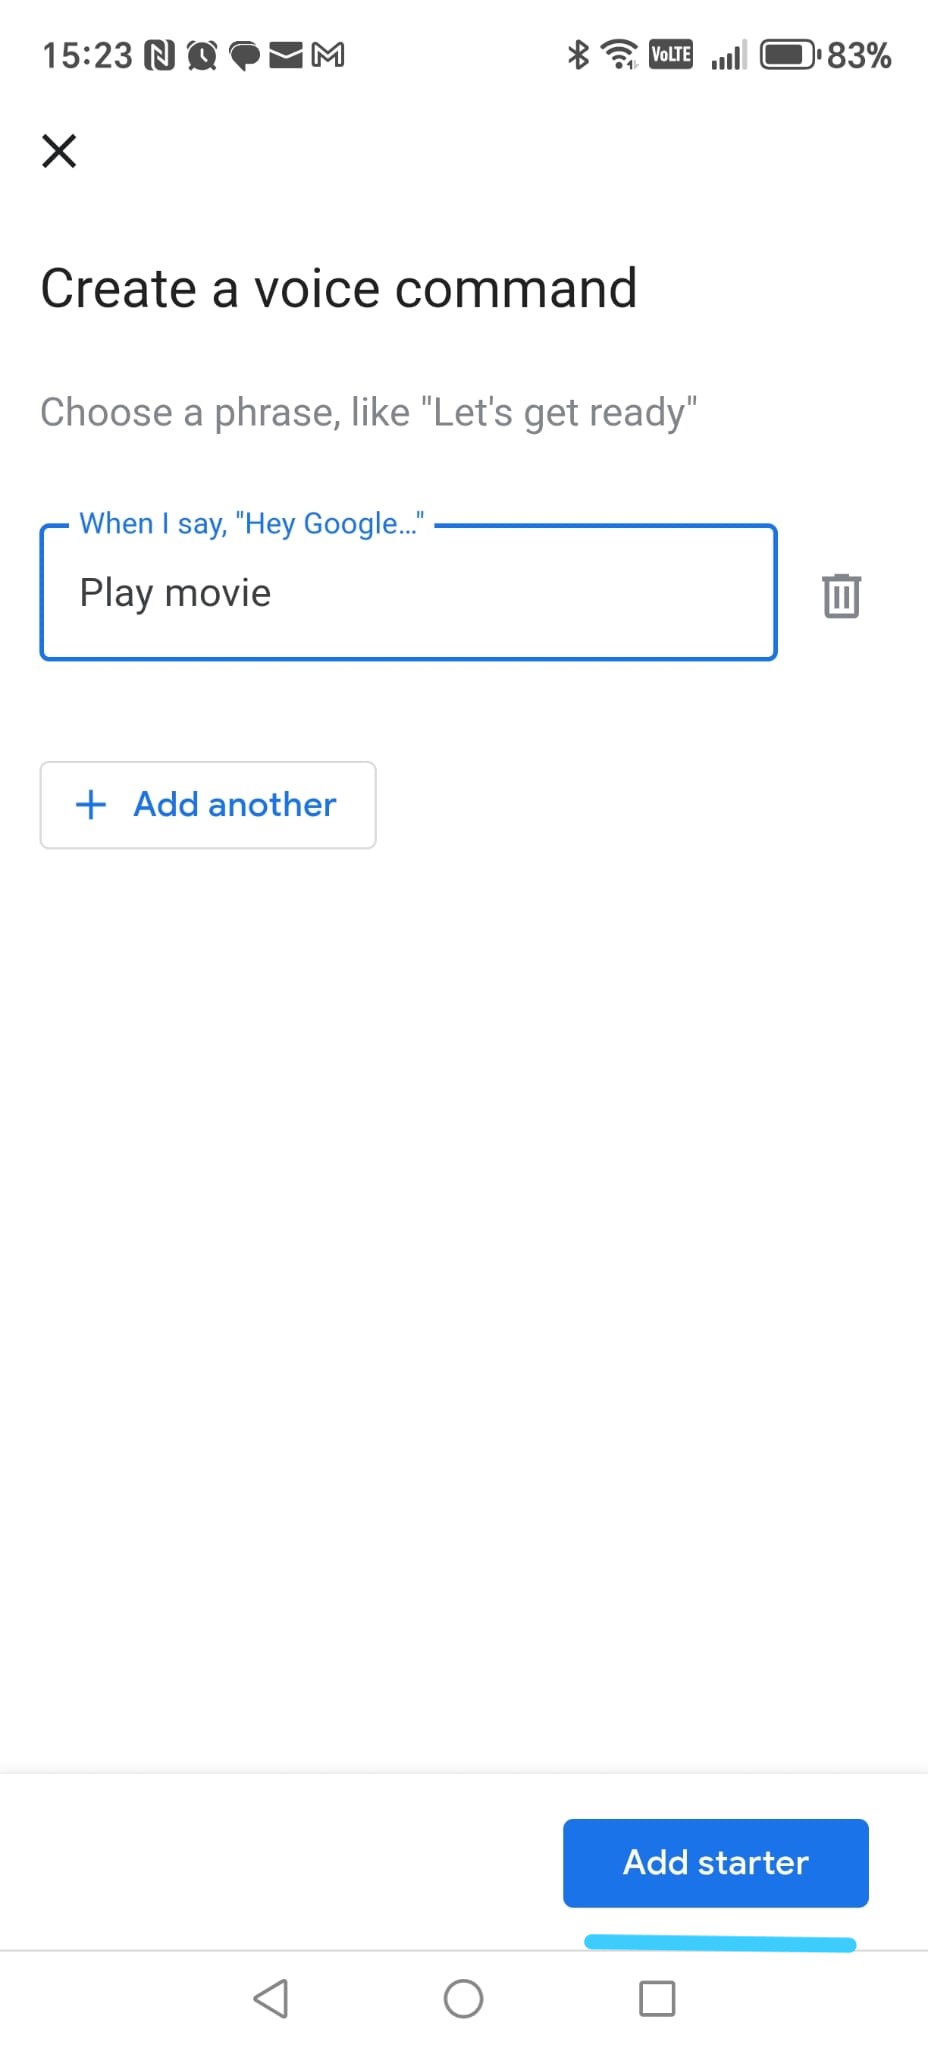
Step 2 - Open the voice command editor
Google Assistant opens the Create a voice command screen.
The text field is empty.
-
Step 3 - Enter the “Play movie” phrase
In the text field, type exactly: Play movie.
Then tap Add starter at the bottom to confirm.
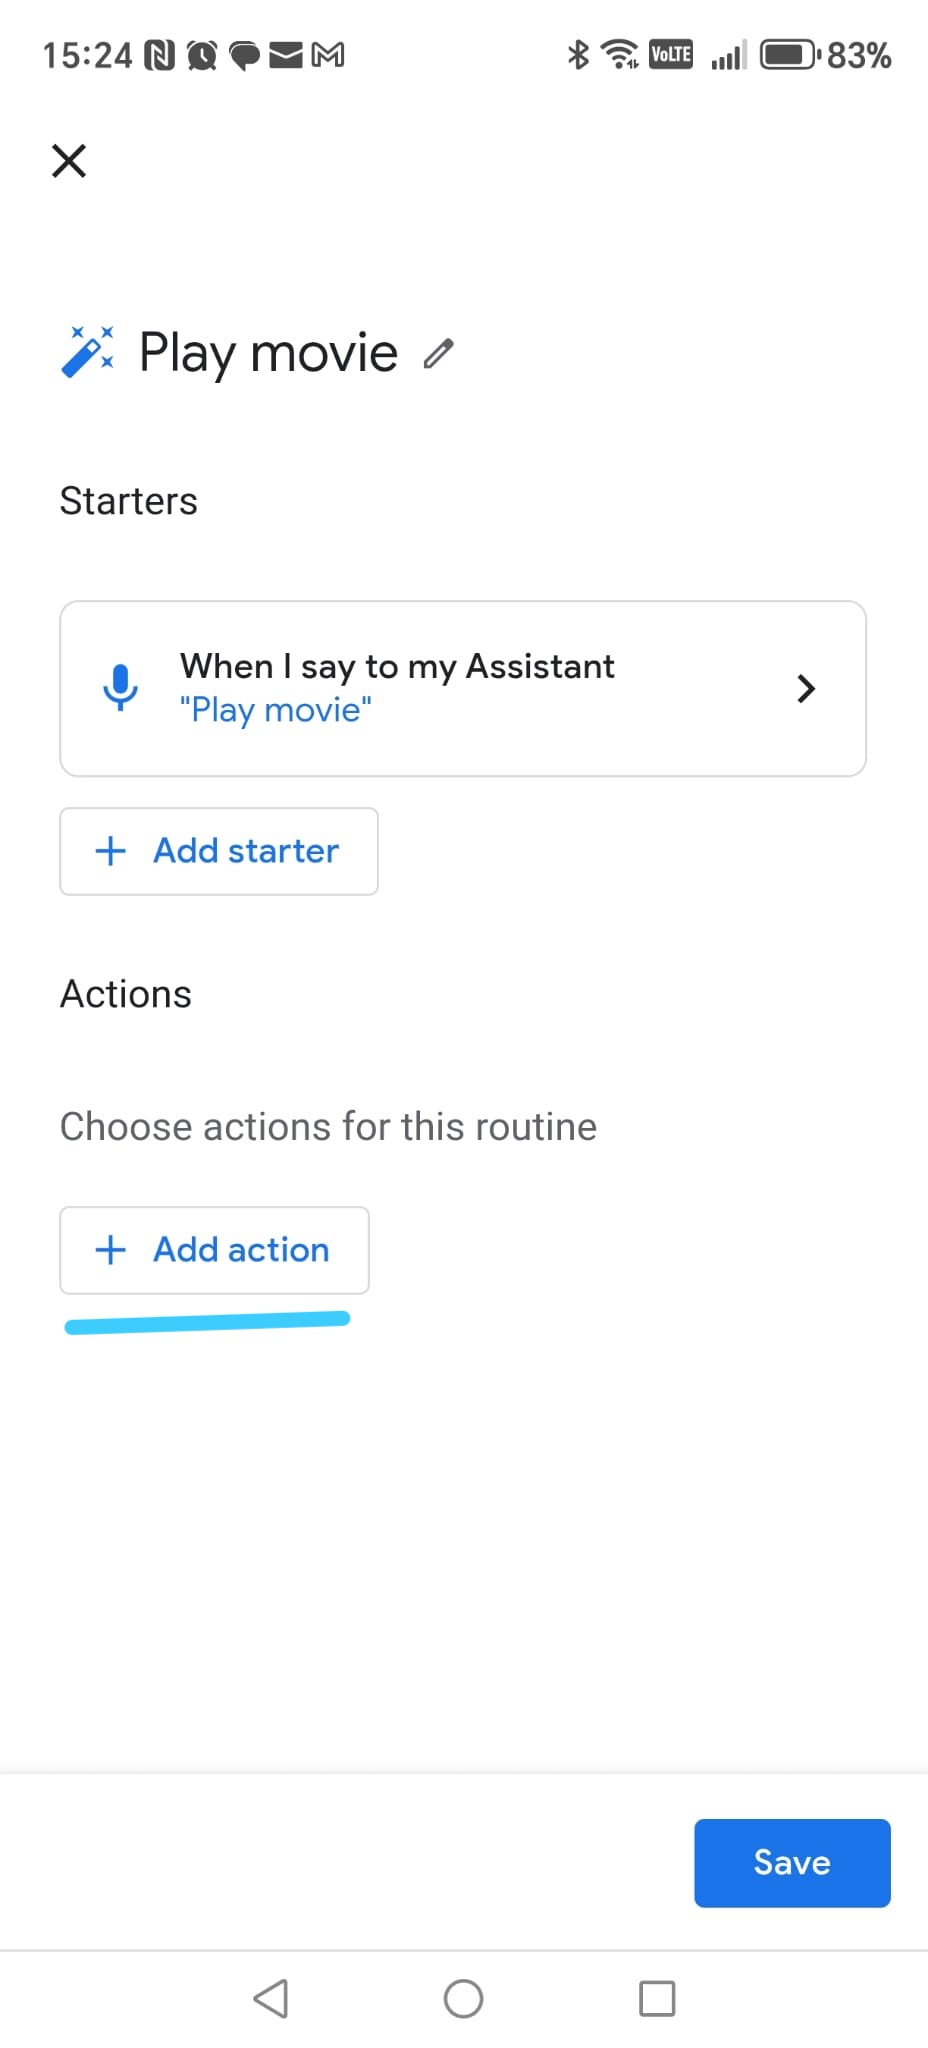
-
Step 4 - Add an action
Back on the routine screen, tap Add action.
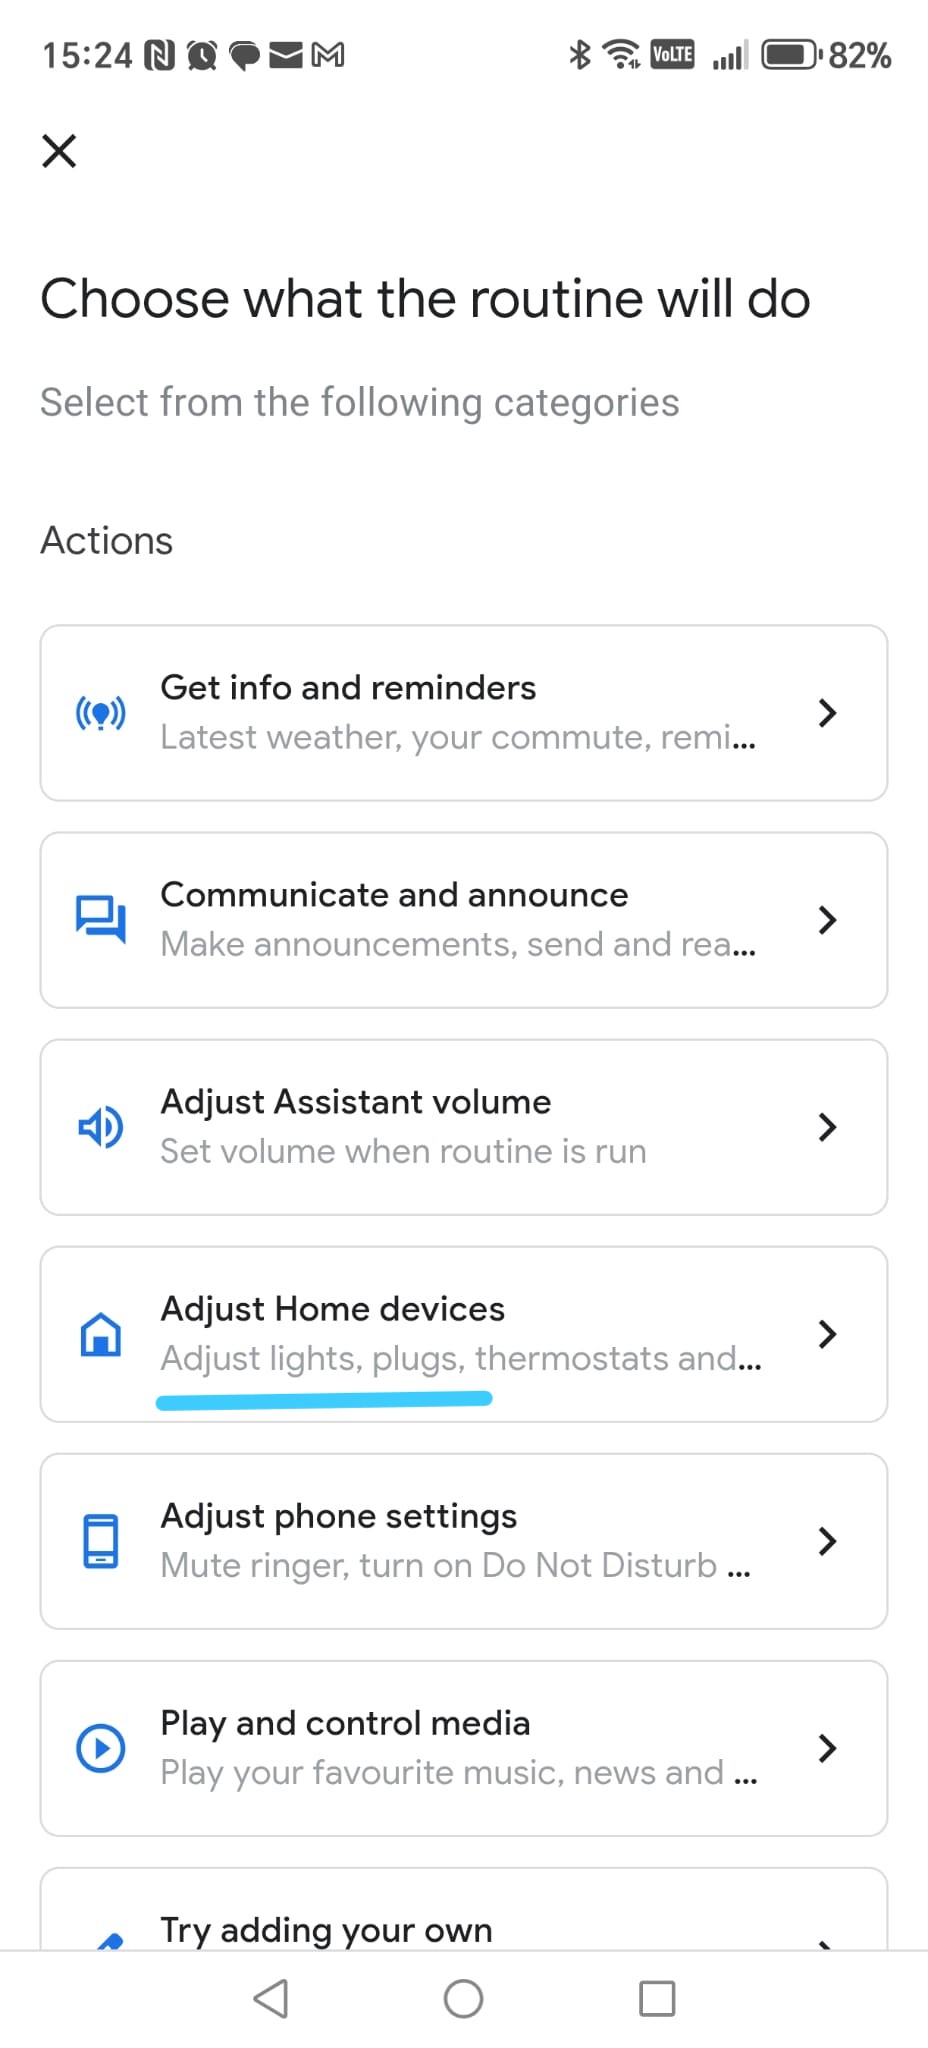
-
Step 5 - Choose Home device control
From the list of categories, select Adjust Home devices.
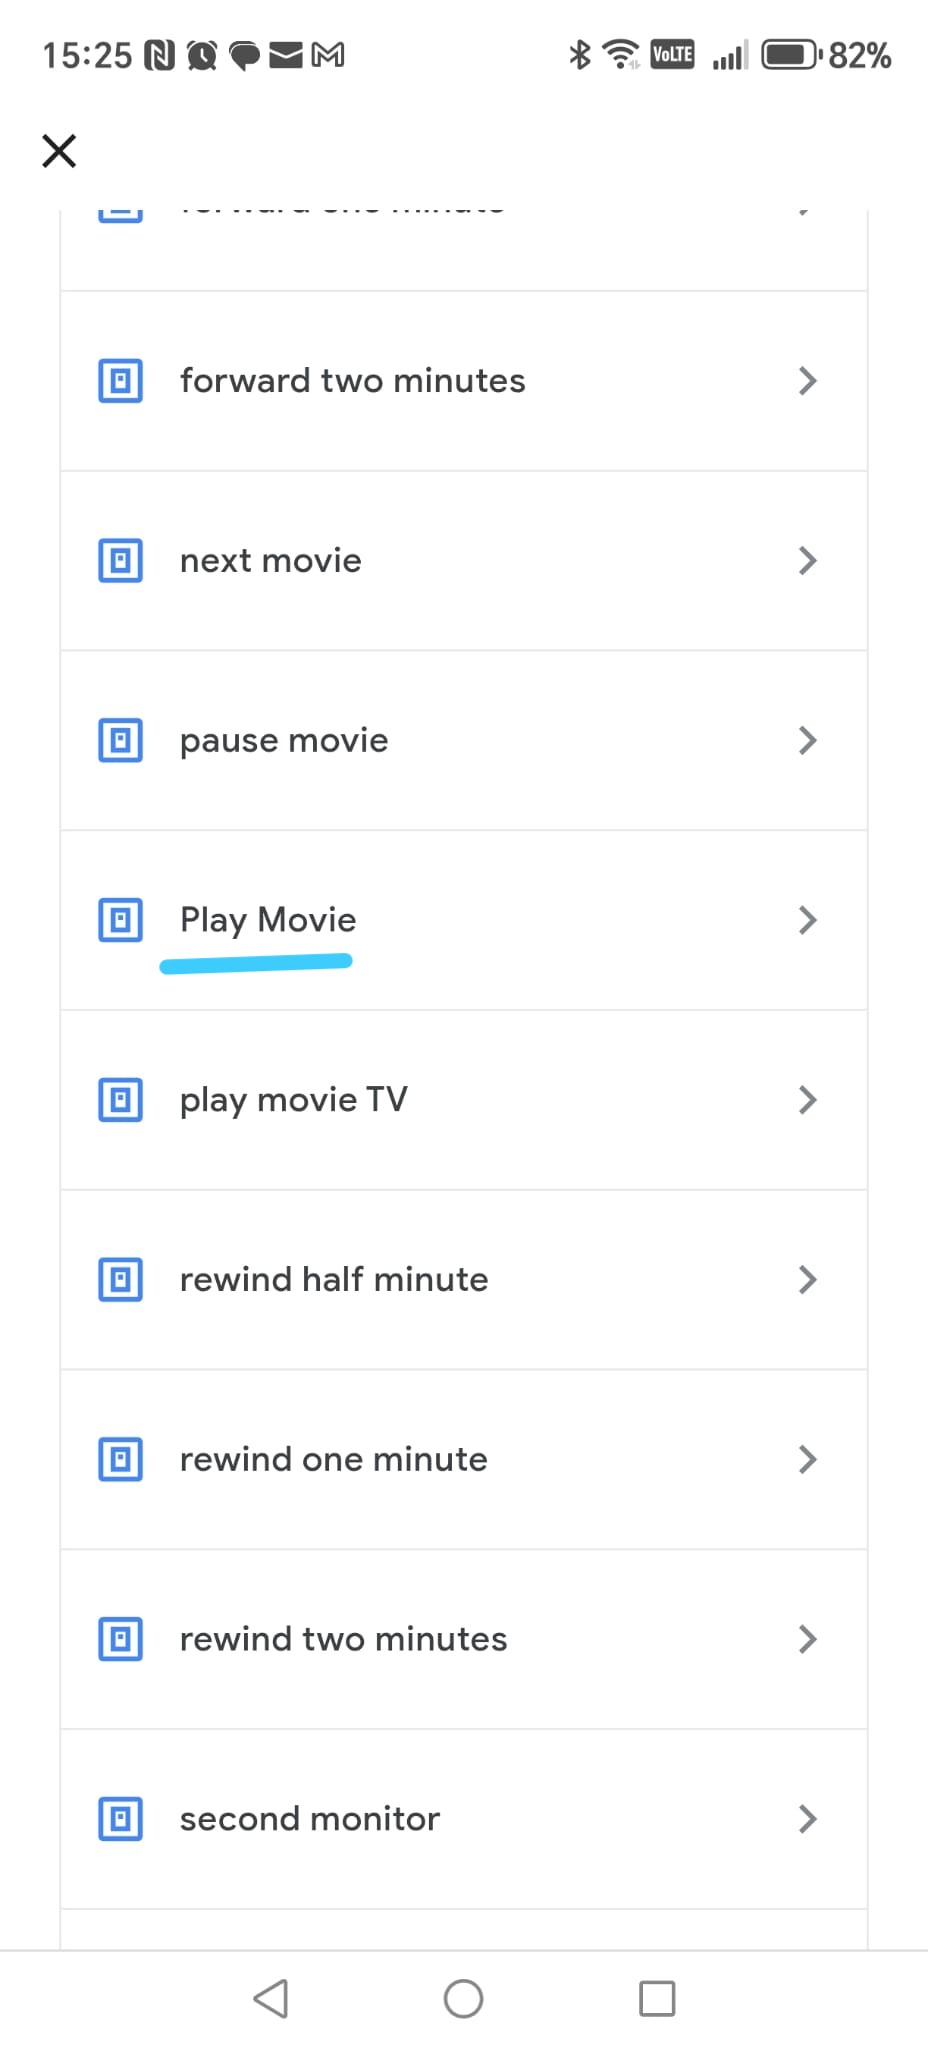
-
Step 6 - Select the “Play Movie” device
Scroll through your smart devices list and tap
Play Movie.
This is the Smart Home Cinema virtual device.
-
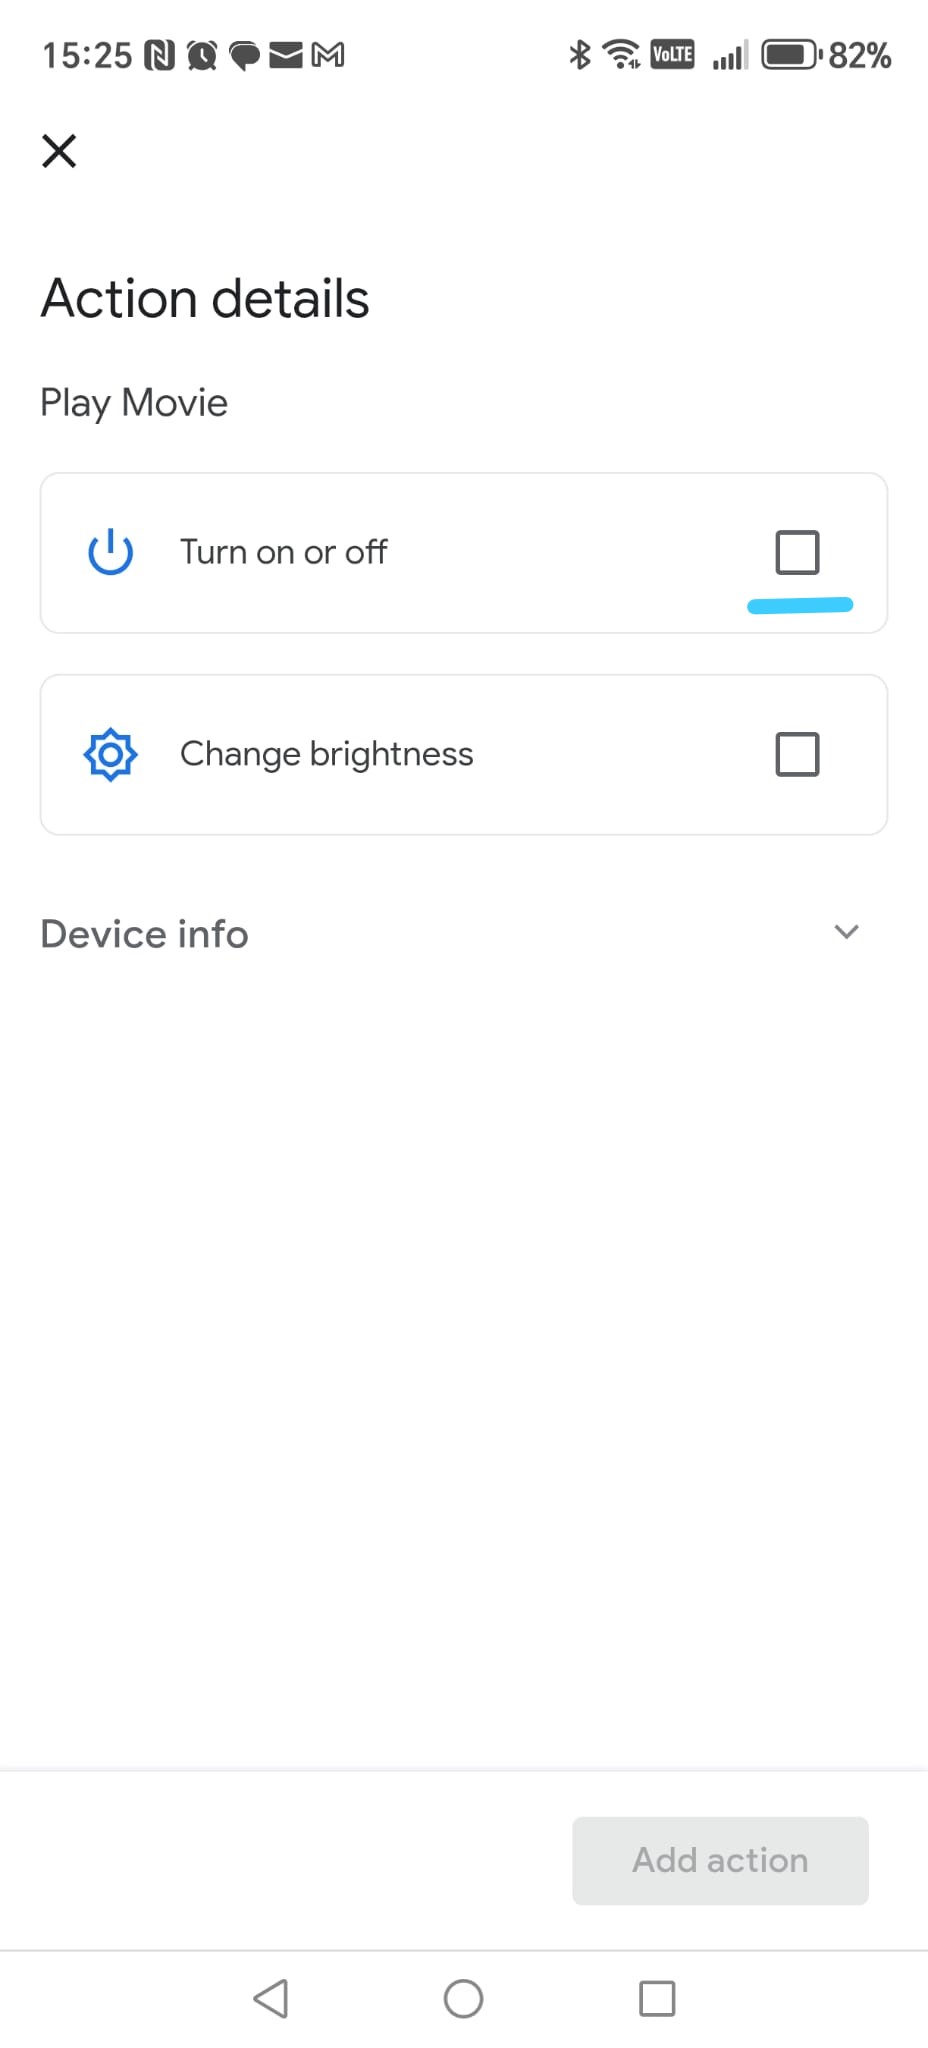
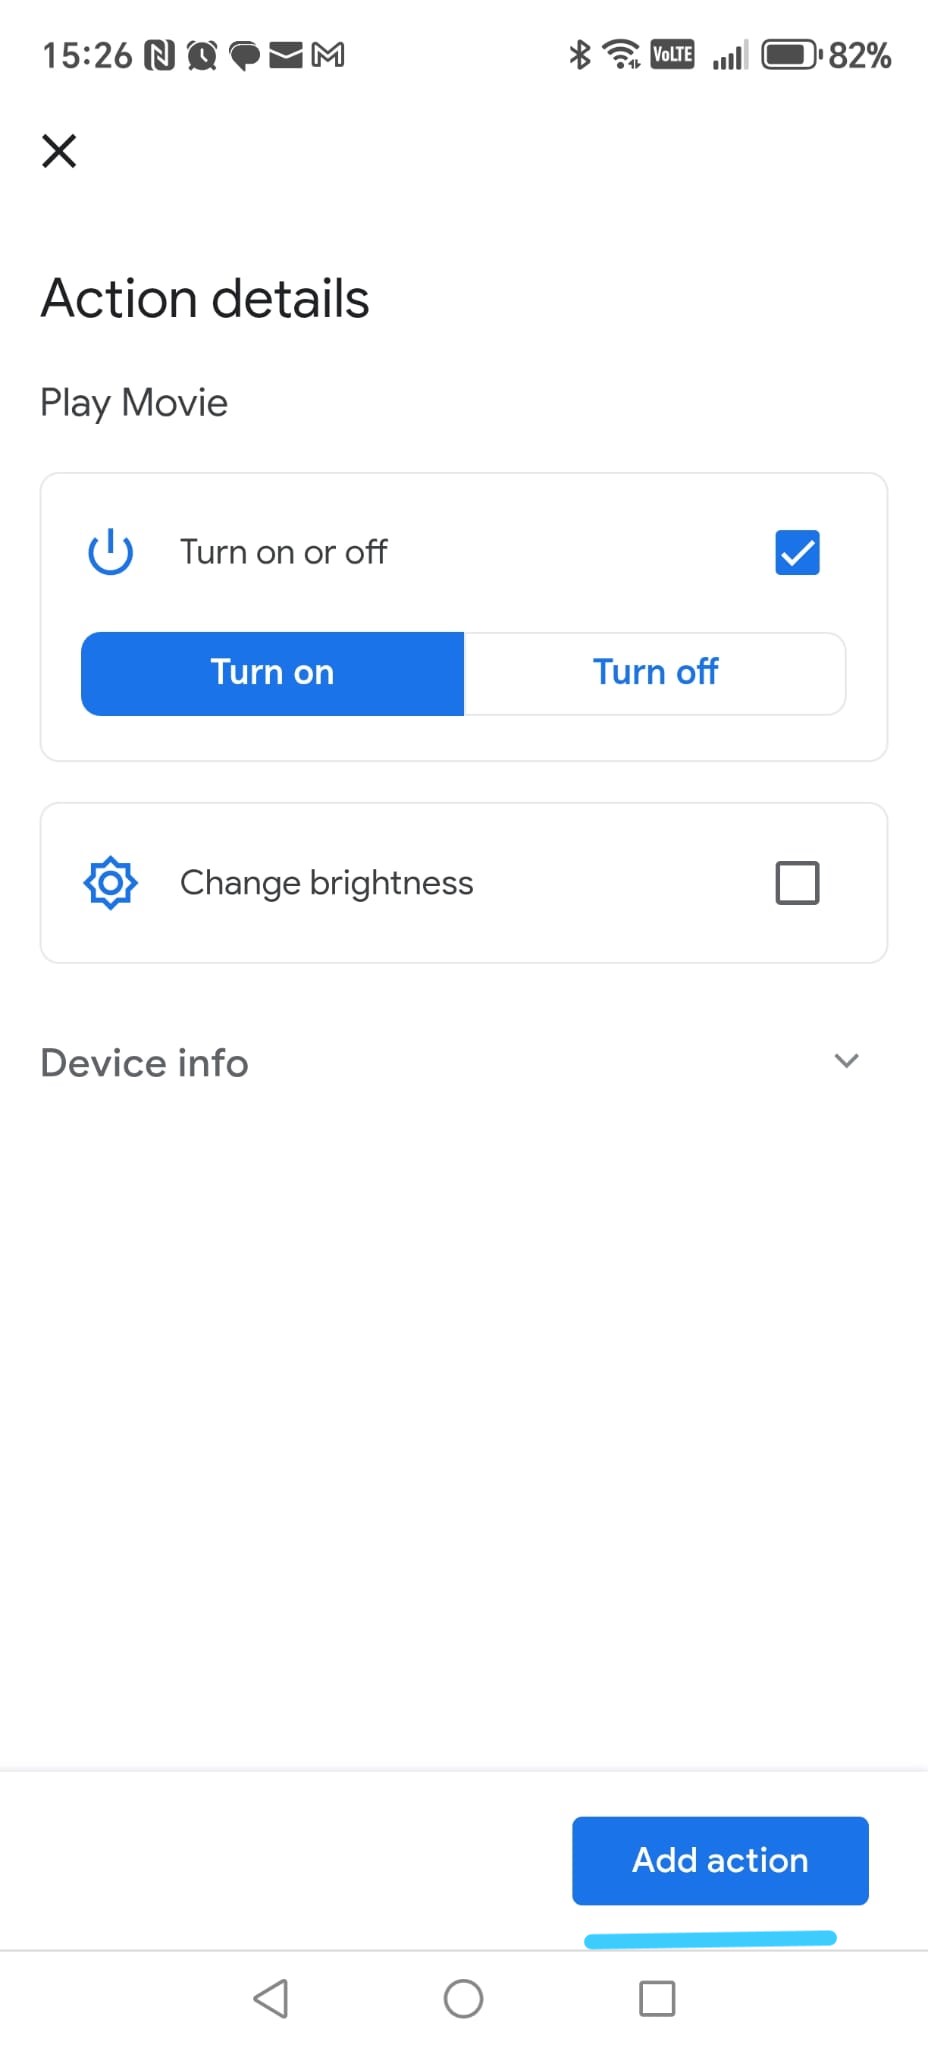
Step 7 - Turn the device ON
On the Action details screen:
- Tap Turn on or off.
- Make sure Turn on is selected.
- Leave all other options unchanged.
-
Step 8 - Confirm the action
Tap Add action at the bottom right.
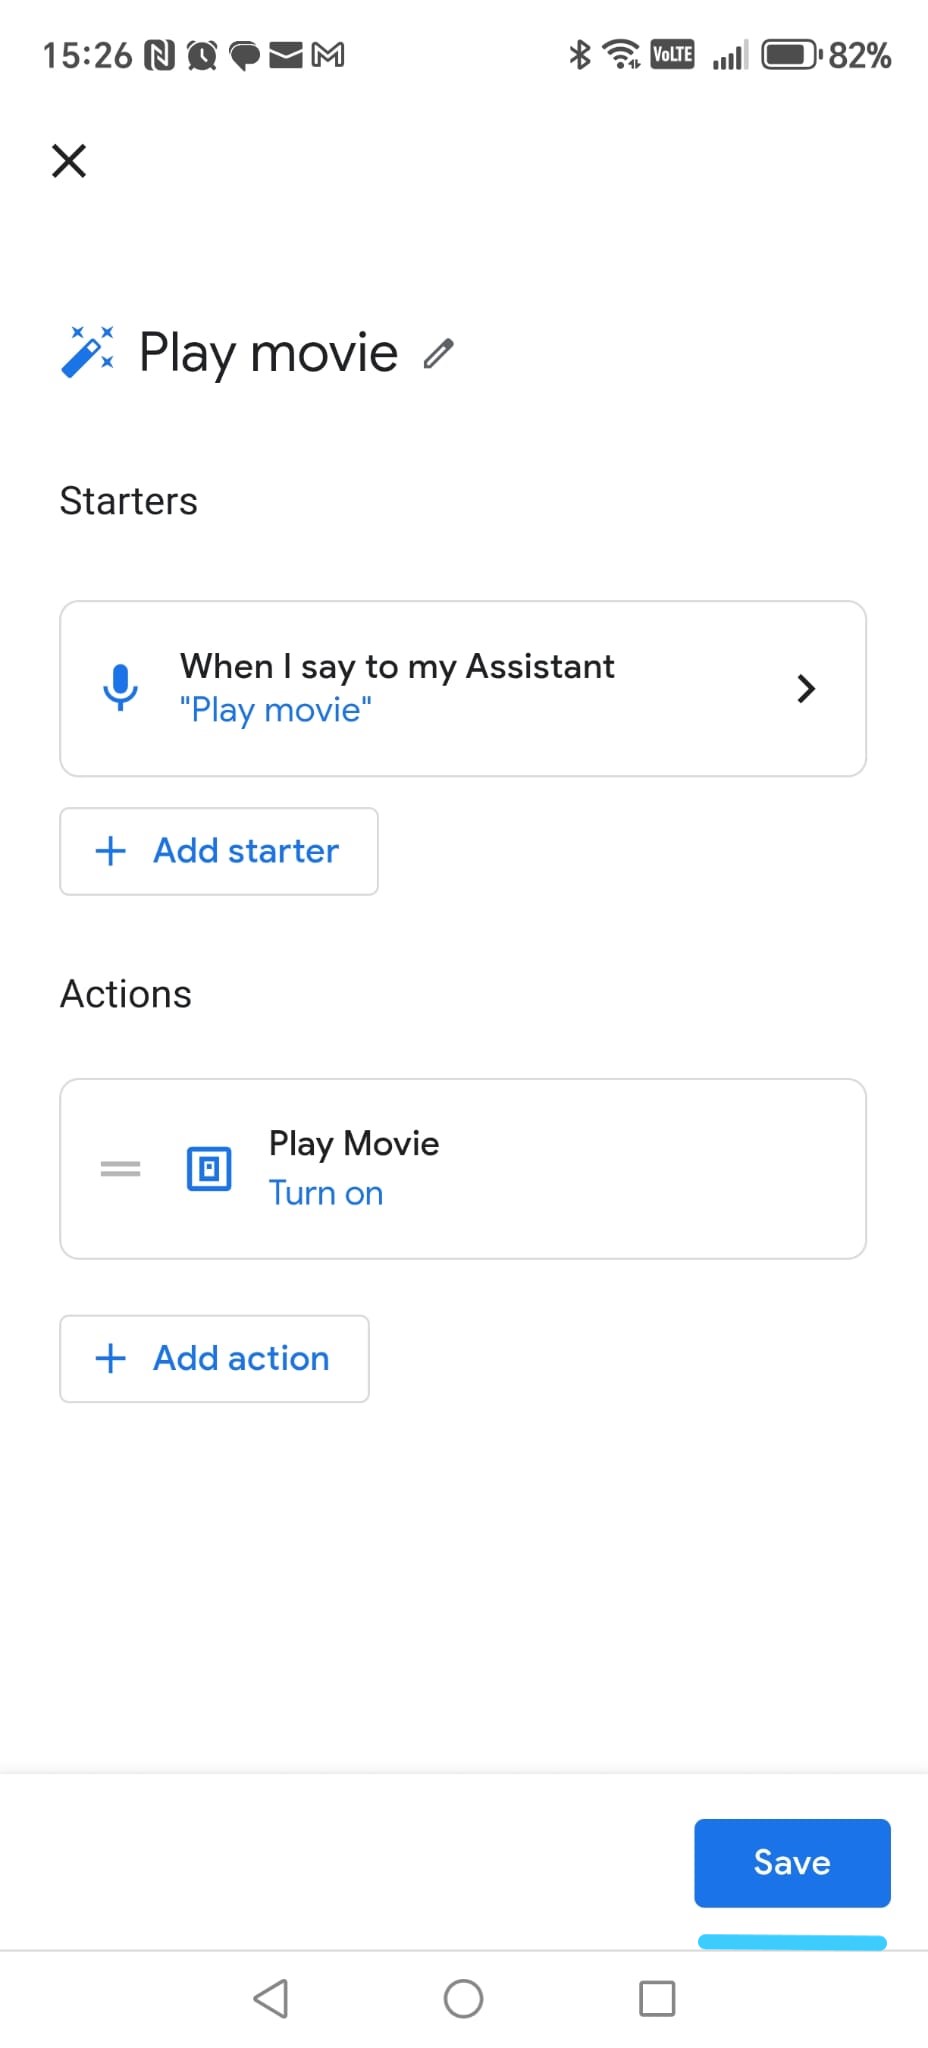
-
Step 9 - Save the routine
You return to the routine details screen.
Tap Save.
-
Step 10 - Routine created ✔
You now see Play movie in the list of routines.
From the New (+) button in the top-right corner,
repeat this process and create the remaining routines one by one,
until all Smart Home Cinema commands have their own routine
(about 24 routines in total).
💡
Tip:
If you make a mistake while creating the routine, don’t worry.
Simply delete the routine and create it again — it usually takes about one minute.
Google Assistant — Screenshot Gallery (Steps 31-40)
These screenshots are displayed as thumbnails. Tap any image to enlarge it.
Google Assistant
Clickable screenshots
11) OpenSubtitles Account Setup (Full Tutorial)
This chapter explains how to create and configure your
OpenSubtitles account so Smart Home Cinema can download subtitles automatically.
If you want to understand how OpenSubtitles works, why an account is required, and how subtitle downloads function in Smart Home Cinema, you can read the OpenSubtitles Integration (API v2) — Beginner Guide.
⚠
Important — please read first
Smart Home Cinema does not download subtitles from random websites.
It uses the official OpenSubtitles API.
To use it, you must have a working OpenSubtitles account
and your email must be confirmed.
ℹ
If you already have an account
You can skip most of this tutorial. Just make sure:
- you can sign in successfully
- your email is confirmed
- you see your Downloads / Allowed limit in Profile
11.1 What you will do in this chapter
- Create a free OpenSubtitles account
- Confirm your email
- Log in and open your Profile
- Check your download limit
Smart Home Cinema uses this account only to download subtitles
for your own movies — nothing else.
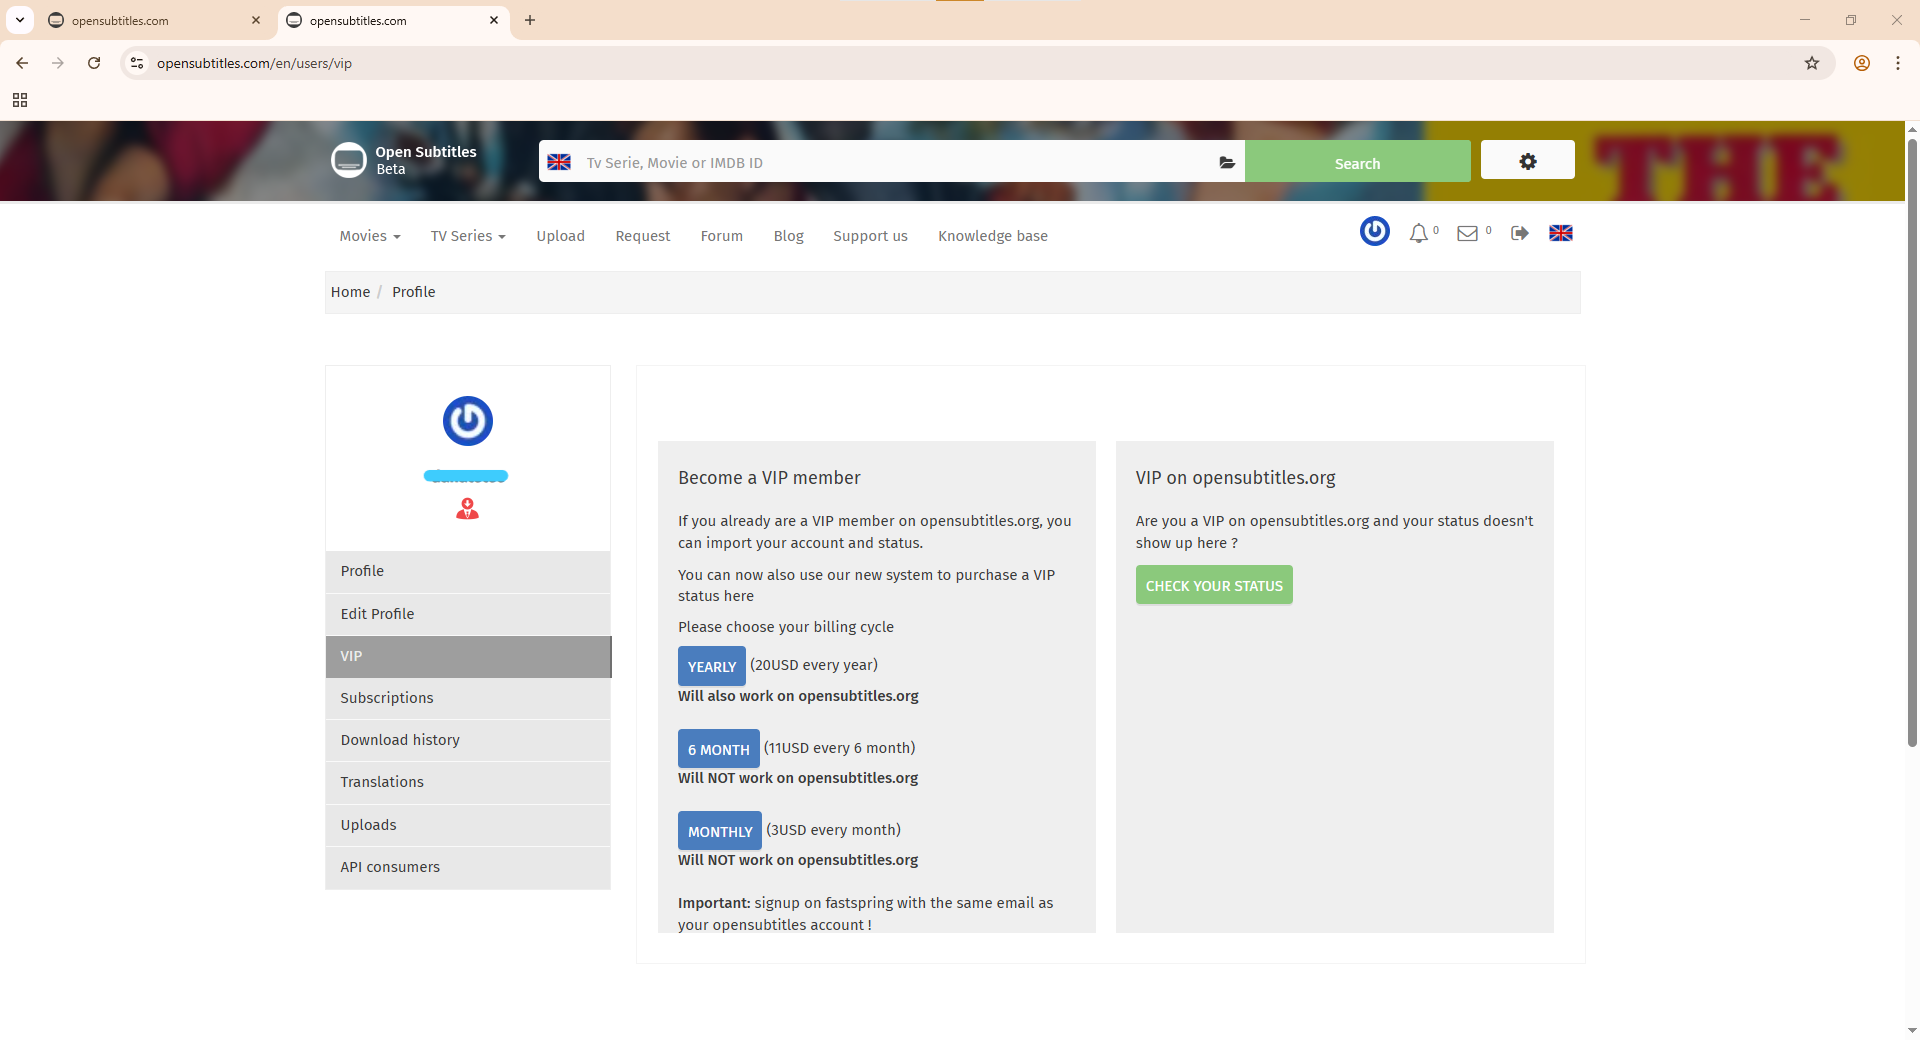
11.2 Free vs. VIP (what you really need)
Free Account
- Up to 20 subtitles per day
- Suitable for normal home use
- Recommended for most Smart Home Cinema users
VIP (Paid)
- Up to 1000 subtitles per day
- Designed for heavy or high-volume usage
For most Smart Home Cinema home users, the free plan is sufficient.
✔
Your username and password are stored locally, encrypted.
They are never uploaded anywhere else.
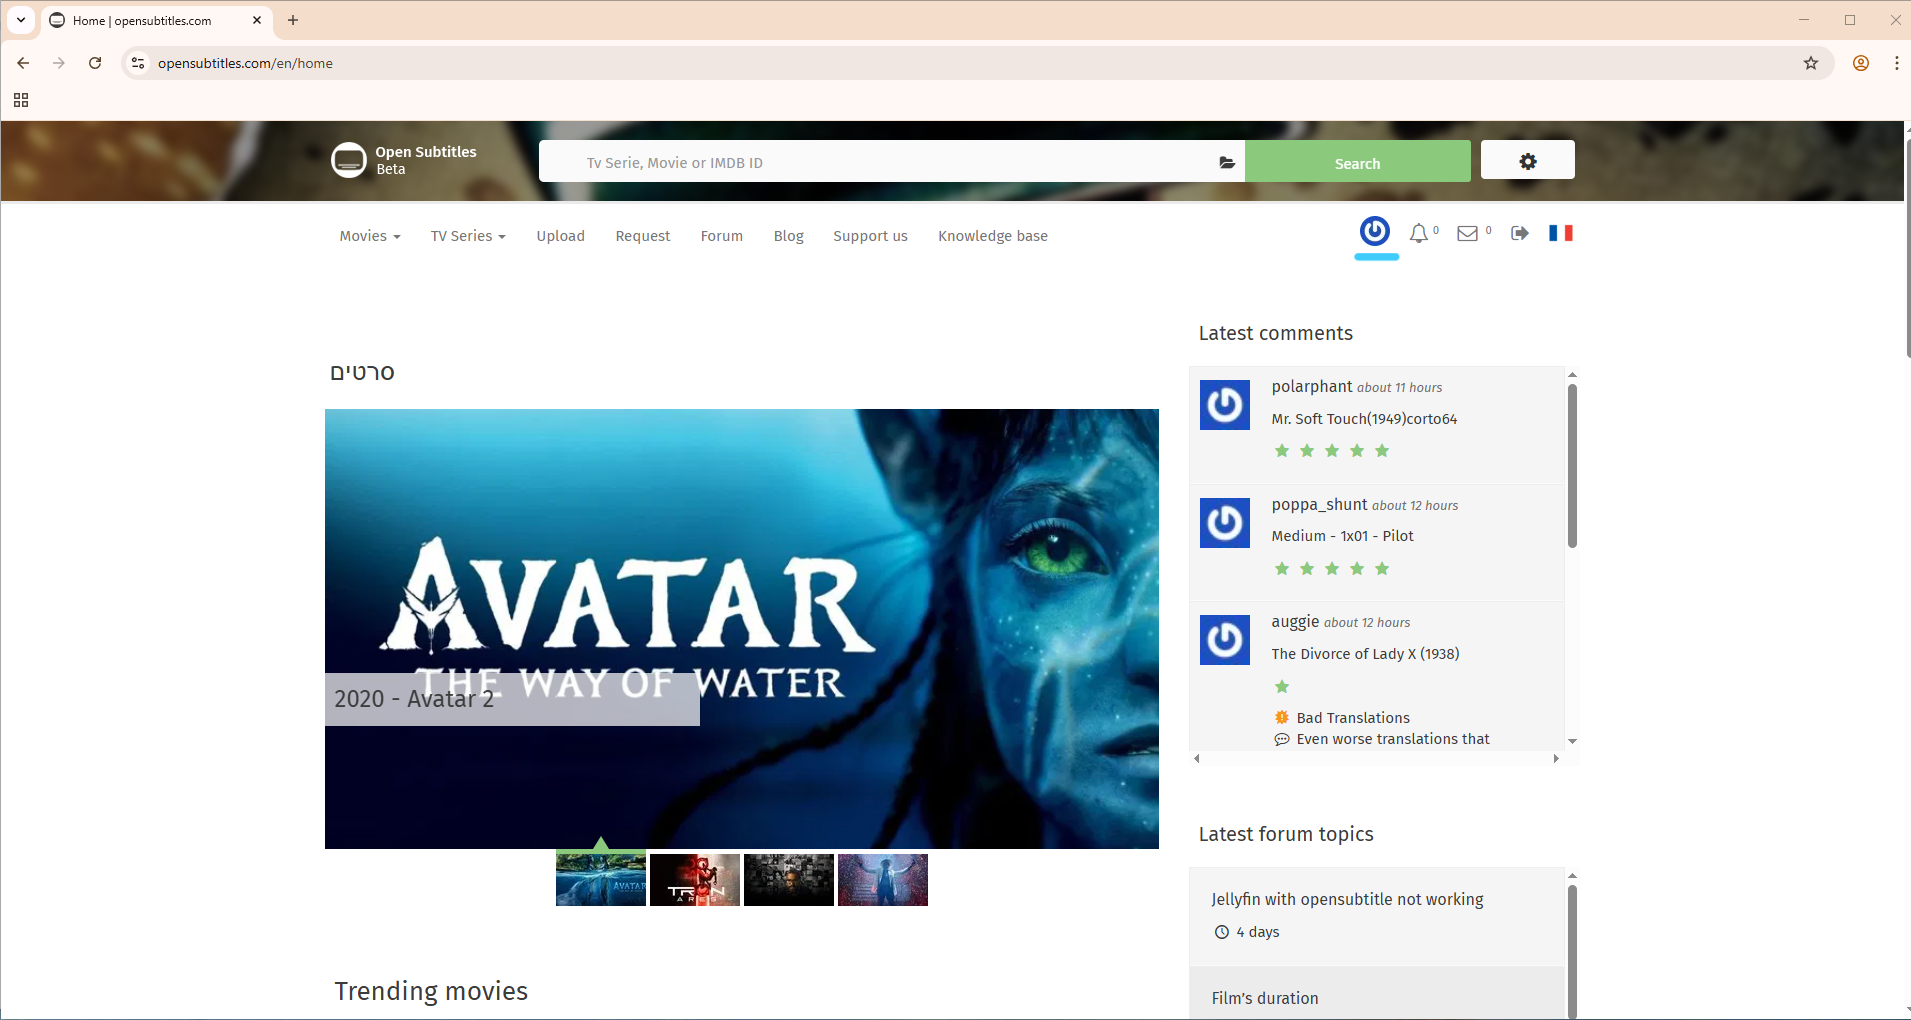
11.3 Create your account — step by step
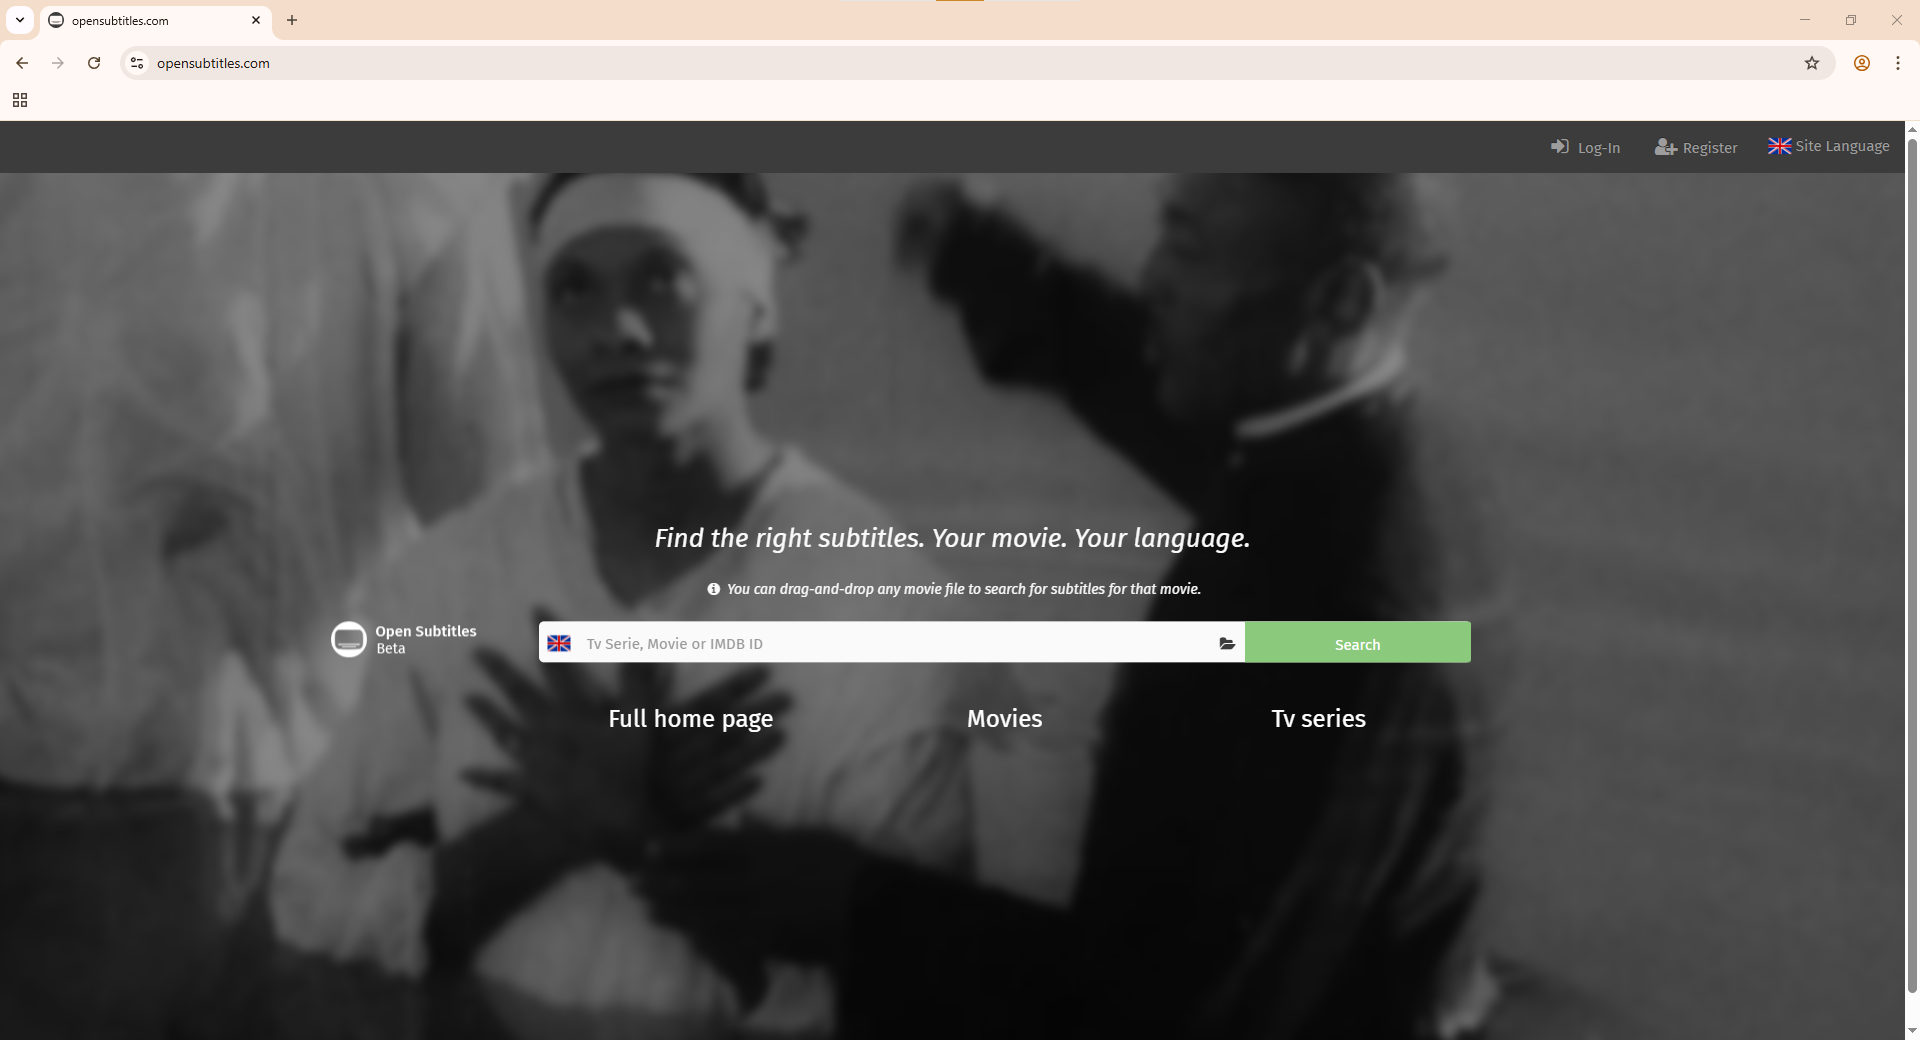
-
Open the OpenSubtitles website
- Go to:
https://www.opensubtitles.com/
-
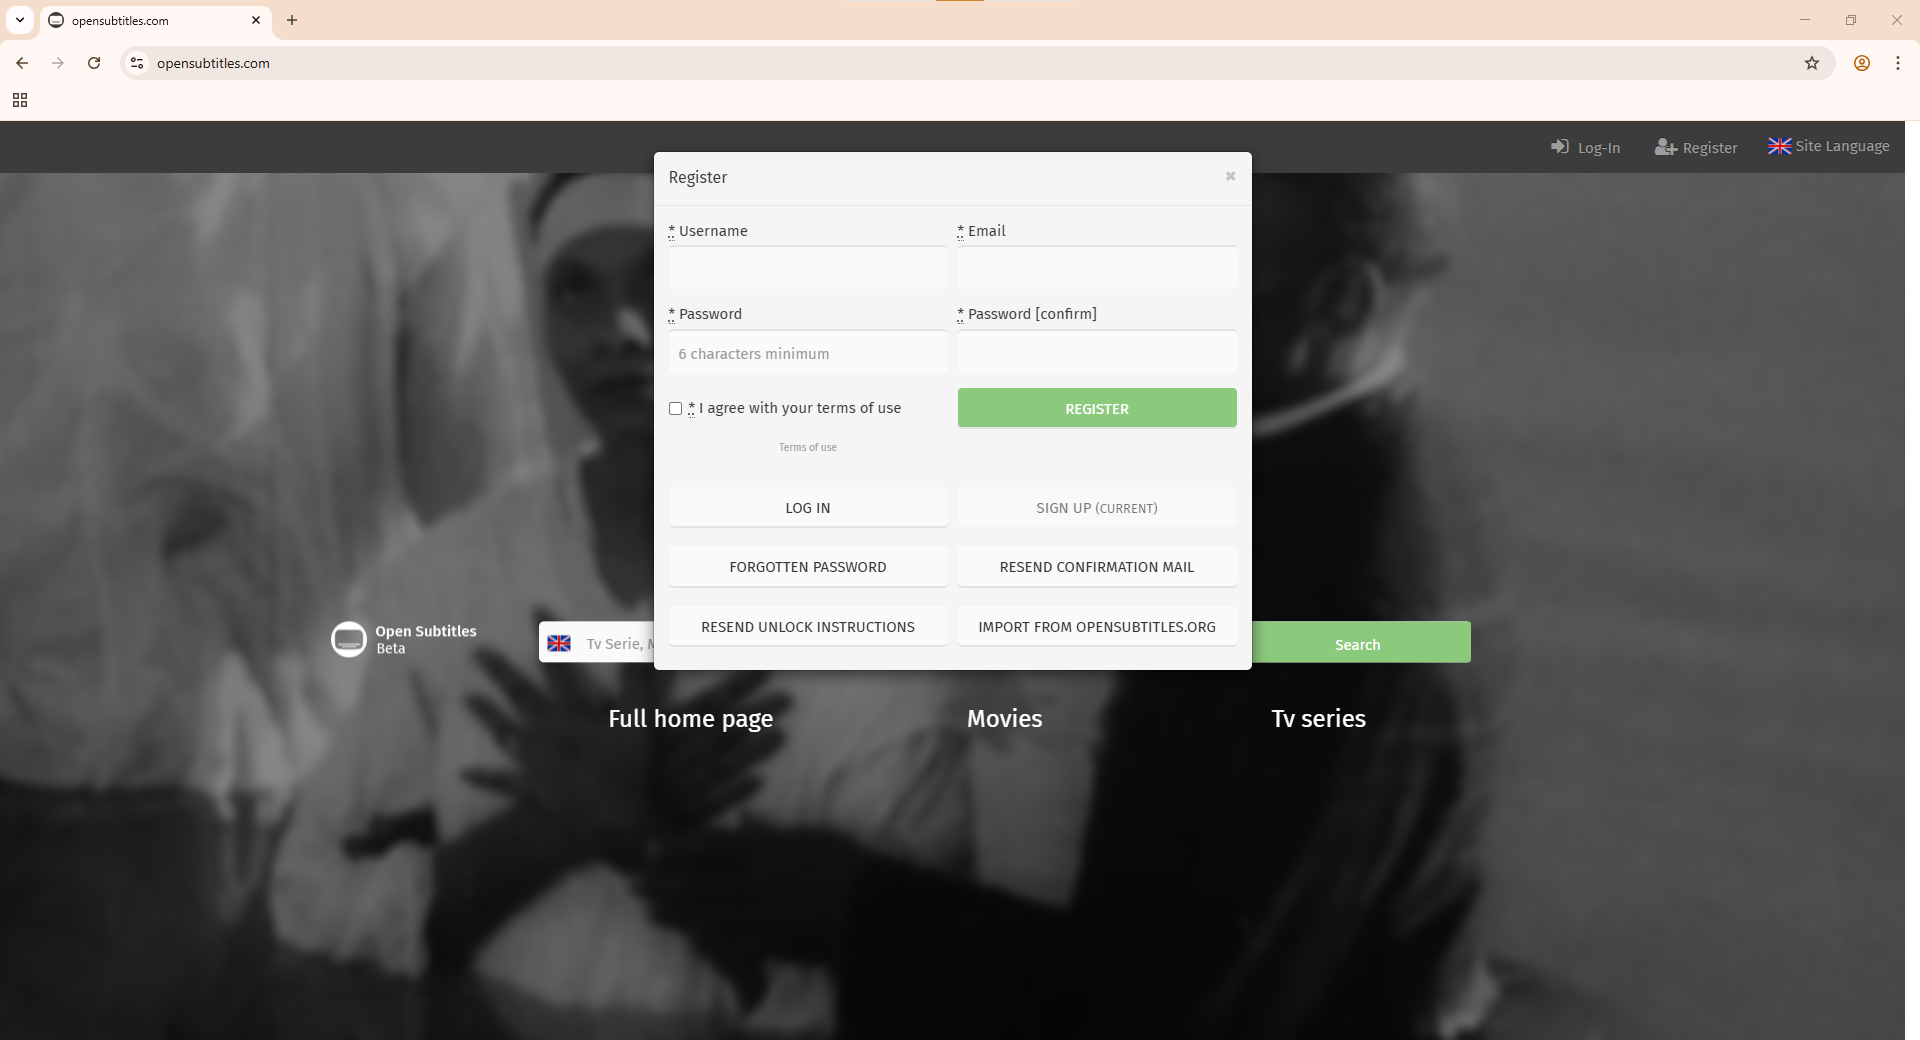
Open the registration form
- Click Register (top-right)
-
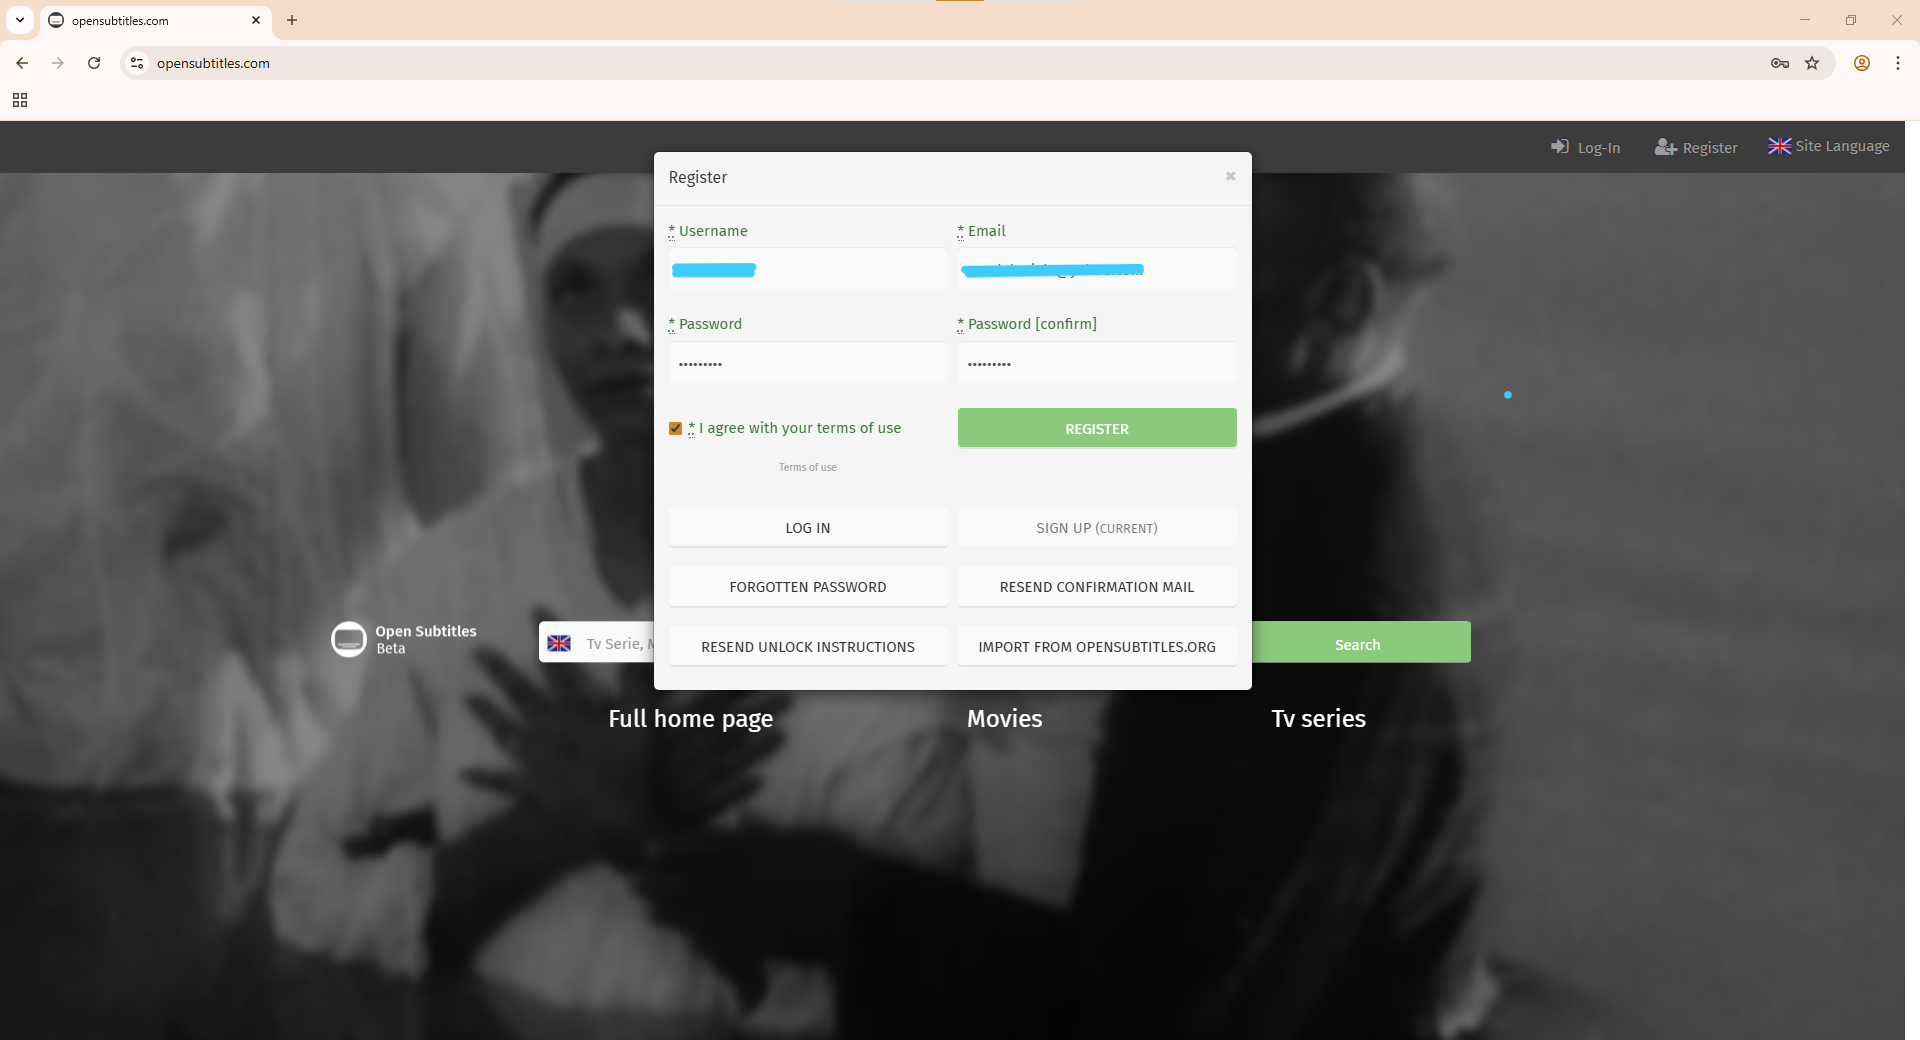
Fill ALL four fields
You must complete both columns:
- Left: Username + Password
- Right: Email + Password (confirm)
Then:
- tick I agree with your terms of use
- click REGISTER
-
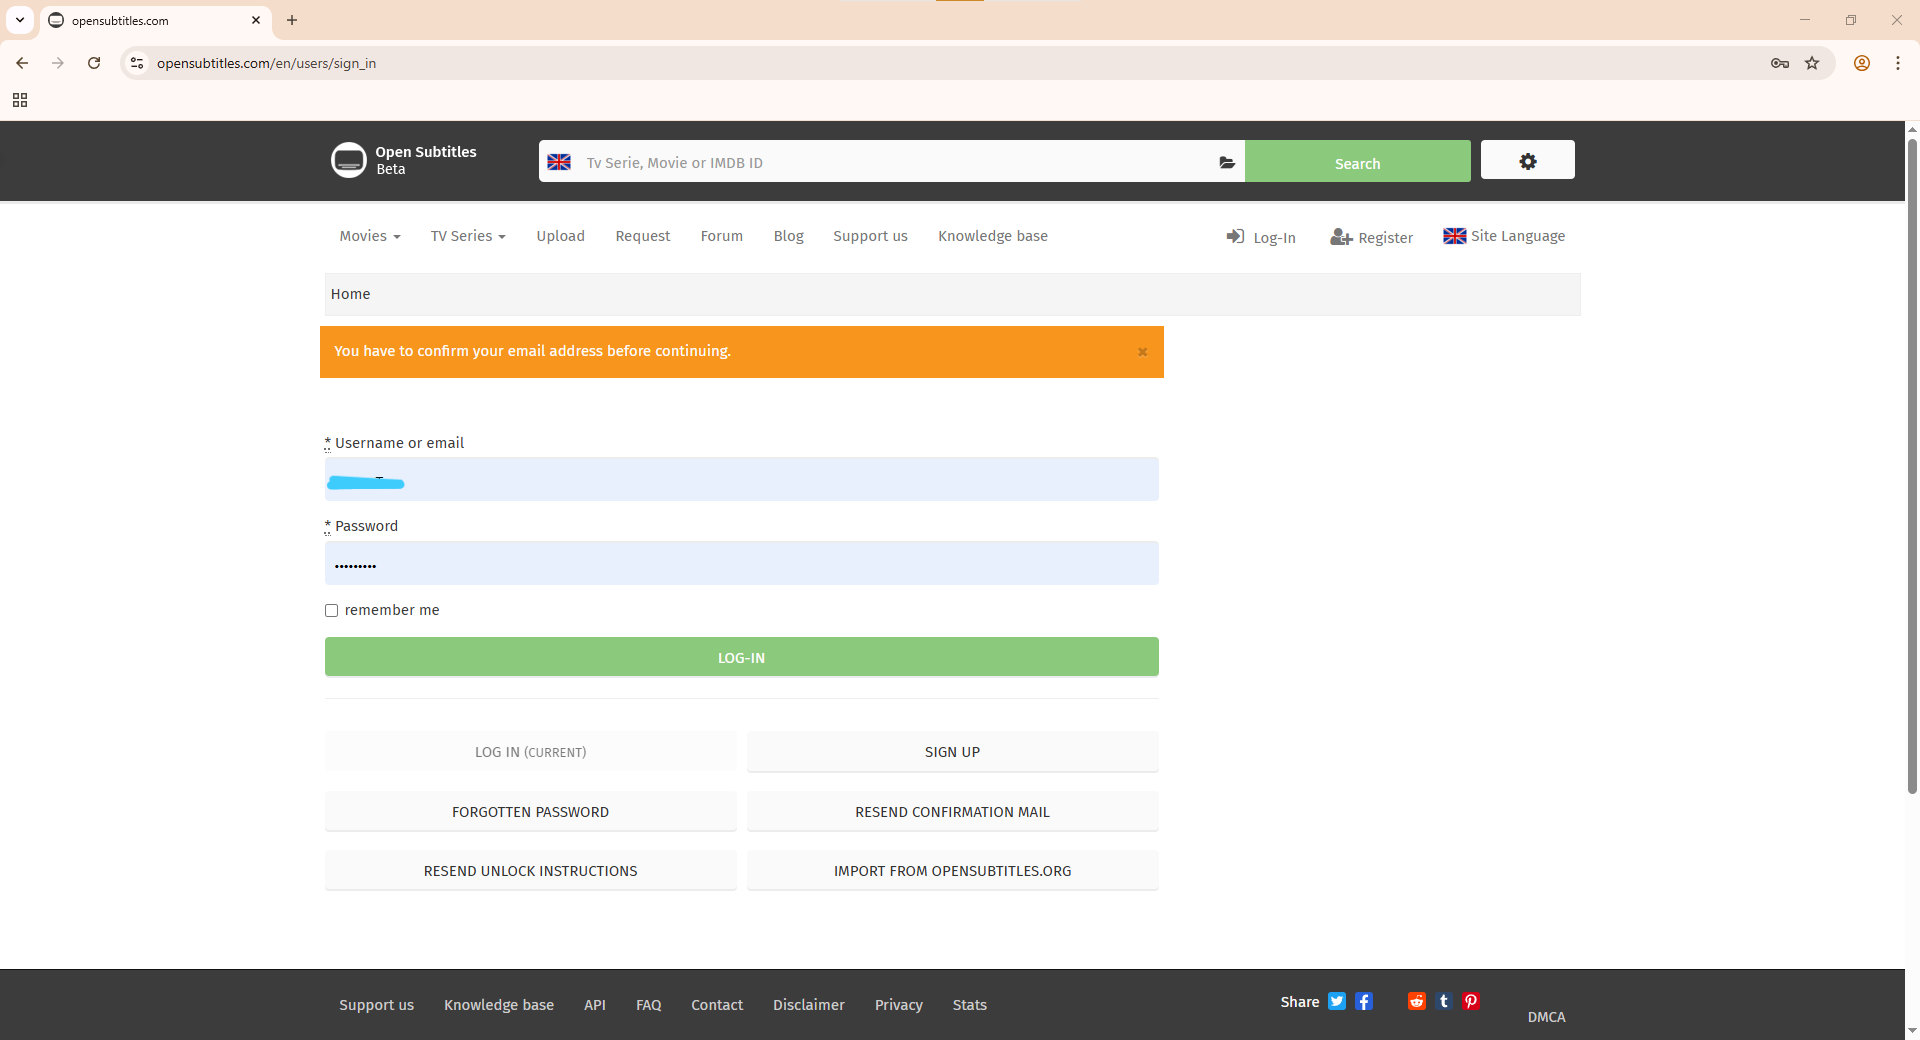
Confirm your email
OpenSubtitles creates your account — but you are
not logged in yet.
- open your inbox
- click the confirmation link
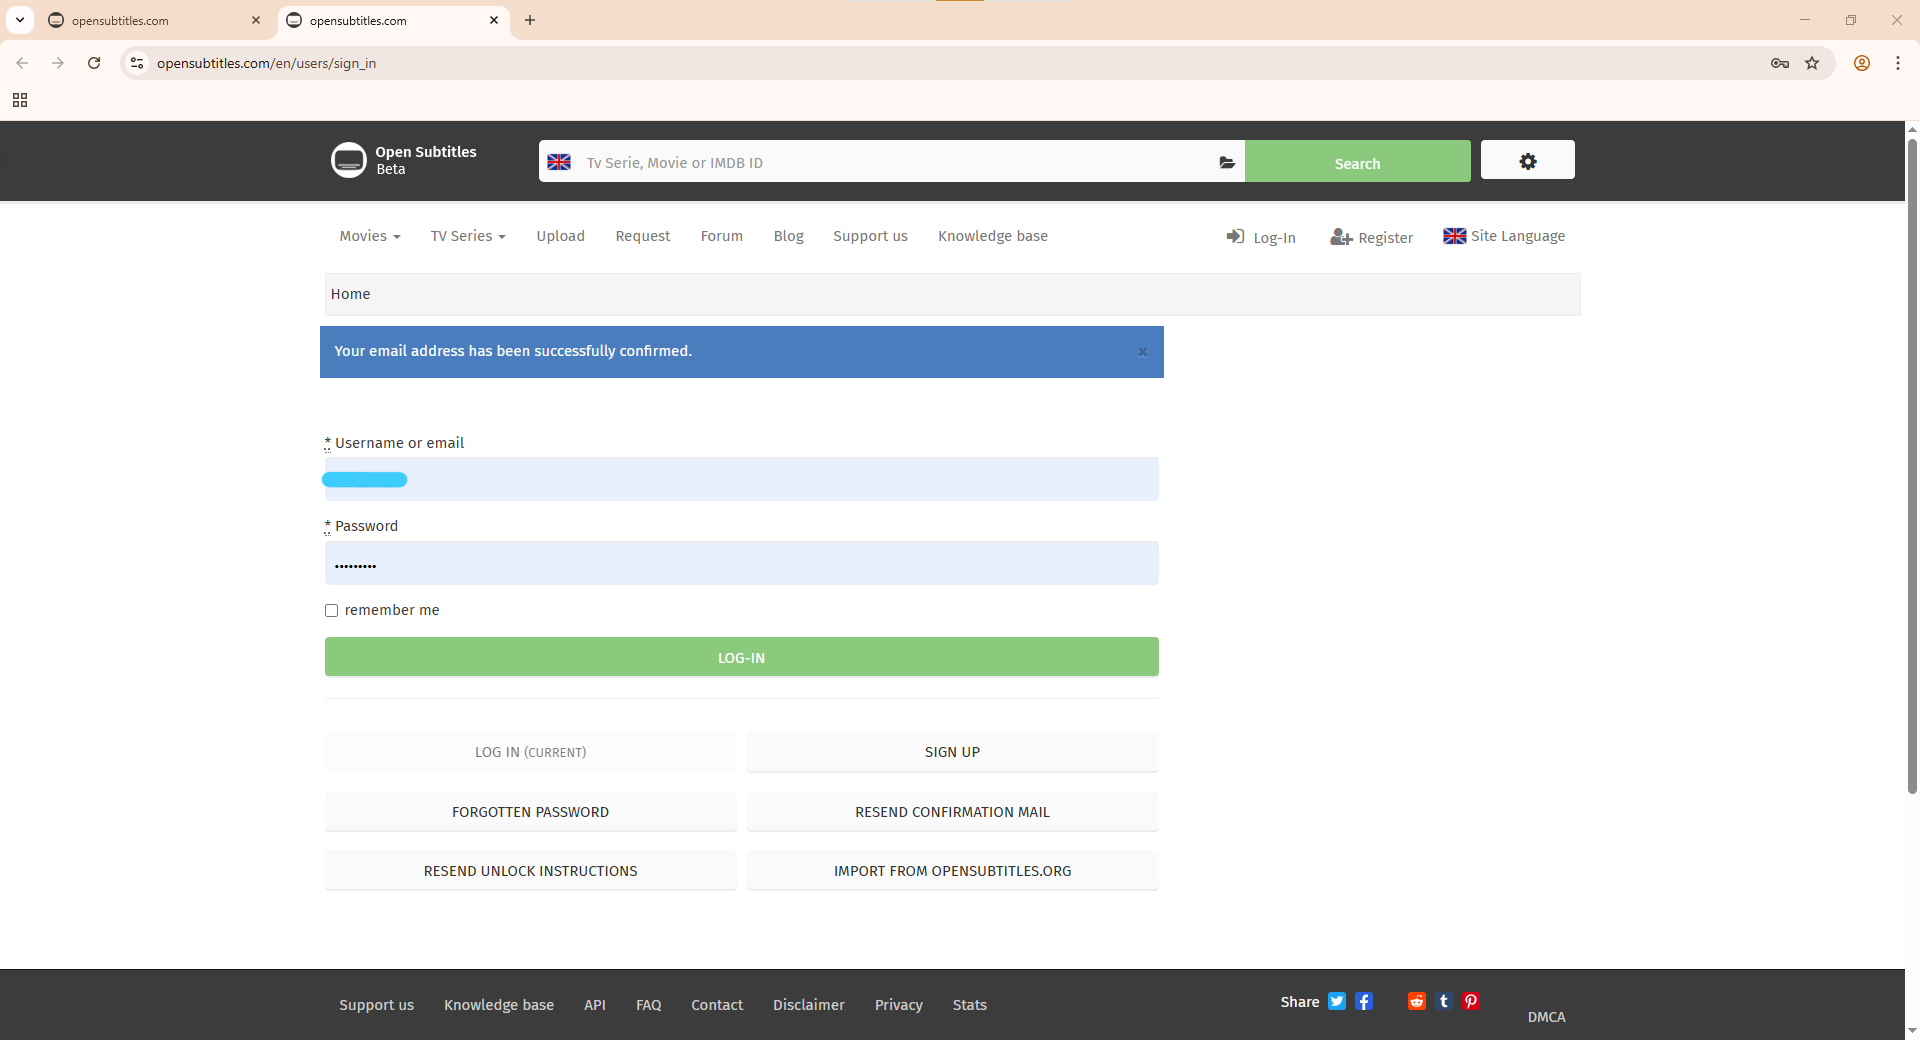
After confirmation you will see:
Your email address has been successfully confirmed.
-
Log in
- enter Username or Email
- enter Password
- click LOG-IN
⚠
Important — remember this for later
When you install Smart Home Cinema and you are asked for your
OpenSubtitles credentials, you must enter your
OpenSubtitles username — not your email address.
If you type the email instead of the username, the login will fail.
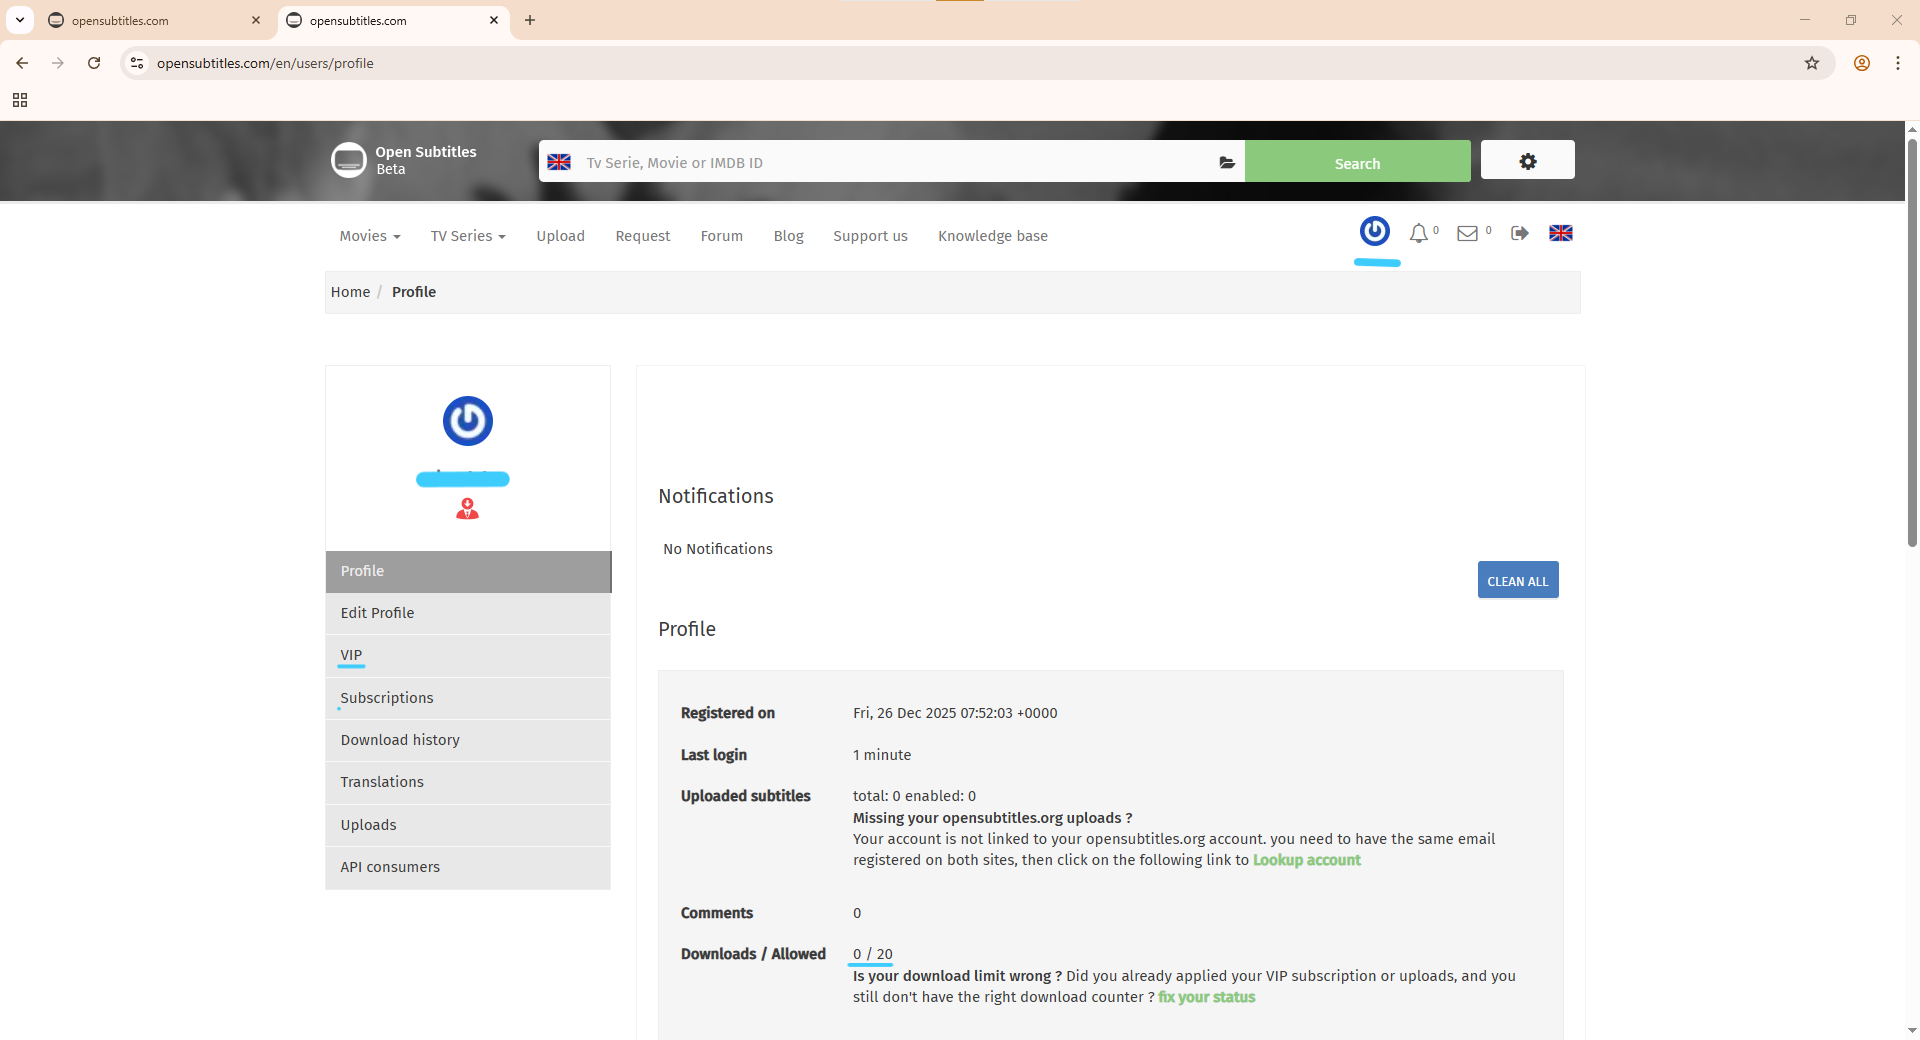
-
Open your Profile (optional)
- click the small antenna icon (top-right)
- select Profile
Here you can see:
- Downloads / Allowed
- VIP options
- Account info
For Smart Home Cinema, the free account is enough.
OpenSubtitles — Screenshot Gallery
Click any image to enlarge it.
12) Commands List & Usage Rules
Smart Home Cinema – Voice Control provides a complete set of voice commands
for controlling playback, managing subtitles, and operating core system features.
This chapter is a quick reference guide. For full explanations, use the chapter links provided inside each section.
12.1 Movie Commands
These commands control movie playback and navigation.
Full logic explained in Chapter 5 — Core Logic & Viewing Workflow
(especially sections 5.1 and 5.3).
Playback & Navigation
- Play Movie — Plays the first video on the PC monitor
- Play Movie TV — Plays the first video on the TV / secondary monitor
- Pause Movie — Pauses or resumes the movie
- Stop Movie — Stops the current movie
Forward & Rewind
- Forward 2 Min — Fast-forwards 2 minutes
- Forward 1 Min — Fast-forwards 1 minute
- Forward 30 Sec — Fast-forwards 30 seconds
- Rewind 2 Min — Rewinds 2 minutes
- Rewind 1 Min — Rewinds 1 minute
- Rewind 30 Sec — Rewinds 30 seconds
Movie Management
- Delete Movie — Sends the first movie and its associated subtitle (if one exists) to the Recycle Bin
- Next Movie — Moves the current movie and its associated subtitle (if one exists) to Watched Movies Folder and starts the next one
- Show Progress — Displays the progress bar and current time
ℹ️
Detailed explanation for delete vs keep:
See Chapter 5.3 — Delete Movie vs Next Movie.
⚠
Stop Everything is a final system command:
- Stops playback
- Switches display back to PC
- Shuts down the computer
Read carefully: Chapter 5.6 — Stop Everything & Shutdown PC.
12.2 Subtitle Commands (Optional)
These commands are available only if subtitle automation is enabled.
Full workflow: Chapter 5.5 — Subtitle Automation.
- Download Subtitles — Downloads subtitles for all available movies
- Sync Forward — Shifts subtitles forward by 1 second
- Sync Backward — Shifts subtitles backward by 1 second
- Sync Subtitles — Automatically synchronizes all subtitles
- Clean Subtitles — Backs up originals and keeps synchronized versions
12.3 System Commands
- First Monitor — Switches to primary monitor
- Second Monitor — Switches to the TV / secondary monitor
- Shutdown PC — Immediately turns off the computer
- Show Commands — Displays the Command Center overlay
- Close Commands — Closes the Command Center overlay
- Open Folder — Opens the Movies folder
Command Center is designed as a full-screen visual reference with all commands listed.
12.4 Quick Rules (Important)
-
All commands operate on the first video file in the Movies Folder.
See Chapter 5.1 — First File Rule.
-
Next Movie moves files — it does not delete them.
See Chapter 5.3.
-
Stop Everything shuts down the PC.
See Chapter 5.6.
-
Subtitle workflow must follow: Download → Sync → Clean.
See Chapter 5.5.
12.5 If Something Doesn’t Work
If a command does not run:
- Check if the command exists in TRIGGERcmd
- Verify that Alexa / Google routine is linked correctly
- Make sure the command name matches exactly
- Re-read the chapter related to that command
13) Troubleshooting
13.1 Installation Problems
This section covers the most common installation issues and how to fix them quickly.
❌ Installer says PotPlayer / VLC is not installed
Even though you already installed the player.
Cause
Smart Home Cinema scans only the default installation folders.
If the player was installed in a custom location, the installer cannot detect it.
Fix
Uninstall the player and reinstall it using the default path:
- PotPlayer:
C:\Program Files\DAUM\PotPlayer
- VLC:
C:\Program Files\VideoLAN\VLC
Do not change the installation path.
After reinstalling, run the Smart Home Cinema installer again.
❌ Installation stops or refuses to continue
Cause
One or more required installation rules were not respected.
This protection prevents possible data loss.
Fix — check these first:
- Movies and Watched folders are on a fixed drive (not USB)
- Both folders are on the same partition
- Folders are not identical
- Installer was not started as Administrator
If anything above is incorrect, fix it and restart the installer.
❌ Antivirus blocks or removes files
Cause
Some antivirus programs may incorrectly flag automation tools and overlays as suspicious.
Fix
- Restore any Smart Home Cinema files from quarantine.
- Add these folders to antivirus exclusions:
C:\Program Files\Smart Home CinemaC:\ProgramData\SHC (recommended)
Restart the installer and try again.
Smart Home Cinema runs locally and does not collect personal data.
❌ Installer completed, but commands do not work
Cause
A required component was not configured before installation.
- TRIGGERcmd not installed or not logged in
- Alexa / Google not linked with TRIGGERcmd
- Media player installed after Smart Home Cinema
Fix
- Check TRIGGERcmd (Chapter 8)
- Check Alexa / Google linking (Chapters 9–10)
- Make sure the player was installed before Smart Home Cinema
If something was skipped, correct it and reinstall Smart Home Cinema.
❌ Installer freezes or buttons do nothing
Cause
Windows may have blocked the installer because it was downloaded from the internet.
Fix
- Right-click the installer file
- Click Properties
- Check Unblock (if visible)
- Click OK
- Run the installer again as Administrator
✔ Quick installation checklist
- Player installed in default folder
- No USB or removable drives used
- TRIGGERcmd ready and logged in
- Antivirus not blocking files
- Installer unblocked + Administrator rights
In most cases, one of these solves the problem.
13.2 Playback Problems
If Smart Home Cinema installs correctly but playback doesn’t work as expected,
check the situations below.
❌ Play Movie does nothing
Cause
The command reached TRIGGERcmd, but the player could not be launched or the
Movies Folder is empty.
Fix
- Open your Movies Folder and make sure there is at least one video file inside
- Make sure the video is not inside sub-folders
- Verify TRIGGERcmd is running and logged in
- Check that you installed the correct edition (PotPlayer or VLC)
If nothing starts, try running the Play Movie command directly from TRIGGERcmd
to confirm it executes.
❌ Alexa command does not run (but works in TRIGGERcmd)
Cause
Alexa is no longer synchronized with your TRIGGERcmd command list.
The command still exists, but Alexa no longer recognizes it.
Fix
Recreate the command inside the TRIGGERcmd GUI Command Editor.
- Open the taskbar (bottom-right corner)
- Click the small arrow pointing up
- Right-click TRIGGERcmd
- Select GUI Command Editor
Then:
- open the command that no longer works
- select the entire text inside the Command field
- copy it using: CTRL + C (mouse copy does not work)
- paste it temporarily into Notepad
- delete the command
- create a new command
- paste it back using: CTRL + V
Important:
- Trigger and Voice must be 100% identical
Example:
Trigger: Play Movie
Voice: Play Movie
After saving, ask Alexa to refresh:
- Open the Alexa app
- Tap the microphone
- Say: “Alexa, discover devices.”
Alexa will reload the list and the command will work again.
❌ Wrong movie plays or order is incorrect
Cause
Smart Home Cinema always plays the first file in the Movies Folder,
alphabetically.
Fix
- Rename files using numbers at the beginning:
01-Movie.mp4
02-Movie.mkv
The lowest number becomes the current movie automatically.
❌ Movie plays, but not fullscreen / wrong screen
Cause
Windows display mode or TV projection settings are different than expected.
Fix
- Make sure TV is connected and powered on
- Set Windows display to Extend or Duplicate (Win + P)
- Use the commands:
Project to PC — movie stays on monitor
Project to TV — movie moves to television
If fullscreen fails once, run the command again — most often the player
didn’t receive focus in time.
❌ Next Movie skips unexpected files
Cause
The First File Rule applies: the current movie is always
the first file in the folder.
Fix
- Check which file is actually first in the Movies Folder
- Rename files if needed (01, 02, 03…)
- Do not keep temporary files or subtitles with the same name inside
❌ Playback stops suddenly
Possible causes
- file removed or renamed during playback
- subtitle tools deleted / moved files
- external drive disconnected
Fix
- Keep movies on a stable, fixed drive
- Avoid renaming or deleting files during playback
- Run the command again after reconnecting the drive
✔ Quick playback checklist
- Movies Folder contains at least one valid video file
- File is not inside sub-folders
- Correct edition installed (PotPlayer / VLC)
- Order controlled using filename numbers
- TV display configured correctly (Win + P)
If problems continue, check the log in:
C:\ProgramData\SHC\Logs
13.3 Subtitle Problems
These are the most common subtitle issues and how to fix them quickly.
Subtitle automation is optional — if you don’t use it, you can skip this section.
❌ No subtitles are downloaded
Cause
Subtitle downloads require an OpenSubtitles account and an internet connection.
Fix
- Make sure you created an OpenSubtitles account (email confirmed)
- Check that your credentials were entered correctly in Smart Home Cinema
- Ensure internet connection is available
- Try downloading again later — some movies simply have no subtitles
In rare cases, larger subtitle download batches may complete only partially on the first run.
If this happens, simply run Download Subtitles again — the remaining files are usually processed on the second pass.
If no subtitle exists in OpenSubtitles, Smart Home Cinema cannot create one.
❌ Subtitles are in the wrong language
Cause
Smart Home Cinema downloads subtitles using the language you selected
during installation.
If the wrong language was chosen by mistake, all automatic downloads
will use that language.
Fix
-
Open the Smart Home Cinema installation folder in Program Files
(PotPlayer or VLC edition), for example:
C:\Program Files\Smart Home Cinema – Voice Control
(The exact folder name may include PotPlayer version or
VLC version.)
-
Find the file:
install_context.json
Right-click it and choose Open with → Notepad.
-
Look for the line:
"subtitle_language": "xxx"
Make sure the value matches the language you actually want
(for example "en", "fr", etc.).
-
If the language is wrong, uninstall Smart Home Cinema and reinstall it,
selecting the correct subtitle language during installation.
Do not edit install_context.json manually.
Use a reinstall to change the subtitle language safely.
❌ Subtitles are out of sync
Cause
The subtitle file timing does not match your copy of the movie.
Fix options
Sync Forward — move subtitles forward 1s
Sync Backward — move subtitles backward 1s
Repeat until subtitles match the spoken dialog.
Some movies need several adjustments — this is normal.
❌ Auto sync did not improve subtitles
Important
Automatic subtitle synchronization is very powerful — but it is not
100% guaranteed to work in every situation.
In some cases, the downloaded subtitle simply does not belong to the
exact version (release) of your movie.
Typical situations where sync may fail
- the subtitle was created for a different video release
- scenes are cut or extended compared to your version
- audio timing is shifted differently throughout the movie
What you can try
-
If you have another version of the same movie (legally obtained),
try playing that version and run Download Subtitles again.
-
If auto sync still cannot align the file, search manually on
OpenSubtitles.org and look for a subtitle that explicitly
matches your movie release.
-
During playback, you can also fine-tune timing using
Sync Forward / Sync Backward.
This behavior is normal: subtitle databases depend on what other users
have uploaded. Not every movie version always has a perfect match.
❌ I see too many subtitle files in the folder
Cause
Multiple subtitle versions accumulate over time.
Fix
Use the command Clean Subtitles.
- unsynchronized subtitles are moved to a backup folder
- the synchronized subtitle remains near the movie
Your movie folder becomes clean and easier to manage.
❌ Subtitle download works sometimes, then stops
Cause
OpenSubtitles may temporarily limit downloads if too many are requested.
Fix
- Wait 1–2 hours and try again
- Avoid triggering repeated downloads for the same files
This is controlled by OpenSubtitles, not Smart Home Cinema.
Daily limit (very important)
Free OpenSubtitles accounts have a strict daily limit:
✔ 20 subtitle downloads per day
After the limit is reached, downloads will stop until the next day.
What to do
- Log into your OpenSubtitles account
- Open your profile page
- Check the daily download counter
Once the daily limit resets, Smart Home Cinema will work normally again.
Sync Subtitles — Progress Overlay Shows Incorrect Numbers
During the Sync Subtitles command, the progress overlay may display
incorrect totals or outdated values.
Symptoms
- Progress overlay shows wrong numbers (e.g.
8 / 8 instead of 4 / 4)
- Total number of movies does not match the actual folder contents
- Numbers appear stuck while subtitle files are still being processed
- The progress bar still completes and closes normally
Cause (rare)
A leftover progress state file from a previous interrupted or incomplete
subtitle synchronization.
This file stores internal synchronization progress information and may
contain outdated values.
Solution
-
Open the following folder:
C:\ProgramData\SHC
-
Delete the file:
progress_state.json
-
Run Sync Subtitles again.
The file will be recreated automatically and the progress overlay
will display correct, real-time synchronization progress.
This operation is safe and does not affect your movies or subtitle files.
✔ Quick subtitle checklist
- OpenSubtitles account created + confirmed
- Correct credentials entered
- Internet connection available
- Try another subtitle version if sync fails
- Use Sync Forward / Backward when needed
13.4 TRIGGERcmd / Voice Problems
Smart Home Cinema relies on TRIGGERcmd to receive voice commands from Alexa or Google Assistant.
If TRIGGERcmd is not configured correctly, no command will reach your PC.
❌ I say a command — nothing happens
What this usually means
TRIGGERcmd is installed, but the voice command never reached your PC.
Step 1 — Check that TRIGGERcmd is running
- Look in the system tray (bottom-right corner of Windows)
- Find the TRIGGERcmd icon
- Right-click the icon
- Click GUI Command Editor
If the window opens and you can see your Smart Home Cinema commands,
TRIGGERcmd is running correctly.
Step 2 — Test manually (important)
Inside the TRIGGERcmd Command Editor:
- find any Smart Home Cinema command
- click the small Play ▶ button
If the command runs successfully, TRIGGERcmd is fine —
the problem is between your voice assistant and TRIGGERcmd.
Step 3 — Try the voice command again
Sometimes Alexa / Google may delay or fail temporarily.
Wait 1–2 minutes and try again.
If the command runs manually but not by voice,
continue in section 13.4 — Alexa / Google not linked correctly.
❌ Command shows “Pending” in TRIGGERcmd
What this means
The command reached your TRIGGERcmd account,
but the TRIGGERcmd agent on your PC did not respond.
Fix — Restart the TRIGGERcmd agent
First, restart the TRIGGERcmd app on your PC:
-
Go to the system tray (bottom-right corner of Windows)
-
Right-click the TRIGGERcmd icon
-
Click Quit (this fully closes the agent)
-
On your desktop (or Downloads folder), double-click
the TRIGGERcmd Agent installer/executable you originally downloaded
from your TRIGGERcmd account
-
Wait 10–15 seconds until the TRIGGERcmd icon appears again in the tray
This forces a clean reconnect between your PC and your TRIGGERcmd account.
Next — Try the command again
Say the same voice command again.
If the PC is sleeping, hibernating or powered off, commands will always stay “Pending”.
❌ Alexa / Google sends the command to the wrong computer
Cause
Your TRIGGERcmd account has multiple devices and the wrong one is selected.
Fix
- Open TRIGGERcmd Dashboard (web)
- Find the correct PC name assigned during setup
- Check that Smart Home Cinema commands belong to that device
Then try the voice command again.
❌ A command runs twice
Cause
The command is triggered both by:
- a voice routine
- and a direct TRIGGERcmd smart device shortcut
Fix
- Open Alexa / Google routines
- Keep only ONE routine for each Smart Home Cinema command
- Remove duplicated shortcuts if any exist
❌ Alexa / Google says “command executed” but nothing happens
Cause
TRIGGERcmd is not properly linked to your assistant.
Fix
- Re-link TRIGGERcmd Smart Home (Alexa)
- Re-link TRIGGERcmd service (Google Home)
Follow again:
- Chapter 9 — Alexa
- Chapter 10 — Google Assistant
After linking, try a simple test command such as:
Play Movie
✔ Quick voice checklist
- TRIGGERcmd Desktop is running
- You are logged in
- Correct PC is selected in TRIGGERcmd
- Alexa / Google are correctly linked
- No duplicate routines for the same command
13.5 File / Folder Permission Problems
Smart Home Cinema needs permission to read your movies and write configuration files.
If Windows or antivirus blocks access, some commands may stop working.
❌ Smart Home Cinema cannot save settings
Cause
The SHC system folder was deleted or access was blocked.
C:\ProgramData\SHC
Fix
- Make sure the folder exists
- Do not delete or rename anything inside it
- If the folder is missing, reinstall Smart Home Cinema
This folder is required. It stores logs, configuration and temporary files.
❌ Commands fail after moving the Movies folder
Cause
The Movies folder was renamed, deleted, or moved to another drive.
Fix
- Restore the original Movies folder path
- Use the same drive and same exact location selected during installation
If you want to change the Movies folder, uninstall then reinstall Smart Home Cinema.
❌ Antivirus blocks overlays or commands
Cause
Some antivirus tools may incorrectly flag automation overlays as suspicious,
even though they run only locally and collect no data.
Fix
- Open your antivirus settings
- Restore any Smart Home Cinema files from quarantine
- Add these folders to the exclusions list:
C:\Program Files\Smart Home CinemaC:\ProgramData\SHC
Restart the PC and try again.
Smart Home Cinema runs 100% locally. No personal files are uploaded.
❌ “Access denied” or commands partially fail
Cause
Windows permissions prevent SHC from writing or deleting required files.
Fix
- Run the installer as Administrator
- Do not install SHC inside custom folders
- Make sure your Windows account has full access to your Movies folder
13.6 Logs & Optional AI Help
Optional — Use AI to understand log messages
Smart Home Cinema always writes a detailed log file while it works.
Every important action is recorded there.
If something doesn’t behave as expected, you can open the log
and see exactly what happened step by step.
Log location:
C:\ProgramData\SHC\Logs
ℹ
The ProgramData folder may be hidden.
If you don’t see it, do this:
- open any File Explorer window
- click View (top menu)
- enable Show hidden items
After that, the ProgramData folder will become visible.
Sometimes it may help to paste the relevant error line into an AI assistant
and ask:
"Explain this Smart Home Cinema error and what I should check."
AI tools can often help you:
- understand what the message means
- identify possible causes
🔐 Important: remove personal data (usernames, paths) before sharing.
⚠ Note:
This is optional. If this doesn’t help, simply continue with the Troubleshooting
steps or contact support normally.
13.7 Safe Reset — Full Reinstall
🔁 When a full reinstall is recommended
- movies folder was moved or renamed
- wrong subtitle language was selected during installation
- multiple files were deleted accidentally
- installation was interrupted
In these cases, uninstall Smart Home Cinema and install it again.
Your movies remain untouched.
14) Legal & Privacy
This chapter explains your license agreement, legal notices for third-party tools,
and how Smart Home Cinema protects your privacy.
i
Local architecture: Smart Home Cinema executes commands locally.
No user analytics. No hidden tracking. No cloud processing.
Local Architecture — Privacy by Design
Smart Home Cinema is intentionally designed to work on your computer only.
All automation, playback logic and overlays run locally on your Windows PC.
Your movies stay on your own drive — nothing is uploaded anywhere.
What Smart Home Cinema does NOT do
- No telemetry
- No analytics
- No user profiling
- No online movie library
- No background data uploads
- No remote access to your PC
Everything runs locally, under your control.
Why the Internet is still needed
Voice assistants live on the Internet.
Alexa and Google process your voice command online — this is how those services work —
but once the command is recognized, the actual action happens
locally on your PC through TRIGGERcmd.
Neither Alexa, Google, TRIGGERcmd nor the Developer (who has no internet
connection to your PC at all) can:
- see your movies
- browse your folders
- read your files
- control your PC beyond the specific command you created
They only receive something like:
Run command: Play Movie
— and nothing else.
Transparency — no hidden behavior
- No hidden uploads
- No remote sessions
- No cloud processing
If something happens, it is visible in the log and fully under your control.
Stability & Long-Term Compatibility
Smart Home Cinema is built around simple, documented and stable mechanisms:
Windows APIs, keyboard automation and officially supported media-player controls.
If third-party tools change in the future (VLC, PotPlayer, TRIGGERcmd,
OpenSubtitles, Windows updates), some functions may require updates.
Core playback control will continue to work as long as the selected player
supports standard command and keyboard control.
Licensing, Trial & Rebind Policy
Trial Period (14 days)
Smart Home Cinema includes a 14-day trial period with full functionality.
The trial exists so you can test the software on your own system and decide whether
it fits your setup and expectations.
During the trial, you should:
- test voice commands
- verify media player integration
- confirm folder structure and viewing workflow
The trial period represents the evaluation phase of the software.
No Refund After License Activation
After the trial period ends, continued use requires activating a license key.
Once a license is activated:
- the software becomes fully functional offline
- no continuous online verification is performed
- the license cannot be remotely revoked
Because of this offline license model, refunds are not provided after license activation.
For this reason, users are strongly encouraged to fully evaluate the software during
the trial period before purchasing a license.
License Binding & Rebind (System Transfer)
Each license is bound to a single Windows PC.
In special situations — such as reinstalling Windows or moving to a new computer —
a license rebind may be requested.
Important notes about rebinding:
- rebinding is intended for legitimate system changes only
- license rebinding is required only when reinstalling Windows or moving the software to a new computer.
Common hardware changes (such as RAM, CPU, motherboard, etc.) do not affect the license and do not require rebinding, because the license is bound to the Windows installation, not to the physical hardware components of the system.
- a rebind can be requested once within a 365-day period
This limitation exists to protect the licensing system against abuse while still
allowing legitimate system upgrades or reinstalls.
If you need to request a license rebind, please contact Smart Home Cinema support by email
and include your license key in your message.
After approval, you can simply enter your license key again to activate the software
on the new system.
Legal Notice — VLC Media Player
Smart Home Cinema does not bundle or modify VLC.
VLC remains the property of VideoLAN and is distributed under GPLv2+.
SHC interacts only through official VLC features:
- command-line parameters
- local HTTP interface on
127.0.0.1
Users must install VLC separately from the official source.
Legal Notice — PotPlayer
Smart Home Cinema does not bundle, redistribute or modify PotPlayer.
PotPlayer remains the property of its developers and is distributed under
its own license terms.
SHC interacts with PotPlayer only through official and public mechanisms:
- command-line options
- standard keyboard shortcuts
- local window automation on your own PC
Users must install PotPlayer separately from the official source.
Legal Notice — TRIGGERcmd
Smart Home Cinema does not bundle TRIGGERcmd and does not access user accounts.
TRIGGERcmd works only as a secure bridge between your voice assistant
and your PC — entirely under your control and credentials.
TRIGGERcmd terms and privacy policies apply independently.
End User License Agreement (Full Text)
SMART HOME CINEMA – VOICE CONTROL
END USER LICENSE AGREEMENT (EULA)
Version 2.0 — © Marius Vomir
1. DEFINITIONS
1.1. “Software” refers to Smart Home Cinema – Voice Control (SHC), including all executables, automation logic, integration modules, configuration files, overlays, and support components.
1.2. “Developer” refers to the creator and copyright holder of Smart Home Cinema – Voice Control.
1.3. “User” / “You” refers to any individual who installs or uses the Software.
1.4. “Third-Party Software” refers to independent applications or services used together with SHC, including but not limited to PotPlayer, VLC Media Player, Python, PIP, Subliminal, TRIGGERcmd, OpenSubtitles, Amazon Alexa, and Google Assistant / Google Home.
1.5. “HWID” refers to the hardware fingerprint (CPU + Disk ID) used for license validation.
1.6. “Trial Period” refers to the 14-day evaluation period provided by the Software.
1.7. “License Key” refers to the activation code purchased for continued use after the Trial.
1.8. “Local Architecture” means all automation and control run entirely on the User’s local PC.
2. LICENSE GRANT
The Software is licensed, not sold. The Developer grants a personal, non-exclusive, non-transferable, non-sublicensable, revocable license to use SHC on one (1) Windows PC only.
Commercial or enterprise use requires a separate license. Continued use requires activation and compliance with Section 4.
3. TRIAL, ACTIVATION & HWID LICENSING
Trial runs 14 days, offline. Activation requires a valid License Key and HWID validation. Each license binds permanently to one PC.
Anti-tamper logic prevents modification, trial reset, HWID alteration, or bypass of activation.
Any tampering may invalidate the license. Lost keys may not be recoverable.
4. RESTRICTIONS
- No redistribution, sharing, renting, or resale.
- No reverse-engineering, cracking, decoding, or bypassing protections.
- No use with pirated or illegally obtained content.
- No using one key on multiple devices.
- No automation that damages third-party tools.
- No activation circumvention or HWID alteration.
Violation may result in termination, blacklisting, and legal liability.
5. INTELLECTUAL PROPERTY
All logic, code, overlays, automation flows, and documentation are property of the Developer.
6. THIRD-PARTY INTEGRATIONS
SHC does not bundle third-party software. Users install dependencies themselves.
PotPlayer and VLC are automated only via official controls. No redistribution, modification, or configuration edits occur.
Python, pip, Requests and FFSubSync are installed only by consent, from official sources, and operate locally.
OpenSubtitles credentials stay local and are never sent to the Developer.
TRIGGERcmd, Alexa, and Google integrations operate through the user’s own accounts.
Visual C++ Redistributable is installed unchanged and governed by Microsoft’s terms.
7. LOCAL ARCHITECTURE & PRIVACY
No telemetry, no analytics, no data transmission. Internet is used only for optional integrations and APIs.
8. FILE OPERATIONS DISCLAIMER
Automated file actions may occur. User is fully responsible for folders, naming, safety, and structure.
9. SHUTDOWN PC & STOP EVERYTHING
Shutdown operations use Windows APIs and may close applications and interrupt work. User accepts all consequences.
10. COMPATIBILITY
No guarantees after OS or third-party updates.
11. WARRANTY DISCLAIMER
Provided “AS IS”, without warranties of any kind.
12. LIMITATION OF LIABILITY
Developer is not liable for data loss, corruption, misconfiguration, or shutdown consequences. Maximum liability is the purchase price.
13. TERMINATION
License terminates upon violation, tampering, or key misuse. User must uninstall.
14. GOVERNING LAW
This Agreement is governed by the laws of Romania. Disputes are resolved exclusively by Romanian courts.
15. LEGAL NOTICE
This section is provided for informational purposes only and summarizes key legal aspects
of Smart Home Cinema – Voice Control.
16. CONTACT
For licensing, activation, rebinding, or legal inquiries, you may contact:
Email: [email protected]
Website: https://voicehomecinema.com
END OF AGREEMENT
This document is provided for transparency and documentation purposes only.
The legally binding version of the End User License Agreement (EULA)
is the one presented during installation and included with the final product.
15) Post-Installation Verification Checklist
Use this checklist only after completing the full installation and configuration.
This is not a quick setup — it simply helps you confirm that everything works.
✓
Player installed and detected (PotPlayer or VLC edition).
✓
TRIGGERcmd installed and commands imported correctly.
✓
Voice assistant linked with TRIGGERcmd (Alexa or Google).
✓
Movies folder selected on a fixed drive and contains at least two movies.
✓
Test: Play Movie → Pause → Resume → Next Movie.
✓
Test: Show Command Center → Close Command Center.
OK
Great — your system is working correctly.
You’re now ready to use Smart Home Cinema every day.
Copied